By Jackie Clay-Atkinson
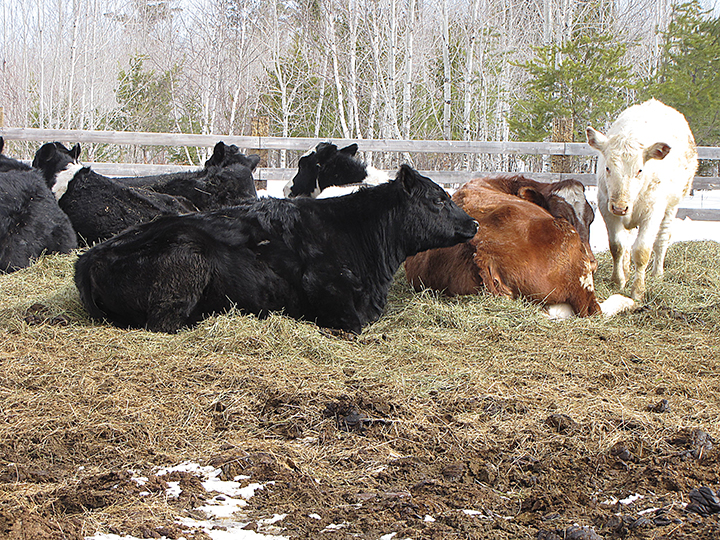
Every time I sit down to enjoy a wonderful beef roast or perfectly grilled steak, I am so thankful we began raising our own beef. The flavor of anything home-raised is always beyond gourmet quality.
But isn’t raising a beef steer expensive? Not really. In fact, we made it even cheaper by raising two at a time. By doing so, we were able to cover most of the cost of raising our own beef, including the processing fee, by selling the meat from the second steer to eager friends and neighbors. (This was so successful we have begun raising even more steers to sell as added homestead income.)
Another bonus to raising your own beef is you know what the steer has been eating. If you want organic beef, you can buy and raise organic feed or feed him your own pasture, locally-grown hay, and grain.
By raising your own beef, you also will know your steer was raised humanely, never crowded into filthy feedlots or shipped under stressful conditions. All of our steers are named, will come when called for treats and scratches, and will load easily into a trailer with a bucket of grain. They spend the summers grazing on lush pasture and exploring the woods.
In short, you have total control over how your steer is raised and what he has been fed. If you like well-marbled beef, you can just feed him more corn when it is nearing butchering time. Like only grass-fed beef? (It is more flavorful, but a bit tougher, too.) You control this also. Here’s a look at how we do it.
Buying your first beef calf
First of all, most homesteader beef doesn’t come from a beef steer. Many homesteaders, including us, started out raising their beef from dairy calves, often Holstein or Holstein crosses because this is the most common dairy breed in the United States and Canada. It is easier to find dairy bull calves for sale and they are sold at a cheaper price.
Holsteins are the big black and white milk cows grazing in many rural pastures. Although Holsteins are dairy animals, well-fed steers make excellent homestead beef.
The heifer calves are usually kept for replacing older cows or cows which have a low milk production or some problem such as mastitis (inflammation and/or infection of the udder), or sold to farmers or dairies.
The one exception to this is a heifer calf who has been born as a twin to a bull calf. These are called “freemartins” and are usually sterile. They can be bought as cheap as bull calves. They do grow a bit slower, but they make fine meat.
The best way to buy your bull calf is right off the farm where he was born. The calves are often sold at a very young age, just after receiving about three days’ worth of colostrum milk from their mothers. Farmers offer these calves for sale through word of mouth, advertisements in local shoppers, or websites such as craigslist. You can also check with area feed dealers to inquire who may have calves for sale. Remember that three-day-old calves are tender and delicate, despite their size, and can quickly get sick and die, no matter what you do. But by buying from a farmer or a local dairy, you’ll have the best chance of raising a healthy calf.
An added benefit is that many farmers will castrate the bull calf for you. There are two common castration methods: banding and pinching. With banding, a tough rubber band is slipped over the testicles with a tool called an elastrator. This cuts off circulation to the testicles. Over time, they will dry up and fall off. (This is very easy to do yourself, if you must. The elastrator and bands can be purchased at most farm and ranch stores for less than $30.) With pinching, a tool called an emasculatome is used to crush individual blood vessels and tubes going to the testicles. It only takes minutes with one side being pinched above the testicles, then the other. (Never crush both at once!) This method requires more precision and experience, so have an experienced person teach you how it’s done. An emasculatome generally costs $50 and can be purchased through any farm and ranch store or website.
The worst place to buy your calf is at a livestock auction. While you can sometimes find deals at an auction, your animal will nearly always come home with health issues such as pneumonia and calf scours (diarrhea that is often fatal).
Other breeds of cattle also make excellent beef. The cheapest calf you can buy is the Jersey or Jersey crossed with another breed. This is because this breed is smaller and shows more dairy character, appearing bonier and more delicate than larger breeds such as the Holstein. Jersey calves will take about eight months longer to grow out to butchering size, but they do make excellent beef.
Many times, you can find dairy calves that have been crossed with a beef breed. This usually happens when a heifer is bred to an Angus because Angus cows have smaller calves that are easier for a first-time mom to deliver. Dairies chiefly use artificial insemination, but they often use a beef bull as a “clean-up” bull to breed any cows which didn’t become pregnant via artificial insemination. These cross-bred calves are generally priced higher than straight dairy calves as they show more beef characteristics such as being all black like an Angus. Although they cost more, these beef crossbred calves will save you money in the long run, as they grow to butchering size more rapidly than straight dairy steers.
Think about buying two calves instead of one
Even though your family will only need the beef from one steer, it’s a good idea to raise two at a time if you have the facilities and can afford extra feed. The reason is two-fold. First, cattle are herd animals and a single steer will sometimes become unhappy and try to escape to look for a “herd.” Second, by raising two butcher steers, you can sell the meat from the second steer and largely recoup your expenses for raising your own. In most states though, you must contract with a buyer or buyers before the steer is butchered as you cannot sell individual cuts of meat unless the processing plant is USDA-inspected, with an inspector being on site while animals are processed. This is why we sell our steers as quarters or halves. If you can’t find interested folk among your friends, co-workers, or family, you can usually find a buyer on your nearest city’s craigslist.
What facilities will I need to raise a beef steer?
Like all animals, a beef steer will need shelter from the elements. For a calf, this can be a simple stall in a barn or a three-sided shed. But it should be on higher ground — not muddy or wet underfoot.
A newborn calf should be housed in a smaller stall and outside lot where you can keep a close watch on his bowel movements. (I sometimes have to laugh at all the time I’ve spent looking at poop!) You want to know if he is having stools and what the consistency is.
After the calf is a few weeks old, you can safely allow him out onto pasture. How much pasture do you need? It depends on how good your pasture is. In many places, you can keep a steer on an acre or two of good grass as long as there is adequate rainfall and good soil. In other places, such as southern New Mexico, it takes more than a hundred acres for each cow. Check with your neighbors or your local veterinarian if you are in doubt. The worst thing you can do is to give your steer too little pasture; grass is much cheaper than buying hay. Trying to keep a steer on pasture which has been gnawed down to the roots is neither economical (you want to quickly raise the steer to butchering size) nor humane.
When you are limited on pasture, it works well to divide the pasture into sections, using rotational grazing. This means moving him from one section of pasture to fresh grazing when the grass gets thin.
Pastures, like your garden, benefit from good care and fertilization. For instance, a pasture which has been plowed, fertilized, and planted with good grass such as orchard grass and legumes such as alfalfa or red clover will support a steer much better than one which has just been left wild.
Fencing is important, too. All too often we see new homesteaders who try to fence cattle in with a single strand of electric wire. While this may work with trained animals who have been exposed to a hot wire early in their lives and have good pasture, it does not work on hungry cattle or those who have not been trained to respect an electric wire. Don’t use electric wire as your only fence when there is a busy road nearby, as it is never 100% effective. A deer could run through the wire (or trees could fall on the wire), knocking it into the grass, making it ineffective. (I once had a stallion who would bump a mare into the fence. If she winced and ducked back suddenly, he’d know the wire was hot. If she didn’t, he’d just walk through the fence!)
There are really only two types of pasture fences which are economical and safe for a beef steer. One is a five-strand barbed wire which is correctly installed using heavy wooden corner posts and braces. The other is woven wire, often called field fence. This is usually a little over four feet high and has square openings where the vertical and horizontal wires are twisted together. Again, to be long-lasting and effective, you must take the time to install stout wooden corner posts and cross braces. For more detailed information on building these fences, check out my book, Homesteading Simplified, available through Backwoods Home Magazine.
While you’re building your shelter and pasture fence, think about how you will load your steer into a trailer when he is ready to butcher. Most processors prefer you bring your steer in to their facility, and getting a 1,000-pound steer into a trailer is a big job. While you can usually beg, borrow, or rent a stock trailer, you won’t be able to rent a cowboy to drag your steer into the trailer! Build a gate leading out of a stall in the barn where you can back a trailer up to, or start training your steer to load into a trailer with a bucket of grain when he is young. Will built a small pen in front of our small corral that has a chute built in front of it. This is very handy for loading cattle.
Whatever you build, make it twice as sturdy and strong as you think you’ll need. Then you’ll never have to chase your steer who’s gone sight-seeing over to the neighbors.
While a homesteader definitely can learn to butcher their own steer, it’s a big job and one many folks just don’t want to tackle. My husband, Will, and I have both butchered countless large animals, from elk and moose to steers. But we much prefer to have our friend, Al, who has a nearby meat processing business on his homestead, do it for us for a reasonable fee.
Feed requirements
A newborn calf should receive colostrum from his mother for the first three days of his life. After this, you will probably buy him and bring him home. If you have a milk cow or goat, your feeding problem is solved. You can just feed him about two quarts of milk morning and evening. If you don’t, there are several very good calf milk replacers available in dry form, usually found in feed stores or farm and ranch stores in a 50-pound bag.
Do not buy the cheapest milk replacer. These are usually made up of soy and are not as digestible as the expensive calf milk replacers. Generally, it takes about a 50-pound bag of good milk replacer to feed a calf up to the time he can be weaned onto grain, pasture, and/or hay.
You will also need a calf bottle which you can buy at your local feed or farm and ranch store. This is a two-quart bottle with a large nipple. Get the one that pops on over the lip of the bottle. I’ve used the ones that have a nipple inserted into a plastic screw-on top but when the calf gets strong, he butts the bottle, knocking the nipple out of the plastic ring and making you lose all the milk! I also take my jackknife and cut a little X in the nipple to slightly increase milk flow. You don’t want the milk to glug down the calf’s throat but a new calf will get frustrated if it doesn’t get much milk when he starts eating and they will sometimes just quit trying.
I fill the plastic bottle about halfway full with warm water then add the powdered milk with the plastic measuring cup that comes with the milk. (This measuring cup is often at the very bottom of the bag, making it necessary to hand-dig through a lot of dry milk to find it!) Use the measurements on the bag; different brands use different amounts of powder. Use a whisk to beat the powder into the water thoroughly. Then add enough water to fill the bottle. Put on the nipple and you’re ready to feed your calf.
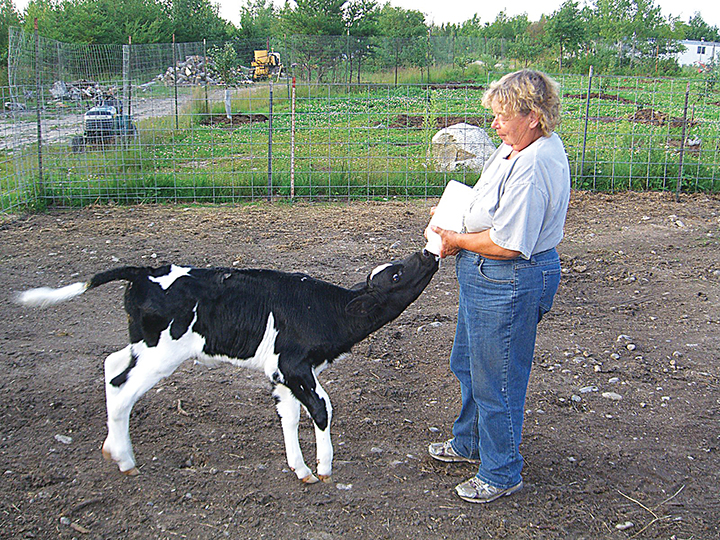
Before feeding a young calf, especially one you’ve just bought, always check the poop! Calf manure should always be formed. It is seldom like dog poop, but you don’t want it to be watery or very loose. If it is, do not feed that calf the milk!
Instead, mix up a bottle of electrolytes with a thickener gel and feed it to the calf. I also dose the calf with Sustain III boluses (pills given with an inexpensive plastic balling gun you can buy at your local farm and ranch store for under $3). The Sustain III boluses are a sulfa which treats bacterial infections in the gut, namely E. coli, which is a common calf scour bacteria. Only give electrolytes for two days, morning and evening, until the calf’s stool is normal. If the calf refuses to eat or does not improve after two days, contact your veterinarian.
Usually though, you will not have this trouble with farm-purchased calves and you can continue giving two bottles of milk daily until the calf is weaned. At about a week of age, the calf will start to nibble on hay, grass, and grain. We feed our baby calves a sweet feed with at least 16% protein, offered first by hand after a bottle has been fed and then later, in a pan. Very soon the calf will happily consume all the grain you offer so you can then cut back, giving him about a pound per feeding, increasing gradually as he grows.
Once the calf is readily eating grain, hay, and pasture (at about eight weeks of age), you can cut out the milk feeding.
We feed our calves two pounds of sweet feed twice daily until the calf is about six months of age. Different calves grow at different rates, just like children. You want the calf to remain in good shape, never getting thin or overly fat.
At about six months of age, most calves do well on good pasture and hay.
Watering
You should always have fresh, clean water available to the calf, year-round. Even baby calves on milk will drink some water. The old farmers’ saying is true: Water is the cheapest feed around. Calves grow much better with adequate fresh water.
In the winter in cold climates, provide a stock tank heater to keep ice out of the watering tank or carry a bucket of water to your calf morning and evening. Wild animals eat snow in the winter to stay hydrated. But your calf is not wild and eating snow makes him expend a huge amount of calories just to melt that snow and keep warm.
Caring for a growing steer
Soon, your calf will be a gangly yearling and good summer pasture will be feed enough to keep him growing nicely. To help with feed costs, we feed our steers windfall apples, extra squash and pumpkins, carrot tops, corn stalks and cobs after we can our sweet corn, pea and bean vines, and reject melons. Never feed tomato, potato, or pepper vines as they can be toxic. This also goes for rhubarb leaves.
As most steers are butchered at between 2 years and 2½ years of age (again, depending on breed), you’ll likely overwinter him the second time.
The following summer, he’ll be approaching two or thereabouts and it’s time to think about butchering and what cuts you want in your meat. As I’ve said, most folks opt to take their steer to a processing plant to have him butchered and the meat cut up and frozen. Some processors have quite a waiting list so contact them in late summer to get on their waiting list.
You can either just continue letting your steer graze on late summer pasture and fall hay, if needed, resulting in popular “grass fed beef” or begin feeding him corn about 90 days before your butchering date. We choose to feed corn as we sell some of our steers’ meat and most folks who stipulate they want grass fed beef complain the meat is “tough,” as it not marbled with fat like store meat. We finish our steers on corn to give the meat more marbling and thus be more fork-tender. No breed or breeds have more tender meat than others. I’ve eaten delectably tender beef from Jersey and Holstein steers just as often as Black Angus.
Before taking in your steer, decide on how you want your meat cut: steaks, hamburger, prime rib, etc. Your processor can usually help you with this in advance.
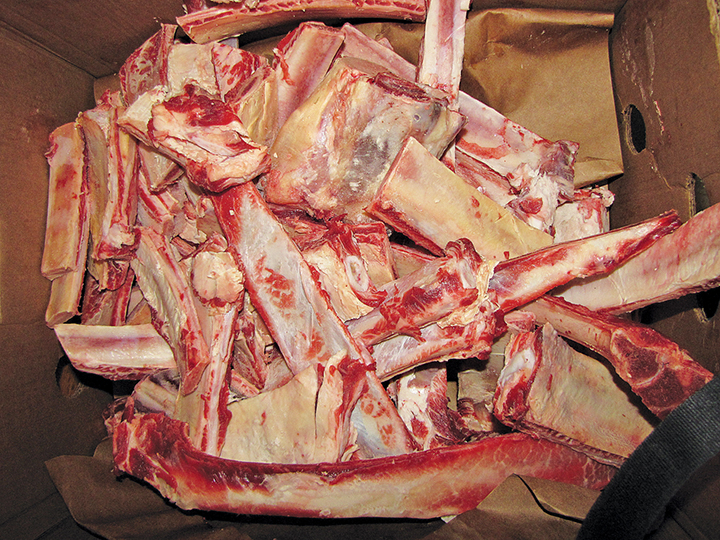
Processors vary a bit; some charge a “killing fee” and some don’t. Most charge a fee per pound of hanging weight to cut up and freeze the meat. The term “hanging weight” means how much the carcass weighs after the skin, feet, head, and offal have been removed. If you are charged for 700 pounds of hanging weight, that doesn’t mean you’ll receive 700 pounds of frozen meat. The hanging carcass will be trimmed of excess fat, bone, and gristle as it is processed (let the processor know if you would like to keep any of this). We keep most of our excess fat and bone. I use the tallow for soap and to feed our birds in the winter months, and I boil the bones for soup stock.
Butchering time
On the night before your appointment for butchering, withhold all feed from your steer as it makes it easier for the processor if the digestive tract is empty. Keep water available.
Hopefully, you’ve trained your steer to come and load in a trailer well in advance. Or at least have a small stout pen from where he can be loaded safely and easily. We pen our steers and with a bucket of feed, easily lead them down a chute, into our low stock trailer.
It’s extremely difficult to get a steer to load into a trailer out in the pasture. They seem to have radar regarding butchering day and usually refuse to load. Having a small pen to load out of is much easier. Never excite, beat, or yell at a steer. Once frightened, things only get worse. Crowding gently with a gate or a stock panel works much better. Plus, it’s said that frightened steers give off adrenaline which gives the meat an “off” flavor.
Once in the trailer, drive gently to the processing plant and unload your animal.
Prepare to store your meat
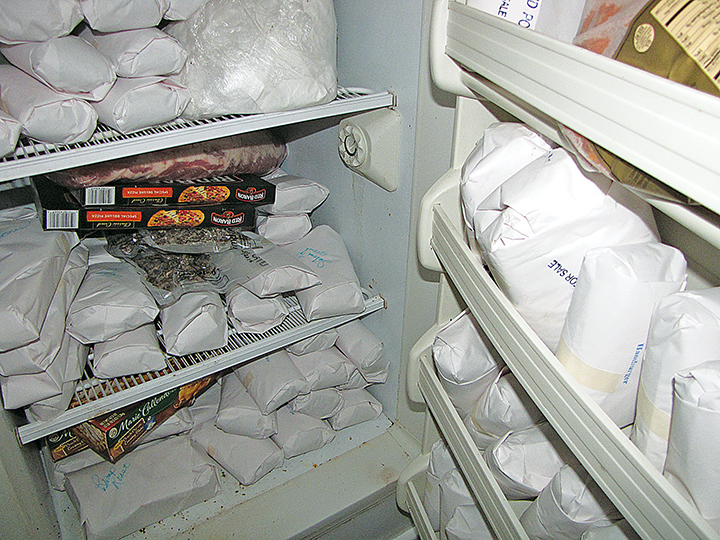
As most processing plants hang the carcass in a refrigerated room for about seven days following butchering, you’ll be picking up boxes of meat wrapped in white butcher paper in about a week and half. Be sure you have freezer room ready. You’ll have a whole lot of packages, each labeled with the type of cut and often with your name. While we have a freezer to hold our meat when we receive it back from the butcher, we don’t rely on the freezer for year-round storage. Long ago, I had a relatively new big chest freezer which quit unexpectedly. By the time we discovered it, the food was thawing. And that included 500 pounds or so of beef, pork, poultry, and venison. I spent three days and nights canning up that meat and even then lost a lot of fruit and vegetables that were also in the freezer. Now I can up my meat as soon as possible following butchering day.
I hope you’ll consider raising your own beef soon as you’ll never eat better meat or enjoy the satisfaction of doing more yourself. This is just another step in self-reliant living.







How did you can the meat?
Loved all the information in this article.
Two questions. About how much corn per day should you feed a 800 to 900 lb steer for that 90 day fatening period? He will be on good bromegrass pasture. Second, should the corn be cracked or can it be fed as shell corn?