 |
|
| Issue #128 • March/April, 2011 |
We all love the idea of having a big, productive garden, full of all the nutritious, tasty foods our hearts desire. But the prices in the nursery catalogs can be enough to make you cry! Maybe you just can’t afford that big garden full of berries, fruits, and other wonderful plants, after all. But wait! Here are some easy-to-learn plant propagating methods you can use to multiply your modest berry patch, orchard trees, and even some vegetables to have as many plants as you want.
When we first enlarged our new garden, I could only afford three black raspberry bushes too much was going on building our new log house, and all the money went to that for a long time. But I did buy those three little bushes. Now, three years later, I have enough bushes from those initial three plants to plant a 50-foot row in our new berry patch up the hill, and also enough to give a bunch to my friend.
Here’s how you can multiply your own garden plants without a degree in plant biology.
|
Multiplying plants by their runners
Season: early spring
This method works for strawberries, raspberries, blackberries, elderberries, and even lilacs and it is the easiest way of all to gain new plants. Only strawberries need a little help, because they produce above-ground runners which must root before they become a new plant. Left to their own devices, most strawberry runners will root eventually, but to help them out, just nestle each runner down into a nice bed of loose, fertile soil, then scoop up a bit of dirt to anchor the runner down to the earth. You’ll know the runner has rooted when you tug on its leaf and it remains seated firmly.
To harvest strawberry runners, simply cut the runner free from the mother plant and gently dig up the new plant. Carefully transplant it to its new row, planting it as deep as it was previously, then water it and watch it grow.
Other plants send up shoots or “suckers” from underground roots. If there is adequate room, you can just let these suckers grow, forming a close-knit hedgerow, but sometimes too many suckers can weaken the mother plants. I often dig up and move my suckers. I did this with my blackberries, black raspberries, red raspberries, and lilacs. I got plenty of new plants like this.
Suckers are easy to dig and transplant. Just step a shovel deep between the mother plant and the sucker, severing the underground root that binds the two together. Then simply dig up the sucker and transplant it. When I do this, I always carefully pull out any grass or weeds so that I don’t also transplant a crop of weeds, along with my new plants. Water the new plants well after transplanting to ensure that they get off to a good start.
|
Dividing plants with offsets
Season: spring or fall
Offsets are little “baby” plants that grow up around the mother plant. Some common garden plants that divide this way are rhubarb, wild plums, comfrey, multiplier onions, and chokecherries.
Offsets are only a little bit different than suckers, in that they don’t have an underground root that tethers it to the mother plant. Offsets may be attached to the mother plant or have their own young root system. Rhubarb and comfrey offsets are closely attached to the mother root, but if you look closely, you can see they are their own individual plants. By using a sharp shovel, you can easily divide the offset from the mother plant, taking sufficient soil along with it to avoid stressing the plantlet. Wild plums, multiplier onions, and chokecherries often send offsets up a little way from the mother plant and are easily dug up and detached from it.
Older, established asparagus plants often form a cluster of rope-like roots, tangled together, with old roots, young plants, and little baby plants all mixed together. Once when the county was clearing out roadside ditches, I dug up a “wild” asparagus plant from the side of the road, taking a bushel basket full of roots, dirt, and grass with it. At home, I soaked and washed the roots, then I pulled away all the grass and weeds, leaving only the tangled asparagus roots. By carefully separating the roots, I ended up with more than 20 asparagus plants.
I ended up with a nice bed of asparagus, all free. The next week, the county continued its ditch-digging and totally destroyed the asparagus plants that I had not taken.
|
Tip layering
Season: mid-late summer
Blackberries, red and black raspberries, and forsythia can be propagated by tip layering. The canes bend over naturally, and where they touch the soil, roots will form, eventually making new plants. We can hurry this process along by weighting down canes with soil or a rock, then burying the tip under an inch of soil. In a while, you’ll notice new leaves and shoots beginning to poke up out of the ground. Let the new plant establish itself well, then tug at the leaves to see if roots are firmly grown. If they are, cut the new plant free from the mother plant with pruning shears, then dig it up and relocate it to its new spot.
Serpentine layering
Season: spring
Some plants, such as grapes, kiwis, hazelnuts, June berries, hops, and blueberries tend to grow roots from leaf nodes. You can speed this process along and harvest a number of new plants for your garden by serpentine layering a few plant stems.
First check to see which stems will easily bend down to lie along the soil. Then find the “knots,” which are the leaf nodes you will be burying. With a sharp knife, carefully cut into the stem (near the knot) at an angle, about one third of the way through. Hold the wound open with a toothpick or other small object, then dab a little rooting compound on the wound with a small artist’s paintbrush. Carefully bury the stem, holding it down with a rock or a U-shaped piece of wire clothes hanger. By doing this in several places on the same stem, you can gain several plants from one stem.
Be sure to keep the soil evenly moist and the soil firmly against the stem to avoid air pockets. Air pockets will often prevent roots from forming.
|
Cuttings
Season: late fall, early winter
One common method of increasing orchard and garden plants is by making cuttings and rooting them. This is used for grapes, kiwis, figs, quince, lilacs, cherries, peaches, and many other plants. The cuttings are taken in the late fall or early winter, when the plant or tree is dormant. Take your cuttings just below the leaf node where last year’s growth ends and this year’s growth begins. Cut straight across, then count up the branch, leaving about three to five nodes and make a diagonal cut just above the top node to remove the new, soft growth at the tip. It will only rot and cause your cutting to fail.
Plant immediately. If you can’t, wrap the bottom in damp paper towels and place in the refrigerator. But plan on planting as soon as possible for the very best results.
Dip the bottom (straight) ends of your cuttings in rooting compound and bury the bottom two-thirds of the cutting in a good quality potting soil. Moisten the soil and wait for growth. If you live in a warmer climate, place the pots in an insulated cold frame over the winter. If you live in a cold-winter area, you can put your pots in a window in your house, but monitor the temperature and soil closely. Plants in a south-facing window can heat up too much and dry out very quickly, even during the winter.
In the spring, you may harden off your indoor plants gently, and plant them in a sheltered spot in your garden to begin life as a new plant. Sometimes it takes a while for the new cuttings to establish; be patient and give them good care. Once they are well-established you can transplant them to their final spot in the garden. Any plants that fail to thrive should be pulled up and discarded.
Besides these hardwood cuttings, you can also take root cuttings from your tomatoes. I’ve often taken cuttings from my best winter greenhouse tomatoes to get an early start on spring planting. You can take tomato cuttings from spring-planted tomatoes to get plants that will mature for a fall crop. Tomatoes are very easy to root, either in water, where they often root in as little as four days, or in moist potting soil.
With a sharp knife or single edge razor blade, take a four- to eight-inch cutting from either the growing tip or sucker, cutting straight across the stem. (Suckers are the little upright shoots between the main stem and a branch of the tomato plant.) Remove the lower leaves to avoid disease. Either place the cuttings in a jar of clean water to root or dip the end in rooting compound and gently plant in moist potting soil. From one strong plant you can harvest a dozen or more cuttings.
|
Root cuttings
Season: spring or fall
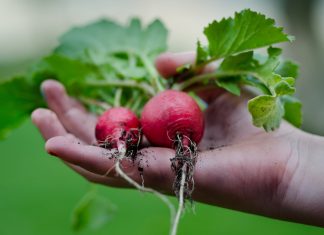
Root cuttings are another very easy way to multiply your garden crops. Such perennial plants as comfrey, horseradish, and Jerusalem artichokes are extremely easy to multiply from root cuttings. Often, simply harvesting a mature plant and leaving the smaller roots in the soil will quickly spread the row or bed. In fact, many of these crops can actually become invasive through inadvertent root cuttings.
To make simple root cuttings, just dig up a mature plant and cut off one or more (depending on the root configuration) side roots. You will want to choose fairly thick roots. Replant the root, taking care to keep the “up” side up. Cut the root off the mother plant with a straight cut on the top side to make it easier to keep track of which end is up. Keep the soil moist, and in a week or so, you should see growth coming up through the soil from the cutting.
|
Starting fruit trees from seed
Apples:
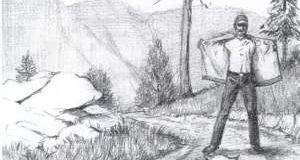
When I was a very young child, my favorite book was the story of “Johnny Appleseed,” a man who traveled through the wilderness wearing a pot on his head and carrying a bag of apple seeds over his shoulder to plant for the settlers who lived on the land or would shortly be coming. Born John Chapman, this missionary and horticulturist made it his life’s work not only to preach to settlers of the wilderness (in what is now known as Michigan, Ohio, Indiana, and Illinois), but also to plant apple seeds as he traveled so that the settlers would have fruit to sustain them.
Today, with all the grafted apple varieties, we are led to believe that you can’t plant an apple seed, as Johnny did, and have it grow into a bearing tree with good fruit. This is true to a certain extent, but it depends on the variety of apple you are harvesting seeds from and the parentage of those seeds. You may get a very good apple, resembling its “mother” tree, a good apple, but one that does not resemble its parent, or a not-so-great apple because the pollinator was a wild crab apple from across the fence. But even the not-so-hot apple isn’t a total waste, as you can easily graft wonderful varieties onto those branches, turning it into a great tree. (See my article about grafting fruit trees in Issue #121, January/February 2010.) It is very important, when you live in Zones 2 through 4, to consider the hardiness of the apple variety you are considering planting seeds from. For instance, I love Fuji apples. But I wouldn’t save seeds from one because it is not hardy in Zone 3 where I live.
You’ll get more consistent results when saving seed from older varieties that have been around for centuries, such as Duchess of Oldenburg, Yellow Transparent, or Red Astrachan.
Harvest your apple seeds from mature, ripe apples (eat the apple first), then lay the seeds out on a pie plate in a warm, dry location to dry. When dry, you can plant them in a designated spot in loose soil that is rich in compost. A friend of mine plants his in an old tire so he can locate the young trees in the spring when they come up. Apple seeds must go through a period of cold in order to begin germinating.
You can also wrap the seeds in moist paper toweling and put them in a jar in the refrigerator. In a few weeks they will start sprouting. Plant them in a four-inch pot in a sunny window, and watch them grow. In the spring, you can set the baby trees out in their new home. It will be about four years before they begin fruiting, but with care they should reward you mightily.
You can use the same method with pears, although they often revert to “wild” pears, which are very astringent. Of course you can go ahead and grow some from seed and try the first fruits when they are ripe. If they are astringent, you can always prune the tree back and graft on branches from a great pear and still have your own creation.
Stone fruits like peaches, plums, and cherries:
Like apples, stone fruits can also be started from seed. Sure, you may get a no-good bum of a tree, but also like apples, you can cut back the poor fruiting tree and graft a wonderful variety onto it and presto, you’ve got a great tree. Back in New Mexico, one of the best nectarines I’ve ever eaten was “planted” in a ditch, probably by someone who ate a nectarine for lunch and tossed the pit. It grew, unnoticed, until it began to fruit. It was known far and wide for its wonderful, juicy taste.
One fall I canned up a bunch of peaches and dumped the pits out onto my garden, where they were tilled in. What a surprise it was when in the spring, among my tomato plants, there were nine little peach trees. I’m sure that if I had planted them in an area where they wouldn’t get tilled under there would have been many more.
Like apples, stone fruits must undergo a period of stratification (being exposed to cold). The easiest way to do this is to simply plant the pits outside in the fall. During the winter, they will be exposed to the cold and in the spring, they’ll emerge from the soil as Mother Nature intended.
You can also put your cleaned pits in a Ziplock bag of moist sphagnum moss in the refrigerator for six to eight weeks. Watch them carefully so that if they begin to sprout, you can plant them in pots immediately. You can pot up the little sprouts and hold them in a sunny window until spring, then plant outside in a protected, sunny spot.
The easiest (most sure) varieties to plant from seed are bush cherries, wild plums, Manchurian apricots, chokecherries, and older varieties of peach, cherry, and plum. Again, you may get a terrific new variety, a mirror-image “child” of the “mother” tree, or a tree that’s just so-so that you graft onto, but the way I see it, it’s a win-win situation.
|
Berries from seed
Although berries are more easily propagated by means of runners, layering, and suckers, it is possible to grow them from seed. Raspberries, black raspberries, blackberries, and blueberries are the easiest to start from seed.
To harvest seed from raspberries, black raspberries, and blackberries, mash them in a sieve and strain off the pulp under running water. Place the seeds in a bowl and slowly drain off the water; the seeds will sink, the pulp rise. Plant them in a cold frame in the fall. They will emerge in the spring. You can thin them out and continue growing on.
Blueberries are easiest to grow when the seed has been harvested from berries that have been frozen for 90 days. Thaw, then put in a blender with warm water on high speed for 10 seconds. Allow to stand for five minutes. Carefully drain off some of the water; seeds sink, pulp rises. Add more water and repeat until seeds are clearly separated. Remove seeds and place on a paper towel to dry. Plant in a three-inch deep flat filled with moistened, milled sphagnum moss. Lay the seeds on the surface and just sprinkle a light layer of more milled sphagnum moss over them and moisten. Cover with a newspaper and set in a warm, sunny location. Keep moist but not soggy. Seeds will germinate in about four weeks, but keep a close watch, as you must remove the newspaper as soon as they begin germinating. These plants are very small. After they are about three inches tall, you may transplant them into individual pots. Don’t set them out in the garden until all danger of spring frost is past as they are tender at this stage.
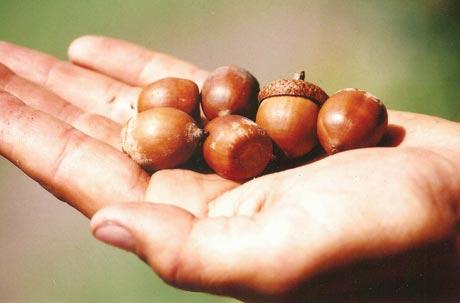
Nut trees
Nut trees are very easily started from seed so easy that even squirrels can do it! After all, this is how many nut trees get their start. As a child in Detroit, I spent hours watching squirrels grabbing black walnuts from the ground, where the nuts had fallen, and carrying them off to bury them in the black soil on the edges of our garden. Sure enough, in the spring, little walnut trees sprang up from the ground, as if by magic.
Now if a squirrel can do it, so can you. Just remember that nuts also need a period of stratification (exposure to cold), as they would naturally receive in nature. Nuts with husks need the husk removed before planting. Wear gloves when handling those green-black walnut husks though. I think I still have walnut-stained hands from handling walnut husks in childhood.
Nut trees usually have a long tap root, so it’s best to plant them where you will let them mature. To be sure you do have a nut tree where you plant it, plant three or four nuts in the same general area. If all germinate, you can carefully transplant the smaller ones, leaving the best one in place. Remember that some nuts, such as black walnut and hickory, get to be very large trees, so allow room for them to grow. Unfortunately, they also take years to produce nuts, so you need to be patient; your children and their children will thank you.
Beware of squirrels; they will “harvest” your nuts before they have a chance to germinate. Before you plant them, try dampening the shells, then sprinkle them with hot pepper. Use gloves for handling and planting though, as it may burn your fingers. The squirrels can’t usually smell the nut because of the pepper, and will not like the taste if they should investigate.
|
If you don’t have any plants or trees to start with
Don’t despair. That’s where family, friends, neighbors, and sometimes complete strangers enter the picture. When you’re visiting, don’t be shy about asking about a “start” from your aunt’s rhubarb, the neighbor’s great raspberries, your friend’s plum, or even strawberry runners from the guy down the street. Most gardeners are tickled to have you ask. Besides, there’s only room for so many plants, then they become like weeds. That strawberry bed gets too overcrowded with lusty plants, the rhubarb becomes root-bound, and the horseradish threatens to take over the garden.
If you don’t have a friend, relative, or neighbor that has the type of plants you want, don’t give up. Tack up a notice in the grocery store, feed mill, or laundromat.
And remember your roots; when you have a bounty of plants in your garden, be generous about sharing them with others. It brings us together full circle.
Propagating your own plants will save you a ton of money, besides being a really enjoyable hobby. You’ll learn a whole lot, along the way, as well. If you’re interested in learning more, I recommend reading The Plant Propagator’s Bible by Miranda Smith and Secrets of Plant Propagation by Lewis Hill.


Would you happen to have any video or more detailed information on how to identify chokecherry offsets? I have a whole corner of chokecherry bushes in my current yard and we are moving and would like to propagate to take with us. I can send pictures of my bushes too if that’s possible.