 |
|
| Issue #142 • July/August, 2013 |

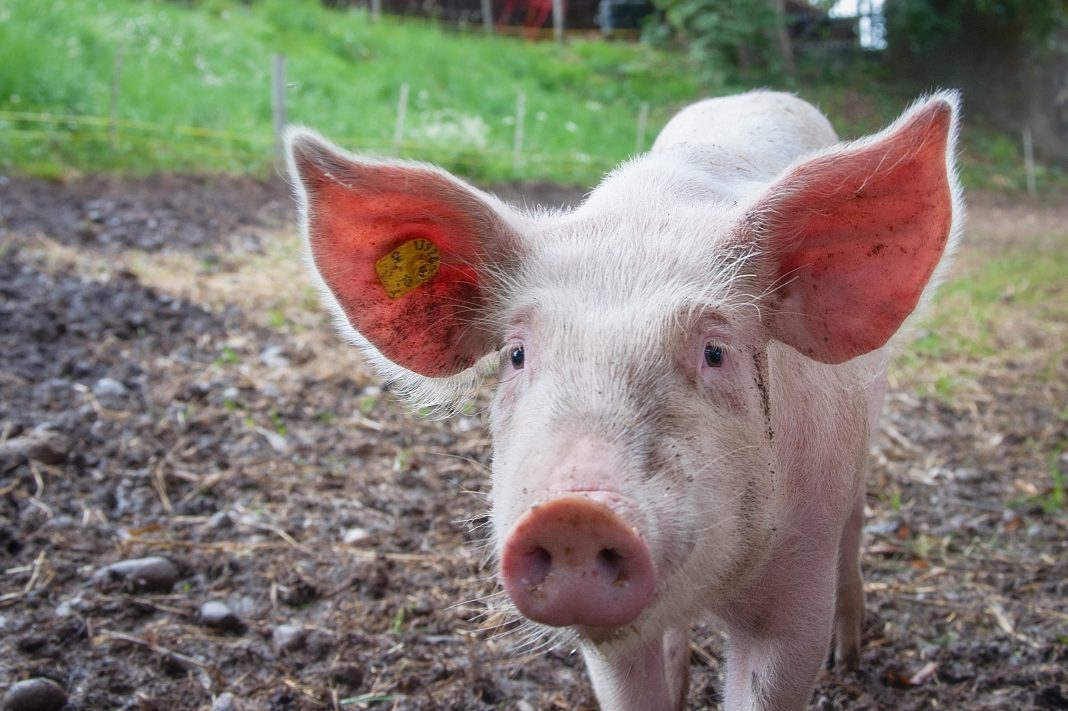
A 450-pound hog will provide a lot of delicious meat.
Hogs are raised throughout our neighboring Amish community for many of the same reasons old American homesteads raised them. First, hogs don’t take up much space. Second, they have a very good feed to meat conversion ratio.
A healthy hog will usually eat about eight pounds of food per day. If you feed straight grain ration, that can amount to quite a bit of money being spent on feed. Fortunately, hogs are thrifty. They don’t need fancy feed they thrive on our scraps. The homestead hog can fare very well on kitchen scraps, a bit of ground feed, leftover garden produce, extra milk from goats or cows, orchard windfalls, and cornfield gleanings. Any of these supplemental feed sources help in offsetting the total cost of purchased feed, and are valuable, nutrition-wise.
Generally speaking, hogs will convert about 2 to 6 pounds of feed to one pound of gain on the animal. In comparison, cattle average about 5½ to 6½ pounds of feed per pound of gain. These statistics are for animals that are on full feed; they don’t take into account the supplemental food sources we’ve mentioned above.
Similar to cattle, a hog will average about 57% edible meat from a live hog. So, you can estimate that a 250-pound hog (a good butchering weight) will yield about 142 pounds of edible meat.
Every winter I help friends and neighbors butcher their hogs and put them up in the form of canned meat, sausages, lard, and bacon. Levavausht (pronounced sort of like “level-vash”) or Amish head cheese is often made as well. The word is an Amish dialectic pronunciation of the Dutch word leverworst meaning “liver sausage.”
Depending on where you live, butcherings usually occur in late winter or early spring when the temperatures are cold, but not bitterly so. Often, there are three to five animals worked up at one time. That takes a lot of time, effort, and manpower. This time, however, my friends were working up only one animal, and things went well during the process. Even with just the one animal, the 450-pounder produced a lot of meat.

Skinning begins by skinning down the rear leg.
The strips of hide will be removed and discarded.
Getting started
To begin with, the pig needs to be killed. This can be done quickly and humanely with a well-placed shot from an ordinary .22 caliber rifle. Pour a bit of feed out for the pig to concentrate on, then, from close range, take careful aim and kill the pig with a shot just above the eyes and just off-center on the skull. That way, the shot won’t glance off the animal’s skull and wound it instead of killing it.
Having killed the hog, the next step is to “bleed” it. We did this by slitting the hog’s neck across the jugular veins and allowing the blood to run out. To get a good idea of where to cut the hog’s neck, just feel your own jugulars and figure about the same spot on the hog. Bleeding the hog will make a mess, so it’s best to do this away from the actual butchering site. If you are planning to make blood sausage, you will need to have a vessel in which to catch the blood.
When butchering a hog, it can be either scalded or skinned. Skinning is quicker, but scalding is the preferred method if you plan to make head cheese or levavausht.

The skinned carcass, ready to open. Notice the large amount of fat present on the animal. It will be used in making lard. Right: Getting the kettles heated up. Notice the handy adjustable hanger for the butchering kettle.
Scalding
Scalding takes more equipment than skinning, but the procedure goes roughly as follows:
1. Heat the water. The water in the tank should be about 160° F. Don’t let it get too hot or it will cause the hair to “set” and it will be very difficult to remove.
2. Kill and stick the pig. Cut one of the jugulars so the animal will bleed out. Catch the blood if you want to make blood sausage.
3. Move it to the scalding tank. Use a tractor with a 3-point boom or a front-end loader.
4. Dip the animal and allow it to soak for a few minutes. Raise it out and scrape as much of the hair off as you can, using a hog scraper.
5. Repeat step four until the hair is removed from the animal.
We used overlapping ropes (you could use a chain) to roll the pig into the scalding water. Then we pulled back and forth, rolling the animal to and fro, making sure that it got thoroughly scalded.
Many folks use 55-gallon drums filled with hot water as their scalding tanks. Others use a big trough made for the purpose. It resembles a feed bunk but will allow the user to fill it with hot water. An old bathtub will also work.
My friends added a coffee can full of wood ashes (hickory is good) when we scalded their pigs. The lye contained in the wood ashes supposedly helps to cause the hair to slip from the hide.
Once you can easily scrape the hair from the animal, remove it and complete the scraping of the entire carcass.

Pint jars of fresh pork are stacked into pressure canners.
The ladies kept the two canners going for quite a while.
Skinning
I’ve helped with butcherings where the animals were scalded and others where they were skinned. It’s simply a matter of preference, but skinning tends to be quicker and doesn’t take as much time or labor.
On this occasion, my friend chose to skin the animal. As is often the case when preparing for a Saturday butchering, we killed the hog on a Friday evening.
We began skinning by cutting around the legs just above the feet. Then, we made cuts from the back of each rear leg up towards the anus. Each rear leg was skinned down and the hide was worked down off the rump. The hide itself, especially on the sides and back, was skinned down towards the head in strips about three to four inches wide. That was to help in pulling the hide off the critter.
Once the carcass was skinned down to the neck, we cut the head off and saved it to use later. We cut open the carcass and carefully removed the anal vent and guts. All the entrails were removed. In this case, we were not going to use them for sausage casings, so we discarded them. If they were going to be used to stuff with sausage, they would have been emptied, washed, and scraped.
We used a meat saw to remove the feet and split the carcass. To split the carcass, we sawed from the tail to the neck down each side of the spine. That left three pieces consisting of two meat halves and the backbone. We hung the halves to allow them to cool overnight. This firms the meat and aids in cutting it up and processing it later.
While skinning the animal, we used the knife deftly to leave as much of the fat on the carcass as possible.

Left: Fresh pork loins and ribs. Right: A slab of fresh bacon.
Processing
Very early the next morning, family and friends began to gather for the actual processing. The halves of the carcass were brought in to our processing area and cut into various large cuts (hams, shoulders, side meat, loins, ribs, and so on) using the meat saw and sharp knives. All of the meat except the ribs was de-boned and prepared for packing into quart jars or for grinding into sausage. The side meat was left for slicing into bacon that will be eaten fresh or taken to a local processor for curing. The ribs were cut into convenient slabs and packaged for cooking shortly after butchering or for freezing.
Since my friend and his family don’t have a freezer in their home, most of the meat was packed into quart jars and pressure canned. The ladies in the group took charge of this part of the operation and it went smoothly.
One of the next chores was to set up the kettles for cooking the meat and rendering the lard. The heavy cast iron kettles were suspended from a heavy pipe frame. There are usually two or three kettles hanging over a long fire. In our case, only two kettles were needed.
Once all the fat was cut into small cubes, we placed it in one of the empty kettles. As the fat chunks heated, they began to liquefy. Then, we had to constantly stir the kettle to prevent the chunks from sticking and burning.
Once the lard was cooked out, we poured it into the lard press. There, all the liquid fat ran through the press and into a bucket. As soon as most of the liquid had run through, the remaining lard was “squoze” out and into the bucket.
After cranking the press and squeezing out the remainder of the liquid lard, the remaining cooked bits the cracklings were salted and snacked on as the work day progressed. I also took home a bag of them!

The sausage is ground and stuffed into long ropes of sausage, then the ladies twist it into links.
Making the sausage
Next, it was time to make the fresh pork sausage. To do that, we gathered the meat and trimmings that had been set aside for the purpose. Good sausage requires a bit of fat in it and that had been considered in trimming the meat.
To grind the meat, we used an old Universal model 632 that has seen years of service. It was connected by a V-belt to a gasoline engine. The flywheels are of such sizes that the grinder runs at a good, slow speed.
We ground the meat and fat into sausage, then seasoned and mixed it by hand. Some of the folks seasoned with just salt and pepper; others preferred a bit more seasoning.
Once we mixed the sausage, we put it into the stuffer.
We stuffed the sausage into commercial store-bought casings. As I mentioned earlier, the hog intestines can be used, but they must be emptied, washed, and scraped beforehand, which is a time-consuming process.
In this case, we soaked the commercial casings in water to make them pliable. After soaking them for an hour or two, we fed them onto the spout of the sausage press, several feet at a time.
Once the press was filled with sausage, we slowly turned the crank, filling the long casing with meat. The women took the filled casings inside, to twist them into links. The women separated the links by cutting each from the others with a sharp knife.
They then boiled the individual links in a kettle of hot water. It’s best to bring the temperature of the hot sausages up to cooking temperature gradually so that they don’t burst.
These links are called “water sausages” since they are cooked in boiling water. Other times, we’ve cooked them in hot, liquid fat.
I enjoyed cooking the sausage, as it required frequent sampling to be sure the meat was done! I made sure that my sampling was accompanied by slabs of bread and mustard.
As soon as the link sausages were sufficiently cooked, the women took them inside and packed them into quart jars. They poured some hot liquid in the jars, then pressure canned them on the propane stove. After the jars were done processing and cooling, they were ready to be stored on the shelves for later use.
If the sausages had been cooked in fat, they would also have been packed into jars with the liquid fat and processed. After they cool, those sausages are encased in a white chunk of lard. Obviously, the jar must be warmed before the sausages can be fished out. The fat is poured off for later use and the sausages heated or used in recipes.

A kettle of cooked sausage is quickly packed into jars for canning.
Head cheese or Levavausht
The making of head cheese is just a part of using all the pig that you can in butchering. To make Levavausht, begin by cooking all the bones remaining after trimming off the meat. Add the liver and kidneys to the kettle and allow them to cook as well. Add some strips of skin to the kettle, but keep in mind that you will only want to add hog skin that has been scalded. The skin will have been scraped clean of hair and will cook up to add a gelatinous quality to the finished sausage. Add jowl meat and fat, then any other meat and fat that remains.
Boil until the meat is easily removed from the bones. Lift the kettle from the fire and dip the meat onto a table where it can be picked clean from the bones.
This is a good time to have a container of salt handy as you’ll probably want to nibble on pieces of kidney or liver as you work. After picking the meat from the bones, run the whole lot meat, organs, cooked skin, and all through the sausage grinder. Mix it with a bit of seasoning, then either stuff it into casings or containers.
My friends decided to keep some of the meat and sausage fresh and put it in freezer bags. They planned on taking the fresh meat to a small locker facility where families rent freezer space. Dozens of families in the neighborhood take advantage of the facility.
For my efforts, I brought home a bag of cracklings and a big bag of bulk sausage (I divided that into smaller packages and froze it.)
The whole operation of butchering and putting up a hog takes several people and a lot of work. It makes for a couple of long, busy days. It is a good and worthwhile time, though. Besides producing a lot of food, I got to spend time with good friends and make some new ones as well. It was, indeed, time well-spent.

The lard is squeezed out through a press into a waiting bucket. The kids enjoy this part of the operation, especially eating the hot, fresh hog cracklings afterwards!


