By Jereme Zimmerman
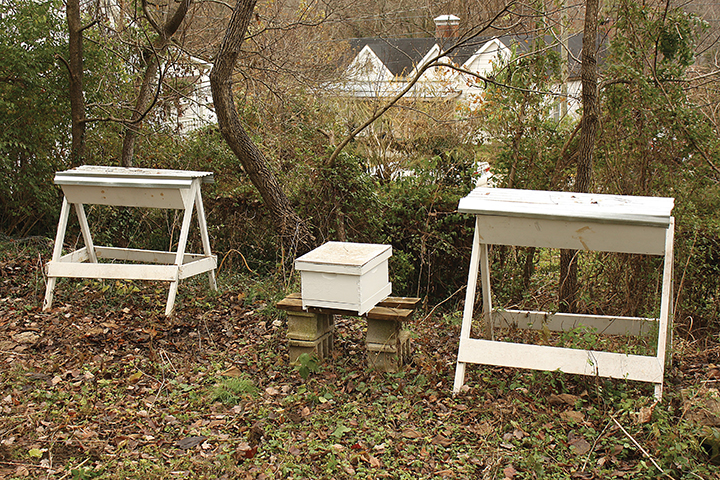
My journey to becoming a beekeeper has been a long one, and I’m still not quite there yet. For the past five years or so, I have read everything I could about natural beekeeping, attended workshops, and spoken to expert and amateur beekeepers. My goal all along was to pursue this endeavor in the most low-cost way I could. This meant a lot of research and a lot of practicality in gathering materials. This isn’t an article about how to keep bees — I’ll touch on some of what I’ve learned from others and what has (and hasn’t) worked for me, but what I want to do is teach you how to build your own affordable, top-bar beehives.
I don’t do construction or build furniture for a living, but I do know my way around a shop. I’m not going to claim that my hives are perfect or super fancy, but with my instructions, you should easily be able to build your own with only rudimentary tools and limited woodworking experience.
Without going into depth on the history of different types of hives, I chose top-bar hives because they’re simple and affordable to make, don’t require much in the way of specialized tools or materials, and are a good option for backyard beekeepers who want to keep bees naturally and sustainably. Top-bar hives have been around in various forms throughout history. The style most people use today, and that I will be discussing, is the Kenyan Top-Bar Hive, which has roots that go back to ancient Greece.
My design is taken (with permission) from my friend Matt Wilson, a Master Beekeeper and former Organic Farming Coordinator at Berea College in Berea, Kentucky. Wilson studied under Les Crowder, co-author of the book Top-Bar Beekeeping: Organic Practices for Honeybee Health (Chelsea Green Publishing). This book is a great resource and will give you much more detail on the whys and wherefores of top-bar beekeeping. Wilson modified Crowder’s design slightly, primarily in adjusting the length of the bars to allow easy transition to a Langstroth hive.
A Langstroth is the standard box-style hive most people are familiar with. It was developed in the 1800s by Lorenzo Langstroth, and subsequently became the standard for much of the world due to its efficiency and economic size and shape. While his design was an attempt to emulate the concept of “bee space” and was meant to be used for natural beekeeping, he couldn’t have anticipated that it would become bastardized over the next several decades by commercial beekeepers who wanted to produce as much honey as possible and weren’t afraid to use highly unnatural processes and chemicals.
The debate on the merits and history of these two types of hives is one best left to beekeeping forums, though. One definite asset of Langstroth hives is that their frames can be removed and the honey extracted without damaging the comb. For top-bar hives, once you are ready to harvest the honey, you have to scrape the entire comb from the bar, requiring that the bees build the comb back up. Some would argue that this keeps the bees healthy and active due to the additional work, but it does mean that you will get less honey from a top-bar hive. For the backyard beekeeper interested in organic practices and producing for themselves and their family, this isn’t necessarily a problem.
Gathering your materials
There are a few required materials for producing an affordable, functional top-bar hive. You can make adjustments based on what scrap you have available or recycled materials you may want to use. You can make a visually-appealing hive with top-quality lumber if you want to put in the extra time and expense.
This design is the most efficient and affordable design you will likely come across. There are certain measurements that you need to get exactly right. I will highlight those in the instructions, but there are various elements of this design that are okay to modify to fit your own materials and needs.
Be sure to use untreated lumber. Standard whitewood is the most economical, but cedar or pine will last longer and can be very attractive if stained (use a natural stain on only the exterior of the hive). As long as it’s natural and untreated, bees will use it. You can potentially experiment with other recycled materials, though. After all, bees often build hives in the walls of houses, surrounded by insulation and other unnatural materials. I like to keep my materials as natural as possible, though.
I highly recommend building at least two hives at once, if not more. It doesn’t take much more time or material to build several hives at once, particularly if you’ve got an assembly line. Also, it’s always a good idea to keep bees in at least two hives should you lose a hive or need to trade out materials.
Hive materials
• Hive body: one 1″x10″x10′ board; one 1″x10″x4′ board
• Top bars: two 2″x4″x8′ boards
• Cover: Galvanized steel roofing panel (8’x29″ will make two covers), plywood, poly sheet or other rigid waterproof material
• Heavy cardboard or thin plywood for divider/additional insulation between the cover and bars (optional)
• Stand: Cinder blocks or anything else creative will work; if you want to build legs, use four 2″x3″ or 2″x4″ pieces of lumber at least four feet in length and two 1″x6″ pieces.
Tools and additional materials
• 1 5/8″ deck screws
• 1 1/4″ finish nails
• exterior-grade, non-toxic wood glue
• exterior-grade paint
• measuring tape
• circular saw or hand saw
• table saw
• square
• pencil/Sharpie
• drill with Phillips bit
• 1/8″ drill bit
• hammer
• paintbrush
• beeswax or honey
Building the hive box
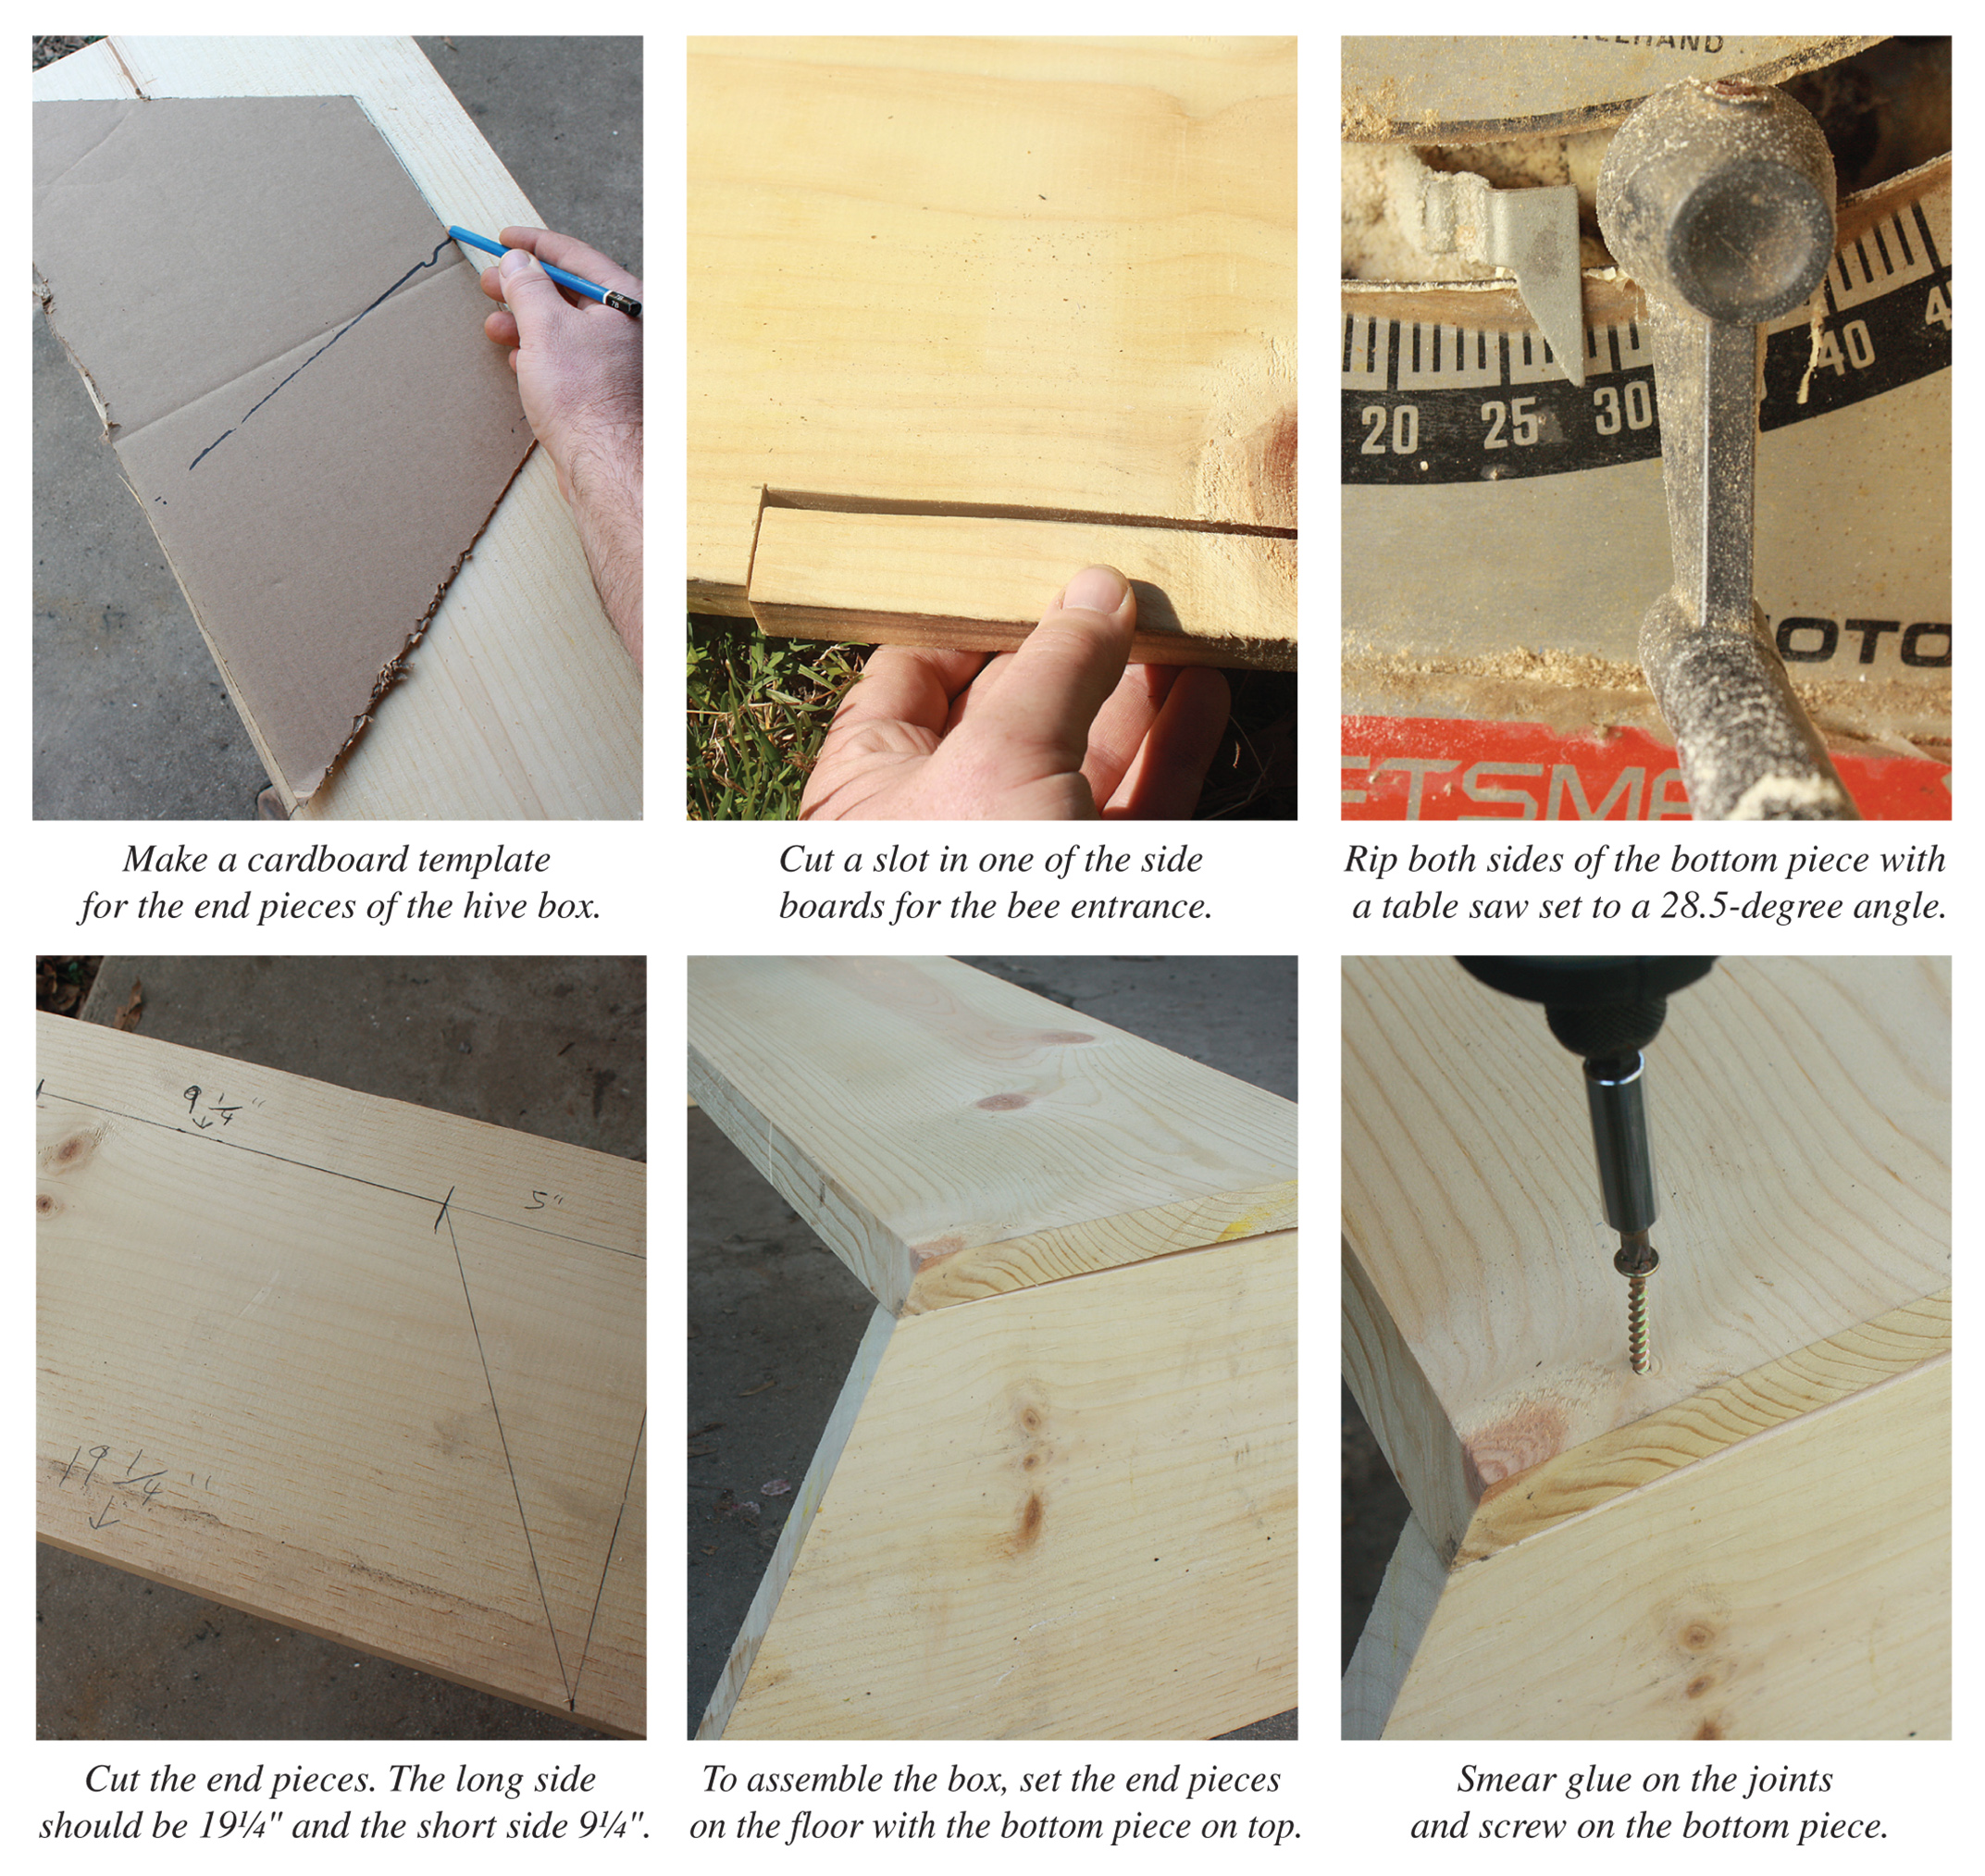
To build the hive box, you’ll need to make some exact measurements. It doesn’t hurt to start by making a template from cardboard or a scrap piece of wood, particularly for the end pieces.
1. Begin by marking lines on your 1×10 to cut three pieces at 43″ in length each for the side and bottom boards. Be sure to factor in the roughly 1/8″ kerf slot the width of the saw blade will create. My suggestion is to use a broad-tipped Sharpie to mark the lines. Be sure to measure from the edge of the line and to cut on the line.
2. For the bee entrance(s), take one of the side boards and cut a slot on one end 1 1/8″ high and 6 3/4″ long. I recommend cutting a slot of the same size at the other end as well. Be sure to save the cutout pieces. Nail one back in with finishing nails for removal later should you ever decide to upgrade to a double-hive system.
3. For the bottom piece you’ll be ripping both sides of the board at an angle. Set your table saw blade to an angle of 28.5 degrees and adjust the stop so it only cuts off the very end (length-wise) of each side of the board. This will allow you to attach the side pieces at the proper angle.
4. Next, you’ll be cutting the end pieces. The best way to do this is to measure out or trace from your template as follows: mark the longest end at 19 1/4″ and the shortest end at 9 1/4″. For the shorter end, it’s simpler to mark 5″ from either side and then draw a line from the ends of the longest piece to the 5″ mark. You’ll be cutting along this angle.
5. To assemble the box, have an assistant set the end pieces on a level floor with the longest end against the floor. Set the bottom piece on the ends, being sure to position the angles so that they align smoothly where the side pieces will be attached. (It’s worth noting that I placed the bottom piece upside down for my first hive and didn’t notice until I fully assembled it. It wasn’t as pretty but I was fortunately able to make some adjustments so that the measurements were all correct.)
6. Take a drill with a 1/8″ bit and drill two holes at each end of the shortest end of the end pieces. Smear glue where the boards come together and screw the bottom piece to the end pieces. Do the same with the side pieces, using three screws for the middle (where they attach to the bottom) and being sure the entrance holes are against the bottom board. Fasten an entrance cover over one of the extra entrances.
7. You’ve now got a fully assembled box! Go ahead and put on the first coat of paint or varnish now or save this for later. Be sure to only paint or varnish the outside of the hive. This is the part that will be exposed to weather, and you don’t want anything unnatural where the bees will be building their combs.
Making the top bars
When building the top bars, please take care to be extra safe. You’ll be operating much closer to the saw blade than with the other pieces. Use guards and a push-tool to keep your hands from getting too close to the blade. Never stand directly in line with the blade, as pieces can jam and shoot back out at a dangerous velocity. Ear and eye protection don’t hurt either.
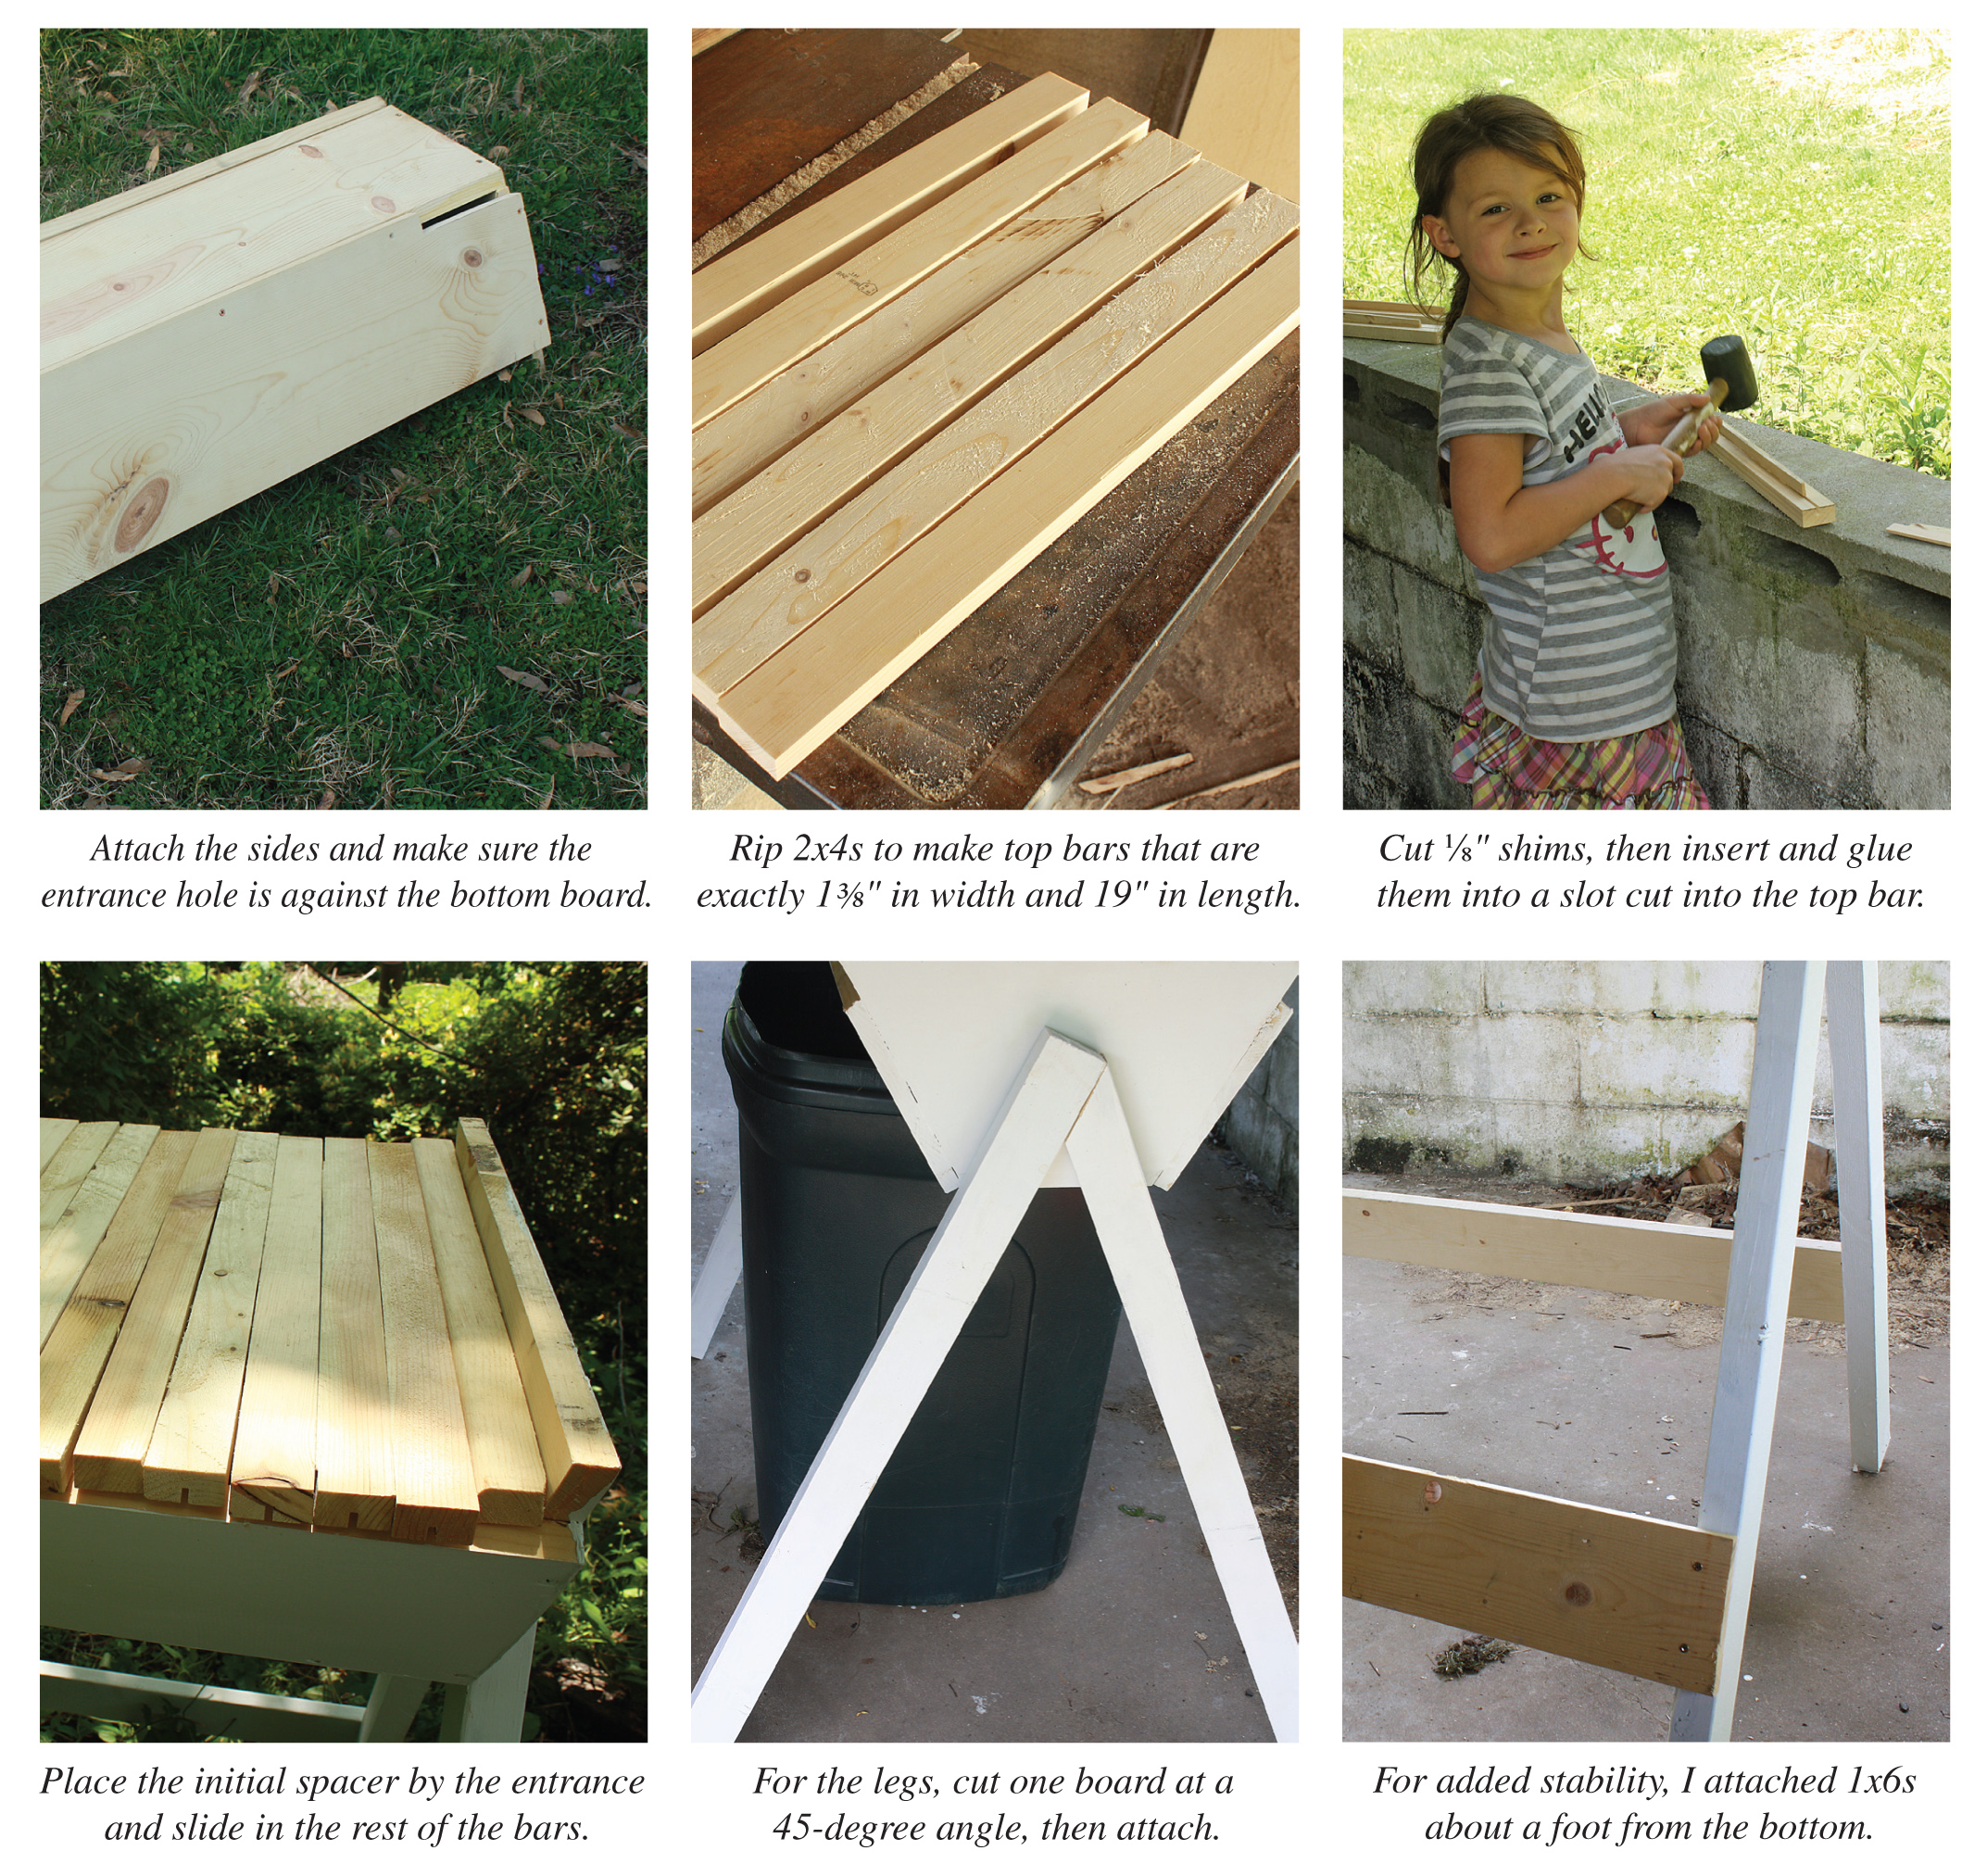
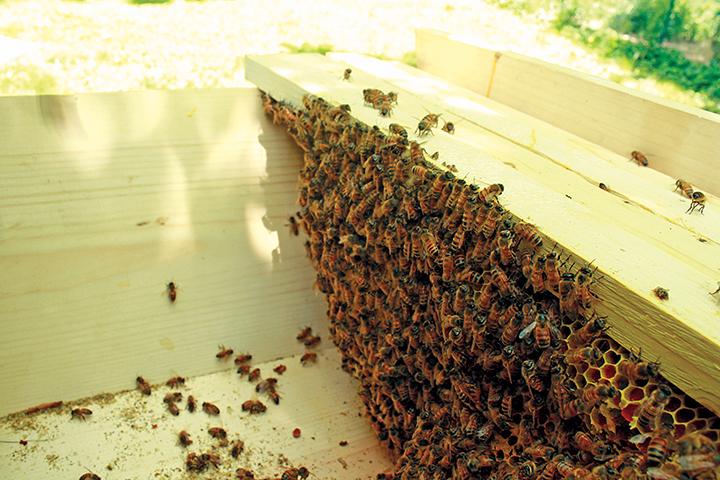
You’ll be making around 30 top bars along with additional spacers. Since each top bar accounts for only half of the bee space required between combs, a spacer should be placed between the first bar and the side of the hive. The spacer should be 3/16″ to 1/4″ wide and 19″ long. Use shims of various widths for the other end of the hive to make a tight seal. It is vital that the top bars be exactly 1 3/8″ in width and 19″ in length. Cut one and use it as a template for the rest. The height can be variable, but if it’s too thin it won’t work. This is where you can take advantage of any non-seasoned scrap wood you have lying around.
1. Measure out as many 19″ marks as you can fit on a board and then cut through the marks with a circular saw. A good idea is to cut every other line, as 38″ pieces are easier to handle and can be cut in half after the bars are ripped. Don’t forget about the 1/8″ blade kerf!
2. Set your table saw to rip at exactly 1 3/8″. It’s a good idea to test with scrap pieces first. Set the blade height to rip just over half the width of a 2×4 (about 1 7/8″). Run the 2×4 pieces through, then flip them over to cut the other side.
3. Once you’ve cut all 2×4 pieces to 1 3/8″, set the table saw to 3/4″ and rip four bars out of each. Precision doesn’t matter too much here since you’re cutting the height. If you used 38″ pieces, cut the boards in half with a circular or chop saw so that you now have 19″ pieces.
4. Next you’ll need to cut out and attach guides to the bars for the first 10-12 bars of the hive that the bees will use to start building their comb. Using these guides, they can maintain a straight comb for the rest of the hive. The guides will need to be 15″ in length and centered so the bars will rest snugly in the hive.
There are two different ways to go about this. The first is to cut a triangular 15″ long piece using an angled saw blade that can be glued and nailed to the bar. The second is to (safely) cut shims at 1/8″ that can be inserted and glued into a slot cut into the bar by lowering the table saw blade to a height that allows you to cut a slot just under half the height of the bar. Popsicle sticks can be used in place of shims. It’s a good idea to rub beeswax or honey along the guides to encourage the bees to build.
5. Place the initial spacer at the front of the hive (by the entrance) and slide the rest of the bars in. Add additional spacers until the bars are snug.
Assembling and attaching optional legs
If you choose to build legs for your hive box rather than setting them on concrete blocks or some other stand, you’ll need 2x4s or 2x3s or any other size of sturdy scrap wood at least 4′ long.
There are various ways to attach the legs, but I’ll describe how I did it.
1. Cut four legs, two for each end. I cut mine at about 3’x10″ in height, but you can determine the optimal height for you when you attach them to the stand.
2. For each end of the hive, cut one end of a leg at a 45-degree angle so that it can be snugged up against the other leg. Have an assistant help or prop the box on something around 4-5 feet high so you can align the legs where you like them and make your drill marks.
3. Once you attach the legs you may notice the hive doesn’t seem all that sturdy. This is where the 1x6s come in. You’ll want to cut them to a good length to attach about a foot from the bottom of each side (lengthwise) to keep the legs sturdy. I cut mine at 46″ and screwed them on with deck screws. My first hive definitely turned out a bit awkward looking. I added additional support boards at the ends, but found they weren’t needed for my second, which was my “lessons-learned” hive.
When your masterpiece is complete you’ll want to think a bit about hive placement. If you’re a beekeeper you probably already have all kinds of thoughts on that, so I won’t go into detail. I have an okay-sized yard in a small town, so my options were limited. I placed mine in a shady area where the bees had a line of site to travel back and forth from the hives gathering pollen from my neighbors’ yards and gardens.
Be sure to level the hives to prevent crooked combs, and to place the legs on rocks or something else solid to prevent rotting.
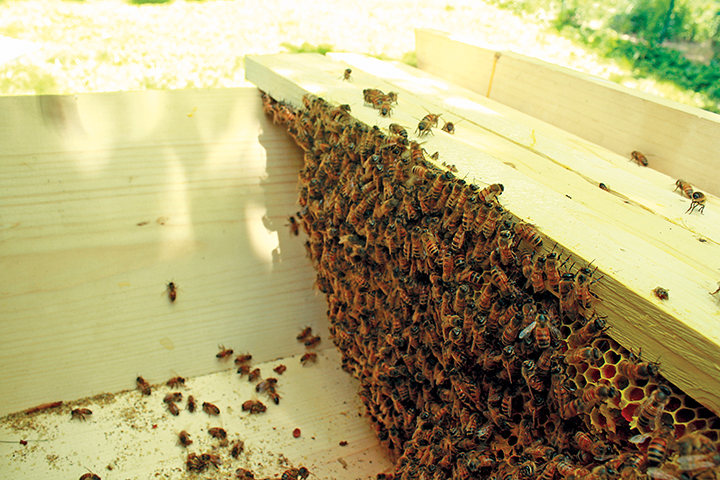
In another attempt to keep things affordable and local, I caught a wild swarm using a swarm trap (that’s a whole other story…) built by my cousin Leah Adams shortly after I completed my hives. I had four or five good solid combs and my bees seemed happy, but they took off after a few months. I have no idea why, but I’ll continue to work to catch swarms until I have a happy bee family.
Beekeeping is a simple, fun hobby, but can be challenging in today’s world. Keeping bees by natural methods using top-bar hives is just another way for you to be more self-sufficient and keep these vital pollinators sticking around.







How would you winterize this type of hive?
This was a very good article. You mentioned a swarm trap that your cousin built. Is there an article about that? Thanks!