By Linda Gabris
Growing up in the rural woods miles away from the nearest country store, store-bought bread was seldom seen in Grandma’s house. So to keep up with demand, she almost always had a huge basin of dough rising behind the crackling woodstove, filling the kitchen with mouth-watering yeasty aroma. When there was no dough on the rise, she would whip up a batch of one of her tasty quick bread recipes.
Like Grandma, I enjoy baking bread, especially in winter when I have more free time on my hands. The extra heat the oven produces on a frosty day is a bonus deal in our lofty house. Plus, bread goes well with winter dishes like soups and stews, so I get a lot more mileage out of every pot. But most importantly, baking my own bread allows me to control the amount of salt and sugar while eliminating unwanted additives found in commercial loaves.
Equipment needed
You will need a glass or stainless steel bowl which allows room for your dough to expand — the bigger the batch, the larger the bowl must be. However I would advise those breaking ground or trying out a new recipe not to tackle big batches because if a recipe doesn’t turn out the first time around, you will have less waste.
Bread baking is an art and even though I tend to cook everyday dishes by “measuring by eye,” I take extra care with measuring when it comes to bread recipes.
A pastry brush comes in handy for loaves that need glazing. Having a selection of various-sized loaf pans in the cupboard makes it easier — if a pan is too large, the loaf will be flat, and if the pan is too small, the dough will spill over the rim, making a burnt mess in the oven.
Different kinds of flours, grains, and meals
There are many different kinds of flours, grains, and meals used in bread making. “Enriched” or “fortified” labels mean specific nutrients were added to the flour. “Pre-sifted” labels mean that you do not have to sift before measuring. “Organic” means that the wheat did not come into contact with non-organic foods during processing. And then there’s bleached and unbleached.
Technically, all white flours are bleached, but the difference is in the process — bleached flour is treated with chemical agents to speed up the aging while unbleached flour is bleached naturally as it ages, the latter being the healthier choice of the two. Bleached flour is said to have a finer texture which some bakers believe is better suited for cakes and pastries, whereas unbleached flour is thought to be the better choice for breads. But according to many bread baking experts, these two flours are interchangeable in most recipes with very little noticeable difference.
Whole wheat flour, on the other hand, is more wholesome since it is not bleached and is made from the entire wheat kernel (bran, germ, and endosperm). This is why whole wheat flour is often used along with white flour to naturally enrich the recipe.
Another flour you’ll happen upon when shopping the grain aisle is “self-rising” flour (intended for quick breads) which contains 1½ teaspoons baking powder and ¼ teaspoon salt per cup of flour. There are several reasons why I do not buy this flour: you cannot eliminate the salt from a recipe if you should wish to, the measurements for the baking powder and salt content per cup of flour can make it complicated for adjusting, and I find this type of flour is more expensive.
Bread recipes typically specify which flour or combination of flours to use but you can make substitutions such as lowering the amount of white flour and upping the whole wheat measure in a recipe to produce more wholesome loaves. Keep in mind such adjustments may cause a particular loaf to be heavier in texture or darker in color than was originally intended. It is fun to tweak recipes but keep notes so you can recreate your personalized winners.
Other popular staples found in the pantries of avid bread bakers are rye flour, barley, potato flour, corn flour, cornmeal, wheat germ, rolled oats or oatmeal, cracked wheat (bulgur), and millet, to name a few.
For those with special dietary needs such as celiac disease or gluten intolerance, you’ll find an array of gluten-free flours on the market today. Some of these include buckwheat (which isn’t a true member of the wheat family), coconut, oat, rice, tapioca, chickpea, sorghum, quinoa, cassava, and nut flours. Most of these are best-suited for quick breads because of their lack of gluten which gives kneaded dough its wonderful elasticity. However, there is an all-purpose, gluten-free flour which can be substituted for regular all-purpose flour said to be suitable for breads.
Yeast (and other leaveners)
You can buy yeast by the envelope, by the jar, or in bulk; the latter two are the more economical choices. One envelope of yeast equals 2¼ teaspoons. There are two main types of yeasts used by home bakers today and they are “active dry yeast” and “instant” (rapid rise) yeast. They can be used interchangeably; active dry yeast usually calls for dissolving in warm water or other liquid before using whereas instant yeast is typically mixed directly into the dough. Most recipes will call for them accordingly.
During the Depression years when yeast was scarce, many old-timers made their own — commonly known as sourdough starters — for rising dough. There are many different recipes for making sourdough starters. My favorite one is Grandma’s old recipe made from fermented milk and flour. It is simple to make and always works well for me. However, with yeast being available and reasonably priced today, there is no need for bread makers to rely solely on sourdough starters.
A word about rising
Bread dough needs to rise in a warm, draft-free location — some recipes call for room temperature but since every room (at least in my house) has a different temperature, it is hard to estimate if it is ideal or not. The ideal temperature for rising bread dough is between 80 to 90° F. If it is too cold the yeast will not work and if it is too hot, the heat will stunt its growth.
If you have a woodstove in your kitchen, behind the stove is an ideal place for the dough to rise, especially in winter when the house is colder than normal. In cold weather I fill the bottom of my kitchen sink with hot water, set a rack in it to place the bowl or pans of dough on, and cover the entire sink with a cloth to hold in the heat. This works very well and the water can be reheated as needed.
In summer, I simply set the dough on the patio table in the sun to rise. Although some recipes call for rising the dough in a preheated oven, I find this typically produces too much heat and the dough gets stunted.
You will notice some bread recipes call for the dough to rise at cool temperature or in the fridge — a practice I seldom use. This is a slower process than rising at a suggested warmer temperature, but if you have lots of time to your avail and the recipe specially calls for this mode of rising, by all means rise the dough according to the particular directions.
Yeast bread recipes
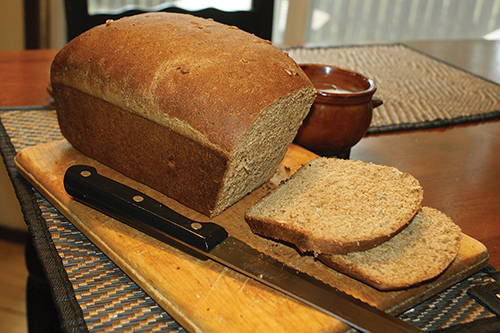
Old-fashioned three-grain bread
This is one of my all-time favorite recipes because it produces a healthy loaf with rye and whole wheat flours, not to mention wheat germ, bran, and seeds. Makes two 8×4-inch loaves.
4 cups all-purpose flour, divided
1¾ cups rye flour
1¾ cups whole wheat flour
1½ tsp. salt
3 envelopes active dry yeast
1¾ cups milk
¾ cup water
2/3 cup liquid honey
4 Tbsp. butter or margarine
2 Tbsp. blackstrap molasses
¼ cup wheat germ
½ cup raw sunflower seeds
2 Tbsp. untoasted sesame seeds
¼ cup wheat bran
In a bowl, mix 2 cups of the all-purpose flour with the rye and whole wheat flours. In another large bowl, combine 3 cups of the flour mixture with salt and the yeast.
Heat milk, water, honey, butter, and molasses in saucepan until warm (about 130° F). Add warm liquid to flour mixture and beat until well blended. Stir in the wheat germ, seeds, bran, and enough remaining all-purpose flour as needed to make a stiff dough.
Turn out on floured surface and knead for 10 to 15 minutes until the dough is smooth and elastic, sprinkling work surface with flour to prevent sticking. Place in a greased bowl, turn to oil top, cover, and let rise until doubled, about 50 minutes.
Punch down to remove air bubbles, divide dough into two parts and form into loaves. Place in greased pans, cover, and let rise 30 minutes — or until dough is about an inch higher than the pan.
Bake in preheated 350° F oven for 45 minutes or until loaves sound hollow when tapped. Empty from pans and cool on wire rack.
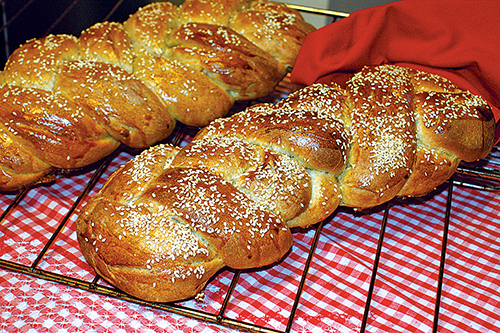
Braided egg bread
I like to make this bread when I’m having company for dinner because it looks so pretty on the table alongside the tureen for the soup course. Makes two 12- to 14-inch loaves.
1 cup warm water
1 Tbsp. white sugar
2 envelopes active dry yeast
1 cup warm milk
3 Tbsp. white sugar
1 tsp. salt
¼ cup butter or margarine
2 lightly beaten eggs
3 cups whole wheat flour
4 cups all-purpose flour
1 egg yolk mixed with 1 Tbsp. water
sesame seeds
Measure water in large bowl, dissolve 1 tablespoon of white sugar, and sprinkle with yeast. Let stand 10 minutes or until foamy.
Put warm milk into another bowl and stir in the 3 tablespoons white sugar, salt, butter, and eggs. Add the milk mixture to the yeast mixture and stir in the whole wheat flour and enough of the all-purpose flour to make a soft dough.
Turn out on floured surface and knead dough, adding as much flour as needed to form a non-sticky sturdy dough. Knead until smooth and elastic, about 15 minutes.
Place in a large greased bowl, rotating so top is oiled, cover with a cloth, and let rise until doubled in bulk, about one hour.
Punch down, turn out on floured surface, and divide into two portions. Form into balls and let them rest for 15 minutes.
Working with one ball at a time, roll it into a 9×14-inch rectangle and cut lengthwise into three equal strips. Fold the strips in half and pinch the seams. Roll lightly to seal. Braid the three strips together and place on greased baking sheet. Repeat with other ball of dough. Cover braided loaves and let rise until doubled in bulk, about 40 minutes.
Brush the loaves with the yolk mixture and sprinkle with sesame seeds. Bake in preheated 350° F oven for 30 minutes or until loaves are golden and sound hollow when tapped. Cool on wire racks.
Pumpernickel-potato bread
This is a free-form bread recipe which means you can divide the dough into two or three pieces and shape it into loaves of desired shapes. I typically make three loaves and freeze one for future use as it freezes very well. This satisfying bread makes a filling supper when served with a bowl of thick, homemade tomato soup. It also goes great with pork ribs in sauerkraut, chili con carne, and baked bean dishes.
9 to 10 cups whole wheat flour
4 cups dark rye flour
1½ Tbsp. salt
¾ cup cornmeal
2 packages active dry yeast
3½ cups water (or saved potato water from the potatoes)
¼ cup blackstrap molasses
3½ Tbsp. dark cocoa powder
1½ Tbsp. melted butter or margarine
2 cups mashed potatoes (I find potato chunks quite tasty in the loaf but add a little milk or cream to the potatoes when mashing to make them smoother)
2 to 3 tsp. caraway seeds
Combine the two flours into a large bowl. In another large bowl, measure out 2 cups of the mixed flour and add the salt, cornmeal, and yeast. Mix well.
Put the water (or saved potato water) into a saucepan and add molasses, cocoa powder, and butter. Heat until warm to the wrist (about 120° F). Add this to the 2 cups of flour along with the mashed potatoes. Mix in one more cup of flour and the caraway seeds. Beat with a wooden spoon while adding more of the remaining flour to make a stiff dough.
Turn out on lightly-floured surface and knead 15 minutes until mixture is very smooth, adding more flour as needed to prevent sticking.
Place in a large, buttered bowl, rotating so top is oiled. Cover and let rise in warm place until doubled in bulk; about an hour.
Turn out on floured surface, punch down, and knead lightly for two minutes to remove air bubbles. Return to greased bowl, cover, and let rise another 30 minutes.
Punch the dough down, turn out on lightly-floured surface, and knead for two minutes. Divide dough into two or three pieces (as desired) and shape into round, long, or oval loaves (or fit into greased loaf pans if you’d rather). Place on greased baking sheets, cover, and let rise until doubled.
Bake in preheated 350° F oven for 50 to 60 minutes, or until the loaves sound hollow when tapped. Cool on wire racks.
Lin’s jalapeño cheese bread
My family loves this cheesy, spicy loaf. You can be very thrifty with this bread by using up the tidbits in the fridge. Makes two 8×4-inch loaves.
1 tsp. sugar (granulated)
1¾ cups warm water
1 envelope active dry yeast
1/3 cup canola oil
1 tsp. salt
1 tsp. hot pepper sauce
1 or 2 finely-diced small red peppers or pinch of hot pepper flakes (optional)
1 beaten egg
½ cup grated shaker-style Parmesan cheese
5 to 6 cups all-purpose flour, divided
2½ cups grated cheese (I like to use Monterey Jack or jalapeño cheddar)
In large bowl, dissolve sugar in water, sprinkle with yeast, let stand 10 minutes or until foamy. With wooden spoon, beat in oil, salt, pepper sauce, peppers, and egg until smooth. Add Parmesan cheese. Stir in 2 cups of the flour, beat well. Add enough of the remaining flour to pick up all the moisture. Turn out on floured board and knead, adding more flour as needed, to make a soft dough. Continue kneading until smooth and no longer sticky, about 10 minutes.
Place in greased bowl, rotating so top is oiled, cover, and let rise until doubled in bulk, about 1 hour.
Punch down, turn out on clean surface, and knead in the shredded cheese until it is distributed evenly throughout the dough. Shape into a ball, divide into two pieces, and form into loaves. Place in greased pans, cover and rise until doubled in bulk, about one hour.
Bake in preheated 375° F oven for 35 minutes. Remove from pans and cool on wire racks.
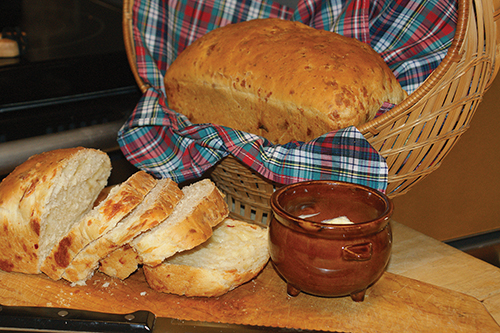
Quick bread recipes
Buttermilk quick bread
Nothing beats a quick bread when you need to get bread on the table fast. In our house, this loaf often accompanies thick, spicy lentil soups and curries. Makes one 9×5-inch loaf.
2½ cups all-purpose flour
¼ cup white sugar
1 Tbsp. baking powder
½ tsp. baking soda
1 tsp. salt
¼ cup melted margarine, butter, or vegetable oil of choice (Grandma used homemade lard)
1¼ cups buttermilk
2 eggs
Preheat oven to 350° F. Grease the pan and set aside. Mix the dry ingredients into a large bowl. Whisk the melted fat in a smaller bowl along with the buttermilk and eggs. Slowly, pour this over the dry ingredients, stirring gently into the mixture only until the flour is absorbed. Do not overmix it. Pour into greased pan and bake about 45 to 55 minutes or until loaf is nicely puffed and golden. Do the toothpick check to see that it comes out clean. Allow the loaf to cool in the pan before turning out on wire rack. Let rest for 15 minutes to ease slicing.
Pizza loaf
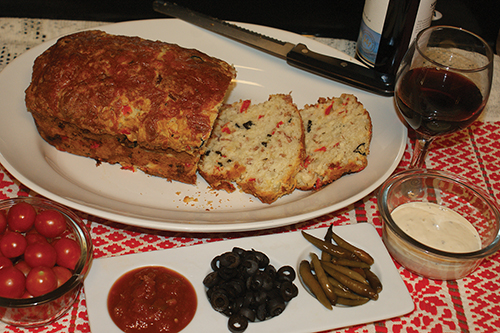
On busy weeknights, this quick bread recipe comes in handy. For supper, I add the meat as mentioned below and simply serve the bread with some hot peppers, cherry tomatoes, and a dipping sauce or two on the side. It is also delicious with a bowl of minestrone or other vegetable soup. Leftover loaf makes excellent lunchbox fare. Makes one 9×5-inch loaf.
3 cups all-purpose flour
1 tsp. salt
2 Tbsp. baking powder
1 tsp. Italian dried herbs mixture (or pinch each of oregano, thyme, parsley, rosemary) plus an additional pinch for top of loaf
1 tsp. chile flakes (optional)
1½ cups milk
¼ cup olive oil
1 egg
1 minced onion
¼ cup minced sweet pepper
3 to 4 Tbsp. sliced pitted black olives
1-1/3 cups grated cheese, divided
Preheat oven 350° F. Grease loaf pan, set side. Put first 5 ingredients into a bowl and mix with a fork. In another bowl combine milk, oil, egg, onion, pepper, and olives. Pour this mixture into the dry ingredients and mix until blended. Fold in the cheese of your choice (setting 2 tablespoons aside for topping) and the meat, if using. Spoon mixture into pan and top with the reserved cheese and pinch of herbs. Bake 45 to 55 minutes or until puffed up well above the pan, lightly browned, and toothpick inserted into center comes out clean. Let stand about 20 minutes before turning out of the pan to ease slicing.
Variation: If I am serving this loaf as the main course, I typically add ½ cup thinly-sliced pepperoni. It is also good with diced ham or crumbled bacon.
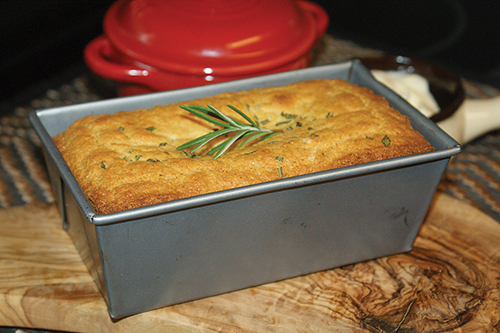
Rosemary cornbread
I like this recipe, especially in winter, because rosemary is my most productive winter window garden herb. This loaf pairs nicely with bean stews and is especially good with a corn chowder. Makes one 9-inch loaf or square pan — or you can bake the batter in mini or individual loaf pans which look very elegant on the table. Just be sure to only fill the pans a scant ¾ full as the batter will rise in the pans.
1½ cups cornmeal
2 cups all-purpose flour
2 Tbsp. sugar
½ tsp. salt
2 Tbsp. baking powder
1 tsp. baking soda
1 Tbsp. fresh minced rosemary
2 lightly-beaten eggs
1 cup buttermilk (regular or low-fat)
1 cup water
¼ cup olive oil (or you can use bacon drippings as Grandma did)
Preheat oven to 425° F. Mix dry ingredients and rosemary into a large bowl. In another bowl, whisk together eggs, buttermilk, water, and olive oil. Add dry ingredients and mix until just combined. Pour into greased pans and bake 25 to 30 minutes for one large loaf, or about 15 to 20 minutes for the smaller loaves, or until a toothpick inserted in center comes out clean. Cool in pans before turning out.
Beginner’s beer bread
When my youngest daughter, Lana, first started baking bread, she loved making this fun, easy recipe because she got such a kick out of asking her dad for a bottle of his homemade malt beer. You can use any kind of store-bought beer, including non-alcoholic variety, but I find the darker the beer, the richer the loaf will be in both color and flavor. It makes one 9-inch round loaf.
3 cups all-purpose flour
3 tsp. baking powder
1 tsp. salt
4 Tbsp. white sugar (or brown sugar for darker loaf)
¼ cup melted butter (plus 1 Tbsp. for drizzling)
1 bottle (12 oz.) dark beer
Preheat oven 375° F. Mix dry ingredients into a bowl, stir in ¼ cup butter and the beer. Beat with a wooden spoon until dough is smooth. Empty batter into greased bowl or pan and drizzle remaining butter evenly over the top of the loaf. Let stand about 30 minutes before baking.
Bake about 50 minutes or until a toothpick inserted in center comes out clean. Let bread cool slightly in pan before turning out on wire rack.
Hungarian langos (fried bread)
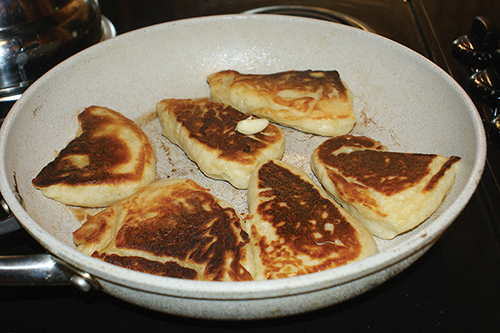
This wonderful Hungarian recipe was handed-down to me from my mom-in-law. One of my favorite ways to enjoy it is with roasted beef marrow bones and garlic — a memorable first course. Makes 10 to 12 fry breads.
3-4 medium to large potatoes, peeled, boiled, mashed, and put through a sieve or ricer
½ cup lukewarm milk
1 envelope dry active yeast (or equivalent)
1 tsp. white sugar
1-2/3 cups flour, divided
1 tsp. salt
fat for frying (homemade lard, butter or vegetable oil)
2 cloves of garlic (if desired)
Peel and boil the potatoes until very soft, drain and mash, cool. Mix lukewarm milk with yeast, sugar, and 2 tablespoons of the flour. Let stand 10 minutes or until yeast is foamy. Add potatoes and remaining flour and salt. Mix well. Turn out on floured surface and knead until smooth. Set in greased bowl and let rise until doubled in bulk, about 30 minutes. Turn out on floured surface and roll into a 10-inch circle about ½-inch thick. Using a sharp knife, cut into wedges. Fry in hot grease over medium heat until puffed and golden on each side. Rub with garlic upon serving or pass the garlic around on a little plate.
Sourdough bread recipes
Grandma’s sourdough starter
Many sourdough starters call for the addition of yeast. I like Grandma’s old sourdough starter recipe better than most as it calls for just two common ingredients — milk and flour. This starter can be used in any bread or biscuit recipe calling for sourdough starter.
To make the starter, put 3 cups of whole or skimmed milk into a crock (or glass bowl), cover it with a cloth, and let stand for 24 hours. Stir in 2 cups all-purpose flour, cover, and let stand for several days in a warm place. When the mixture is bubbly (working) and smells pleasantly sour, store it in a lidded jar in the fridge.
You must “feed” your starter to keep it going. When you take some out, you put some back, meaning if you remove a cup of sourdough starter for a recipe, replace it with a cup of flour and a cup of warm milk or water and let stand at room temperature some 4 or 5 hours. When it expands and foams, return it to the fridge. If nothing happens, it is dead and you will have to start a new batch.
Easiest ever sourdough biscuits
3 cups all-purpose flour
½ tsp. salt
½ cup fat (butter, margarine or lard)
1 cup sourdough starter
½ cup buttermilk
Mix flour and salt into a large bowl. Cut in fat until crumbly. Whisk together 1 cup of sourdough starter with ½ cup buttermilk. Stir into the flour until combined, adding a little more buttermilk if needed to gather up the flour and form a soft dough. Turn out on floured surface and knead gently. Roll to ½-inch thickness, cut into biscuits, and place on greased baking sheet. Brush tops with melted butter, sprinkle with herbs, or grated cheese, if desired, and bake in preheated 425° F oven for 15 to 20 minutes or until puffed and golden. Makes 15 to 20 biscuits, depending on size.
Variation: Add 2 teaspoons of baking powder and ¼ teaspoon baking soda to the flour if you wish an even “puffier” biscuit that still is loaded with sourdough taste.




It says to use the flour as needed to make a stiff dough. You may or may not use it all. Depending on how soft your dough is. Dough acts differently in different conditions for example; high humidity, elevation, warm or cold weather. These all will have a different effect on how the dough will turn out. Hope this helps!
In the three grain bread recipe you start with a total of 5 1/2 cups of flour mix. You then take 3 cups to start the process. What is the balance of 2 1/2 cups of the mix used for? The balance of the all purpose flour (2cups) is used to add to the dough to made it stiff. No mention of the balance of mixed flour.
Thanks.