 |
|
| Issue #68 • March/April, 2001 |
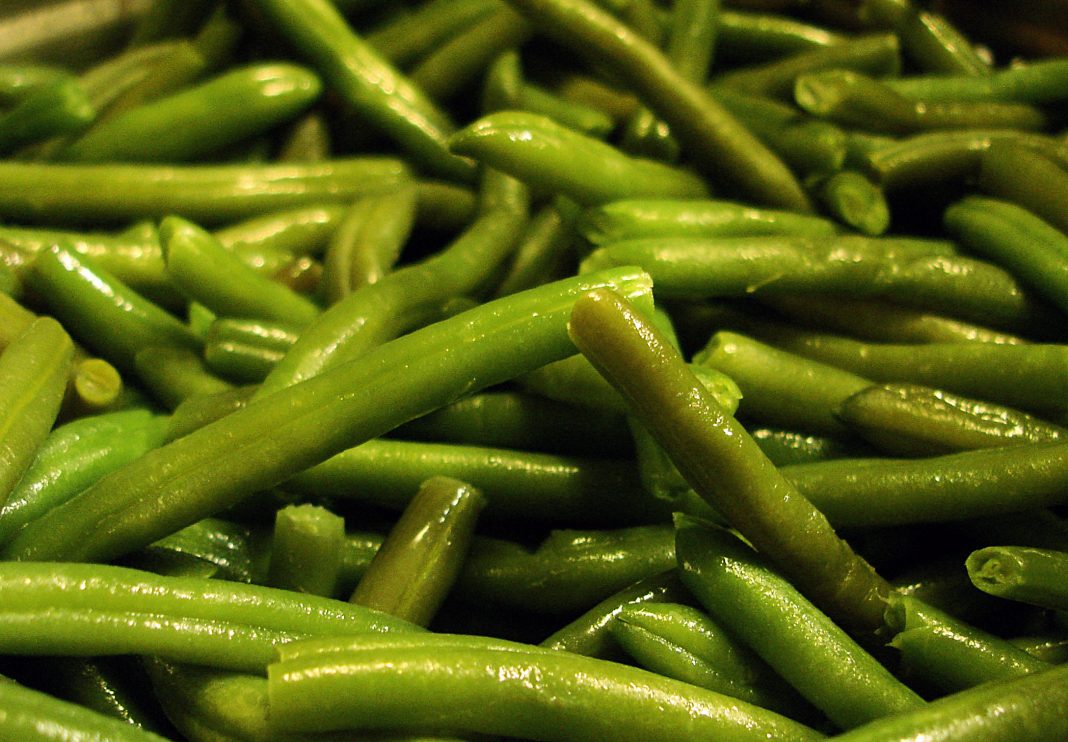
Anyone with some gardening space, a sunny location, and good loamy soil with pH 6.0-7.5 can grow snap beans. With some good recipes, you’ll have people begging for your secret ingredient.
The secret, of course, is simplethey are fresh. You won’t find them in the produce aisle at the local supermarket nor at the diner across town. You’ll only find them in your garden.
 Pole beans such as Romano are prolific, giving the gardener plenty of green beans to enjoy fresh, canned, and frozen. |
There are more and more snap bean choices showing up in seed catalogs. I pay particular attention to the ones said to produce well in hot, humid areas. We gardeners living in Zone 8 appreciate vegetables that can stand some hardship. Experience is the best teacher as to which plants will do well in any area. I have found that a number of bush bean varieties perform best here in southwestern Arkansas if you can harvest before July. In other places, where temperatures don’t reach 100° F and stay there for days, these same varieties will bear over a longer period. I can recall a summer a few years ago when our Blue Lake pole beans loaded with hundreds of 2 inch long young beans were a total loss due to a prolonged onslaught of heat and high humidity.
We are partial to pole varieties for several reasons. Not only do they have great flavor, but they’re easier to harvest as you can pick them from a standing position with little stooping required. Since they’re well above the ground, there is hardly any likelihood of dirt being splashed on the beans when heavy showers occur. Unless a disaster happens, as with the Blue Lakes above, the vines will usually bear until fall if beans are not allowed to mature on the vines. The pole beans best suited for our area seem to be Romano and Kentucky Wonder. They have out-produced all other pole beans we have tried. The old reliable Kentucky Wonder has been around since the 1800s.
 Bush beans usually give a good account of themselves, but picking them is not as easy on the back as harvesting pole beans. |
It is possible to have both spring and fall crops of beans, but the fall crop is a gamble. That crop has to be planted during hot weather to be able to produce a decent harvest before frost, but hot weather is not the best time for planting beans. Normally, beans should be planted during spring after all danger of frost is past but cool weather still exists. An exception to this is the Fava Bean (Windsor variety) which is mainly recommended for the northern United States and is extensively cultivated in northern Europe. Fava beans may be planted as soon as soil can be worked in the spring. Fava produces stalks two to three feet tall and an abundance of large bean pods containing three to five beans about one inch in diameter. I have only tried growing these once. Fortunately, the plants did produce a very good crop before hot weather set in, but we did not like the strong flavor of the beans which takes some “getting used to.”
When planting beans, keep these things in mind. All bean plants need to have an open sunny spot in the garden. Bush beans don’t do well if overshadowed by tall plants such as pole beans or caged tomatoes. Pole beans need stout support. Use wire stretched between tall, well-anchored posts, or tepee-type trellises made of 10 or 12 foot long saplings or bamboo driven into the ground. The expected wind velocity in your area should be a determining factor as to how many poles you need to build wind resistant bean tepees. If you live in a strong wind area such as the Great Plains or a coastal area, you will need to use 10 or 12, where in less windy ares you only need 4 or 6 poles. Diameter at the bottom of the tepee should be six to eight feet and the top should be tied together with stout string or wire.
For climbing support between poles, tie a biodegradable type string around the bottom of the tepee about three inches above the soil looping it around each pole and keeping the string taut. Do the same thing about halfway to the top of the tepee and tie another near the top. Then tie strings from top to bottom looping them around the horizontal strings ending above where seedlings will emerge from the soil. Be sure to leave a gap so you can slip through to harvest beans on the inside. Put up the support before you plant the beans.
 Green beans and potatoes, one of the Great Depression’s main courses, is still delicious and often stirs memories. |
At the end of the season you can cut the strings and the poles should come loose easily. Then you can compost the heap of vines and strings and store the poles to use again.
Generally speaking, bean seeds should be planted 1 to 1½ inches deep. Follow directions on the packet regarding spacing between plants, as pole plants require a bit more room than bush varieties. I plant seeds somewhat sparingly, as I dislike thinning out perfectly good plants when seedlings come up crowded. Bean plants do not transplant well, if at all, so there is no point in trying to salvage seedlings once they are disturbed. Usually germination is high among fresh packets of seeds so close seed sowing isn’t really necessary.
If your soil is on the heavy side, it can be made more pliable by adding humus in the form of organic matter such as compost, leaves, straw, etc. However this should be done as far ahead of spring planting as possible. Fall is a good time to make good use of yard rakings digging them into the soil and letting nature take its course over the winter months. Also, if you are not familiar with your soil’s pH, it might be well to have the soil tested. Your county extension agent should be able to guide you.
 Baskets of green beans are not only eye-catching, but they’re loaded with nutrition. |
Like most other garden crops, beans need some TLC. The plants are not going to do their best if left alone to fend for themselves. Weeding and watering-are essential if a good crop is to be expected. Bean plants are shallow rooted and sometimes it is well to give them some light cultivation to break up crusted soil and assure root aeration. Weeds and grass will fight to crowd out any vegetable crop and once they are under control, a good mulch can save the gardener hours of weeding. When bean plants are large enough to have several leaves and they’re easy to work around, put down a light mulch to deter the unwanted. Adding to the mulch from time to time will eliminate the necessity of any further tedious weeding and will help maintain moisture in the soil when dry spells come along. Mulch also attracts those diligent workers known as earthworms. They’ll take over the tilling in exchange for good living quarters.
Snap beans should be picked every second or third day while at their peak of perfection. If pods are allowed to stay on the vines until the beans enlarge and you can easily see how many beans are inside a pod, the quality will diminish. Plants will not achieve maximum production if beans are not picked regularly as it is the harvesting of the snap beans that stimulates the plants to keep producing.
|
Each section of the country seems to have its own particular problem as far as bean diseases and pests are concerned. Some of the most prevalent and found all over the United States are the form of bacterial blight. One, called “halo blight” causes leaves to have many dead spots with yellow halos around them. Another known as “common blight” appears as large, water-soaked, light green spots on leaves that later turn brown.
Many kinds of viruses are widespread and symptom vary with the type of viruscurling, mottling, streaking of leaves, stunted plants, etc.
Nematodes are microscopic worms that feed on the roots of a number of plants including beans. If plants turn yellow and wilt, pull some up and look at the roots. If they are misshapen with a number of small round nodules on them, you can bet nematodes are present. A soil test should determine whether or not nematodes are the culprits and, again, your county agent should be able to give current advice. One remedy is to plant a “trap” crop of special marigolds. Golden Guardian is a recommended variety and is advertised to kill 99 percent of nematodes over a three month period.
More visible bean pests include Japanese beetles, Mexican bean beetles, leafhoppers, sow bugs and slugs. The latter two are the ones we battle in our garden. We use 10% Sevin dust sparingly sprinkled on small boards to combat the sow bugs but do not put on the soil where earthworms might come in contact with it as it will kill them. Slugs are controlled by using diatomaceous earth (won’t work if soil is wet) at the base of plants or tiny amounts of table salt where slugs are numerous.
Whatever the problem, a few rules are helpful where beans, as well as other plants, are concerned. Do not compost any diseased vines, but dispose of them away from the garden. Burn them if possible. Don’t work around plants after a shower or when they are wet with dew. Brushing against them can help spread disease. Rotate your cropsi.e., don’t plant the same vegetables in the same spot year after year. Keep your soil in good condition by continuing to add compost and organic mulch which breaks down and helps with soil composition. This promotes healthy plants and they are less likely to be attacked by disease. Avoid the use of chemical fertilizers as these have a tendency to kill off many useful organisms in the soil and they are death to earthworms.
At the end of the season, if plants show no signs of disease, they may be dug into the soil as the plants are great soil builders. Much of the nitrogen they use is taken from the air without depleting the soil. Turning them back to the soil recycles plant-food elements.
Nutritionally speaking, snap beans are one of the most beneficial vegetables we can eat. Low in calories, they’re packed with vitamins A and C, calcium and iron, and contain good amounts of potassium, phosphorus and protein. Pretty good pickings, I’d say.
When we’re blessed with far more green beans than we can use, we put some away for the future. Our favorite way is to freeze them. Simply wash beans and snap into suitable lengths. Put the beans in boiling water for about three minutes and immediately plunge them into ice water to cool quickly. (A french fry basket is good for this.) Pack the beans into freezer bags, pour some of the first water (cooled) over them and seal bags. Be sure there are no leaks and place bags flat on cookie sheets and freeze. When frozen, bags may be stacked in freezer.
Count yourself among the fortunate when you have a big bowl of green beans to enjoy. Those of us who remember the Great Depression days say, “Amen!”
Seed sources:
Pole beans Blue Lake, Romano, and Kentucky Wonder are sold by most seed companies.
Fava Beans:
| Johnny’s 1 Foss Hill Road RR 1, Box 2580 Albion, ME 04910-9731 |
Golden Guardian Marigold Geo. W. Park Seed Co., Inc. 1 Parkton Avenue Greenwood, SC 29647-0001 |
| Hard Times Green BeansThis dish was regarded as a main course during the Great Depression and World War II eras when meats such as steak, chops, and roasts were hard to come by if you didn’t raise your own. Grace was often said over this simple dish backed up by a hot pan of corn bread or tasty cracklin’ corn bread. If you were lucky, you had a choice of coffee, buttermilk, or sweet milk to go with the meal.
1 lb. green beans, washed and snapped This mixture was allowed to cook in a good side pot for at least an hourmuch longer than we cook snap beans nowadays. (Always check to see if more water should be added to keep food from sticking and to be sure that there is ample bean broth.) Beans were not tender-crisp, but the flavor was great and anyone who didn’t want a second helping was said to have a puny appetite. Corn Bread As for the corn bread, if any was left, someone always finished it off as a snack soaked in a cup of buttermilk. There are many variations to corn bread recipes, but here is the one I remember best. 1 cup yellow corn meal Sift the dry ingredients together in a mixing bowl. Blend in the wet ingredients until mixture is smooth. Turn mixture into a greased 8 inch hot iron skillet and bake in a 425°F oven for about 20 minutes or until light brown and done in the middle. If using buttermilk, reduce baking powder to 1½ teaspoons and add ½ teaspoon soda. Corn bread made with buttermilk has its own great flavor. Cracklin’ corn bread is made by adding about ¾ cup pork cracklings to the corn bread mixture before baking. Cracklings are made from pieces of fresh, fat pork (no lean). Cook in a small amount of water in an iron skillet over low heat and stir occasionally to prevent sticking. When water has boiled away, continue to cook meat in order to render all grease from it. When meat reaches a crisp, light brown stage, remove it from skillet and drain on absorbent paper. You now have cracklings. |


Great article, thanks! Green beans are our absolute favorite vegetable. Fresh is good, but we especially like them canned–canning brings out a different flavor that we prefer. Like you, we also prefer pole beans as they are a lot less work than bush types. I like to pinch off the stem end as I pick so that all I have to do in the kitchen is wash and snap them and they’re ready to cook. Can you recommend a truly stringless variety of pole bean? We grew Kentucky Wonder last year which were listed as stringless in the seed catalogs, but ours came out very stringy. Thanks again for the article!