| Issue #143 • September/October, 2013 |
Hard cider is an American tradition dating back to before the Revolution. In the early days of America, it was as prevalent as beer. Unlike what we teach school children, Johnny Appleseed did not wander the American frontier planting apple trees to give everyone apples to eat as they settled he was planting orchards so that the settlers would have mature apple trees to make hard cider. This turned out to be a very profitable venture for Johnny Appleseed. Even though hard cider is as American as apple pie, it seems to have fallen out of favor.

My Purkeypile Hard Cider on tap at a local pub
Hard cider is simply apple juice that has been fermented to create an alcoholic beverage. It is surprisingly easy to make.
The first step in making hard cider is to get five gallons of apple juice. If you have an orchard, you can take your apples and crush them in a press to make the juice. Although some people don’t find it visually appealing, having chunks of apple in the juice won’t hurt anything. If you don’t have a large supply of fresh apples, a good alternative is to use apple juice or cider from a grocery store. Going this route also eliminates a lot of the mess and hassle that goes into making fresh apple juice.
Once you have your five gallons of apple juice, you can add any additional flavorings you like. I find a pound of brown sugar is a good addition. To add the sugar, I usually heat a half gallon or so of the juice enough to absorb the brown sugar, but not to the point of boiling.
Once you have your juice ready, it is time to turn it into hard cider. For this you’ll need a container that you can seal off with an airlock. Five- or six-gallon glass carboys are ideal, although you can also use a food-grade bucket with a lid and hole for an airlock. For an airlock you’ll use a rubber stopper with a hole that the airlock fits into. The airlock is essentially a device that will let gas out, but not into the container.
Before you add the juice to the container, you’ll need to sanitize it; simply washing it with dish soap won’t suffice. You can fill it with water and a little bit of bleach and let it sit for a few minutes to sanitize it, although make sure you rinse it several times. Another alternative I prefer is an iodine solution such as Star San. With this, you simply fill the container up with a cap or two of the solution, let it sit for a minute, then empty it. No need to rinse it, and you don’t have to worry about it ruining your batch of hard cider.
Once you’ve sanitized the carboy or bucket, fill it with your apple juice. A funnel is essential if you’re using a carboy. Once you’ve added all your juice, add cider yeast and put the airlock on. The yeast is what makes the magic. The yeast will multiply, using the sugar in the apple juice as its source of food. As it eats the sugar, it’ll expel carbon dioxide and alcohol as by-products. This is the same process as wine and beer all alcohol is essentially yeast “poop.”

You can use a half-gallon growler from a brew pub to experiment with various recipes.
Now comes the hard part: waiting. It will take about six weeks for the yeast to finish working. It can be done as early as four weeks if you’re impatient, but I’ve also let it sit for nearly four months without a problem.
After about a week you can rack it. Racking is when you take the cider from one carboy or bucket and siphon it into a second, leaving the accumulated yeast on the bottom. This results in cider that looks and tastes cleaner. Make sure that the tubing and second container are sterilized when you rack. If things are not sterilized, wild yeast and bacteria will compete with your alcohol yeast and contribute to foul flavors at best, and will make your batch undrinkable at worst. (This is why you sanitize everything and use an airlock.)
No need to worry if you end up with a bad batch, though. The alcohol will kill anything that will hurt you, so while it may taste terrible, you won’t get sick. Sunlight will also contribute to off flavors, so if you’re using a glass carboy you’ll want to cover it with a dark shirt or towel. You’ll know your cider is fermenting when you see the airlock bubbling after 12 to 24 hours. This subsides after a few days as the amount of sugar for the yeast decreases.
Once you’ve waited six weeks, it is time to bottle your cider. When bottling, first rack the cider into a bucket, following the sterilizing procedures I’ve mentioned before. Add a dextrose (corn sugar) solution into the bucket. Take about a pint of water and four ounces of corn sugar and boil it for five minutes to sterilize it. This additional sugar gives the remaining yeast enough to eat to naturally carbonate your cider in the bottle.
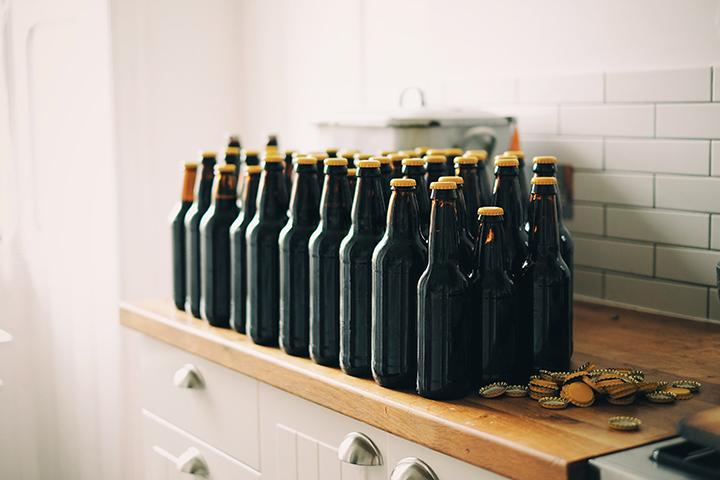
You’ll also need to sterilize your racking device, bottles, and caps. The bottles and racking device can be done in a bleach or iodine solution. You’ll want to boil the bottle caps in water for about five minutes. I usually keep my bottles upside down until I fill them to help prevent airborne contaminates from getting in. You’ll need 48 12-ounce bottles or about 26 22-ounce bottles. These bottles don’t have to be new; you can recycle commercial ones. If you use recycled bottles, make sure they don’t have twist off caps those might prevent a good seal and ruin some of your bottles of cider.

Home cider-making equipment. From left to right: a five-gallon Cornelius keg, a bottle capper, and a 6.5-gallon carboy with a sticker thermometer.
Fill all of your bottles, leaving about 1/2 to one inch unfilled so there is room for some air to create the carbonation. Cap each bottle with a bottle capper as soon as you fill them to minimize the chance of contamination. After you’ve bottled everything, let the bottles sit for 10 days or two weeks so they naturally carbonate. You’ll want to reduce their exposure to sunlight, so keep them in a box or dark place. After 10 days or so, stick some bottles in the fridge overnight, then crack them open and enjoy an American tradition!
It is also possible to put your cider in kegs instead of bottles. The advantage to this is that there is less work at this stage filling a keg is essentially like doing one big bottle instead of many small ones. There’s also the appeal of having a fresh pint of cider straight from the tap. For kegging cider, use five-gallon Cornelius (soda) kegs. Any book that discusses kegging homemade beer is a good reference the equipment and setup is the same for cider as beer and you can even mix the two on a single system.
There is one more thing you can do with your hard cider if you want make applejack. Applejack is essentially the hard alcohol version of cider. To do this you’ll carry out a process known as freeze distilling. Fill up a pitcher of hard cider and place it in the freezer. As slush starts forming, fish this out. Continue doing this until the mixture doesn’t freeze at all. Since water freezes at a much higher temperature than alcohol, what you’re doing is removing the water from the mixture and leaving the alcohol and flavoring behind. In the old days people would leave barrels of cider on their porches and fish the ice off every night, leaving applejack.
A great source to get the equipment and yeast you need is a home brewing store. If you don’t have a local homebrew store, an excellent online source is www.morebeer.com. They have great prices and will ship your order for free if you make a modest-sized order.
I’ve often said that making hard cider is so easy an elementary school student could (but probably shouldn’t!) do it. I’m sure you’ll find it to be the same. It is a great hobby and an economical way to make your own booze. I hope you enjoy it as much as I have.


