| Issue #102 • November/December, 2006 |
In most areas, wells or springs are able to provide water sources for the homestead, but there are places where groundwater is either not available or where it is desirable to accumulate it in storage structures. For the purposes of this article, ponds will refer to water storage structures that are created with dams or that are relatively large holes excavated in the soil to hold water. Cisterns are buried tanks or covered in-ground structures for water storage, and tanks are above-ground or partially in-ground water storage structures.
|
Ponds
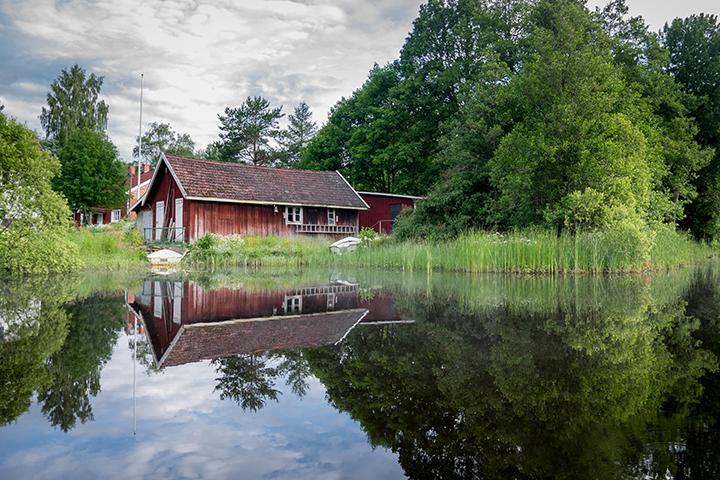
Farm ponds are water-holding structures that may receive their water from one or more sources. The pond is able to store water for future use, but it is usually not suitable for supplying potable water because it may contain numerous bacteria or other organisms that are harmful to humans. Pond water is normally used for livestock water, small-scale irrigation (such as for vegetable gardens or a few fruit trees), raising fish or domestic waterfowl, wildlife, and fire protection. Most farm ponds collect runoff water from surrounding lands, so they may have fecal contamination from livestock manure. Runoff may carry the manure and its organisms into the pond, or livestock may defecate directly in the water while they are drinking.
Pond construction:
Most ponds consist of a small dirt dam constructed in a water channel to intercept and store water from rain and snow that falls upslope from the dam. This means that the pond depends upon water from precipitation, and there must be enough water flowing over the surface of the land to collect behind the dam. You need to make a preliminary dam site selection in a drainage that is in the area where water is needed. Ideally, the natural features of the area will allow placement of the dam in a narrow area in the drainage to minimize the amount of dirt to be moved, plus the drainage will open up behind the dam site to maximize the water storage area of the pond.
The area behind the dam, or the watershed, needs to be evaluated to see if there will be enough water flowing into the dam to fill it in a year with average precipitation. If possible, look at ponds of similar surface area and depth in your area that have water in them. Use topographical maps (these may be purchased at most sporting goods stores). If you can’t easily find maps in your area, talk to your Natural Resources Conservation Service (NRCS) conservationist or county Extension Service agent to find out where you can purchase them. These officers can also give you information on the amount of runoff you can expect on your land considering the annual precipitation, the size of the watershed, and the amount of water that soaks into the soil or evaporates. Check the state regulations pertaining to pond construction and use. Some state water regulations require permits for pond construction and use.
Calculate the amount of water available to fill a pond by multiplying the area of the watershed determined by outlining the watershed on a topographical map, and determining the number of acres. Multiply by the amount of annual precipitation in feet and fractions of feet, minus the losses to the soil, vegetation, and evaporation. Again, the NRCS conservationist or Extension agent may be very helpful. This will provide the number of acre feet of water that is available for storage in the pond. One acre-foot is equivalent to one acre being covered by water one foot deep. There are 43,560 square feet per acre and approximately 7 gallons per square foot, so that is a lot of water. If you have time before construction of the dam, it would be wise to observe the runoff in that drainage where you plan to place the dam. During intense rainstorms or at the time of rapid snowmelt, see how much water would be flowing into the dam. This will provide you with a sense about how water will flow into and fill your planned pond. If no water flows down the drainage, even during a hard rain, it may not be feasible to have a pond on that site. On the other hand, if a heavy rain produces flood conditions in the drainage, there may be too much water for your small pond to safely contain.
|
After it appears that your proposed site will have enough water, check the soil to determine whether or not it is suitable for dam building. If all the soil at the site is very sandy, it will not make a good dam. Soil for dam construction should have enough clay content to allow it to compact well so it will hold water. Usually the soil in the bottom of the pond should be excavated for use in the dam construction, as that will enlarge the basin for water storage.
The size of the dam itself will be determined by the amount of water needed and the amount of time and money that can be dedicated to the dam building project. Two major considerations must be considered in determining how much dirt will be moved: The size of the dam itself; and the size for a spillway. Any dam that collects runoff must have a suitable spillway to take away excess water when the dam fills. This spillway must be low enough below the top of the dam to avoid overtopping and must be located so the water is carried away from the dam structure to avoid erosion of the dam. The spillway should be as wide and flat as possible to minimize erosion risk and should be able to handle the highest estimated flow of water in the drainage. It should be constructed at one end of the dam, away from the fill of the dam itself, in undisturbed soil. If practical, line the spillway with stone to help prevent erosion.
Construction of the dam will require the movement of large amounts of dirt. Although same large earthen dams have been constructed by hand or with animal power in the past, the use of machinery is so much more efficient that it is unlikely that anyone in this day would decide not to use it in such a venture. The choice then comes down to contracting with someone who has the equipment or purchasing your own equipment. It may be that you will need earthmoving machinery for other work on your land, and it will pay to investigate purchasing older equipment that still works well if it is used gently. It is not uncommon to see older Caterpillars or other dozers for sale for a few thousand dollars. Just be sure to have someone knowledgeable about heavy equipment help you in selecting a machine that will serve your needs. Another option is the use of farm machinery with blade or bucket, but a much smaller pond will probably result from the use of this less suitable equipment.
Begin the construction after the site has been selected, the size of the dam has been decided, and the exact location of the dam and spillway selected. The first step is clearing the vegetation and topsoil from the area to be covered by the fill dirt that will form the dam. This will help prevent the formation of channels that may allow water to undercut the dam. It is necessary to form a bond between the dirt being moved in to form the dam and the soil that is in place under the dam to make sure there is nothing that will prevent the formation of that bond. It is best to construct a key-way by excavating a channel two to four feet deep in the soil that will be directly under the top of the dam. The key-way will be filled as the dam is built to further ensure the bonding of fill material and the original soil.
I like to place a pipe with a valve on it through the base of the dam to allow use of the water below the dam itself. This allows for more sanitary livestock water than watering directly from the pond or for minor irrigation systems for watering gardens or fruit trees. With proper treatment, the water from ponds can be made safe for household use, but this should be way down on the list of possible sources for potable water. The pipe going through the dam should have corrugations in it or some baffles on it to prevent possible flow of water along the outside of the pipe. I have installed pipe to make a siphon over the top of a dam, but it is a lot easier to put the pipe through the dam during construction. The pipe should be in place as soon as the key-way is filled so that all of the water above the original level of the drainage channel will be available for use.
Construction of the dam should be done when there is little danger of runoff so the dam will not wash away during construction. A lot of work can go down the drain in just a few minutes if a flash flood hits during construction and the water washes over the top of the partially constructed dam instead of through the spillway that is designed for overflow. Of course, unseasonably heavy rains can happen, and there is no way to plan for that. If you are building the pond in an area that may have rainfall during any season, install a culvert pipe through the base of the dam with a headgate on it so it can be closed off after construction is finished. This culvert should be large enough to handle normal runoff during the season in which the dam is constructed. That way, runoff coming at any time can flow through the culvert, and construction that is already done will not be adversely affected. It will also come in handy to drain the pond to clean it out if that becomes necessary in the future. If a culvert has to be used, that will add considerably to the cost of the pond unless you can find some older, used culvert. Sometimes the county road department will replace culverts when they are widening a road or making other changes, and the old culverts may be sold at greatly reduced prices or may even be available free. Check with your county road superintendent to see if any are available.
|
Begin actual construction of the dam itself by pushing dirt with the dozer to form a pile of dirt all along the area where the dam will be built. Take as much of the dirt as is possible from the area where the pond will be. The more dirt taken from the pond basin, the more water can be stored there. You may also use the dirt removed from spillway construction for fill material. Avoid areas of sand and gravel since these will not compact well in the dam. Continue pushing dirt until a dam is formed that is at least four or five feet higher than the bottom of the spillway. Some settling of the fill in the dam will take place over time. The dam should have a three-to-one slope on the upstream side to ensure that the water will not exert too much pressure, causing the dam to fail. That means that for each foot of drop from the top of the dam to the bottom of the fill, there should be three horizontal feet of fill. I like to make the top of the dam at least 10 feet wide. The slope of the downstream side of the dam is not as critical as the upstream, or water side. A one-to-one slope on the downstream side is adequate. Finally, make sure the surface of the dam on all sides is relatively smooth and compacted.
The top, both upstream and downstream sides, and the spillway should be planted to a grass that is well adapted to your area. Grass seed may be broadcast by hand or with a small, hand-cranked seeder. Then, drag a section of harrow, tree limbs, or something else that will put the seed into the soil surface over it, so the seed will be covered. Even running the crawler tractor over it will help as the tracks will push much of the seed into the soil, allowing a large percentage of germination. I have also planted grass seed by driving an ATV with knobby tires all over the area. The grass cover will help prevent erosion of the soil that has been disturbed. Never plant trees or shrubs on a dam as the deeper roots may eventually die and decay, leaving channels that the water can follow, putting the dam in danger of failure.
Ponds may also be constructed in bottomlands or anyplace there is a shallow water table by simply digging out a pit that goes into the water. In these cases, the water fills the pond by flowing under the surface of the soil and into the hole. There will be water in this type of pond as long as the water level in the shallow aquifer stays above the bottom of the pond. Or, when it floods, water may cover the area where the pond has been excavated and it could be filled with sediment.
Spring-fed ponds may also be constructed, catching the flow from a spring in a small dam or an excavation. I especially like these ponds for raising fish. In Oregon, I had a very small spring-fed pond that was probably not more than 20×50′ and I very successfully raised trout in it. Of course, they had to be fed in such a small pond, but it was enjoyable to feed them every day, and they provided a lot of recreation and food. Some of them grew to well over five pounds.
|
Protecting the watershed:
The quality of the water in the pond and the useful life of the pond are dependent upon the condition of the land that comprises the watershed. If water flows from cultivated land that is easily eroded, the water flowing into the pond will carry soil and fertilizer into it, creating dirty water that will silt-in the pond and that will grow abundant algae and bacteria. On the other hand, if the watershed is well-managed pasture or woodland, the water will be clear and free of pollutants. Cropland that has grassed waterways and that is farmed in such a manner that there is very little erosion can also yield runoff that contains a minimum of pollutants.
In areas where sediment in the water is a fact of life, such as many desert areas, it may be wise to dig small basins in the drainage channel upstream from the dam you have constructed for your pond. These can be small, scooped-out areas that will slow the water before if flows into your pond. Slow-flowing water will not carry much sediment, so it will be deposited in the silt trap basins, preventing it from going into the pond. The sediment can then be scooped out with the dozer or a tractor bucket, and it will be ready for the next runoff event.
Where livestock graze in the area of the pond, in addition to using proper grazing practices, it is wise to fence off the pond area itself. Livestock watering should not be done in the pond because they tend to pollute their own water source. Use the pipe placed through the pond to fill a watering trough located somewhere below the pond. A strategically placed pond can be used to deliver water through a gravity pipeline to more than one water trough. Plastic pipe can go to several pastures and water levels in the troughs regulated by simple float valves.
Pond and dam maintenance:
Properly constructed and managed, a farm pond will provide water indefinitely for homestead needs. Prevention is the best management technique, so management of the land around the pond, the watershed area that feeds water into it, is the best way to ensure water quality. Grazing the land should be under strict management so a good vegetation cover is maintained. Checking the dam and spillway regularly for small eroded areas or rodent burrowing is important. Those areas should be repaired and burrowing animals controlled. The fence around the pond needs to be kept in good repair to prevent livestock from direct access to the pond water.
|
Some ponds may be infested with waterweeds and algae. There are chemical treatments to control these water pests, but fish may also control them. Grass carp and other species eat the vegetation in the pond and keep it open. Check with your local Extension agent to find out which fish are suitable for your pond and to determine the best way to control weeds and algae.
Cisterns
Cisterns are covered structures used to store water in the ground. They often collect water from the roofs of homes and other buildings. Many older rural homes had cisterns, either because there was not an aquifer within reasonable depth for a well or because the well water was highly mineralized. I have known women who would cook dry beans only with cistern water because beans cooked in the hard well water seemed to just get harder. The collected rainwater had no minerals, and the beans would cook up quickly in it.
In a few areas, well water is not an option, and cisterns are a way to collect water for household use. In those areas, water must be hauled from town and piped into the cistern when there is not sufficient rain to fill it.
The Persians constructed very sophisticated cisterns, filling them with runoff or with water from irrigation canals. Many of the older towns have cisterns constructed into the complex that makes up the bazaar, or old business area. Some have huge domed roofs constructed of masonry with no reinforcement. Others are small buried tanks that collect runoff water, and the roofs over them protect the water from evaporation.
I saw an old water system in an irrigated desert community in Utah that took water from the irrigation ditch to fill the cistern. The irrigation water from the river was muddy so they had an open-topped, shallow tank that held the water and allowed it to settle out some of the mud. It then went through a homemade sand filter to clean it further and then into the cistern where it was pumped out as needed for home use.
|
For practical purposes, cisterns for the homestead are useful for using water collected from roof gutters to provide either regular water for the house or emergency water when the power to the well pump is off. A small pitcher pump will provide ready access to the water. In some areas, especially near cities, rainwater and dust washed off of the roof may contain pollutants you don’t want to drink. If this may be a problem, have the water from your cistern tested. You may also have a diversion from the pipe feeding to the cistern. When a light rain falls and during the first few minutes of a hard downpour, the diversion is left running onto the ground surface and then it can be manually changed during hard rains to fill the cistern with water that is less likely to contain pollutants.
I used a 400-gallon plastic tank for my cistern. I dug a hole deep enough so its top would be about a foot below the ground surface. I then filled it with water to keep it from caving in and backfilled around it. All of the drain spouts from the gutters of the house were put into buried PVC pipes that take the water to the cistern. I built an overflow into the tank so excess water will flow away from it. A platform was constructed over the top of the tank and an inexpensive pitcher pump installed to remove water for household use. A new concrete or plastic septic tank would also make a good cistern or it can be made in place of concrete, brick, or stone. It is probably wise to seal a site-built masonry cistern to ensure that it will hold water.
Water tanks
By my definition, water tanks are above, or at least partly aboveground, structures for storing water. They are usually situated so that the water flows from the tank by gravity to the point of use and are part of another type of water system. I mentioned the use of storage tanks as part of a spring-fed gravity water system in a previous article. They may also be part of a well system. Low-yield wells may pump into either a tank or cistern to collect enough water to run a demand pressure system. In that case, a water-level switch in the well would control the pump feeding into the tank and another pump would take water from the tank and would be controlled by a pressure switch.
Water tanks were often used in conjunction with a well and windmill water system. The windmill pumps water from the well through a pipe to a tank that is above the level of the house. Water will then flow by gravity through a regular pipe system to the house and to livestock water troughs. An overflow pipe is provided to divert excess water into a pond or livestock water facilities.
|
A system to temporarily supply water to the house and livestock during power outages may be developed in a way similar to that used in a windmill system. A tank is set above the level of the house (either on a hill or a tower constructed for the purpose) and a water line from the regular pressure system fills the tank, controlled by a float valve, similar to the one that allows your toilet tank to fill without overflowing. A simple pipe from the bottom of the tank with a check valve can be connected into the same pipe that fills the tank. When the power goes out and the pressure system no longer works, the pressure in the water system will become lower than the pressure of gravity in the tank. The check valve then allows the water to flow out into the system. Another check valve between the pressure switch and the well keeps the tank water from emptying into the well. The water pressure in the house will be much lower with the tank than with the regular pressure system, but it will provide emergency water. It will be a limited supply, however, so anytime the house is dependent upon the tank, strict water conservation measures should be employed. It will be a temptation to think of everything as normal with this system, but the water supply will be limited to the volume of the emergency water tank.
In areas that have cold weather, tanks will have to be protected from freezing. Some old farm water towers had siding on them, all the way to the ground. Combined with insulation, this would keep the frost out of the pipes going to the tank. In extreme cold, a stove would heat the room at the base of the tower, and the heat would keep the entire system from freezing. When the tank is sitting on the ground surface, taking the pipe into the center of the bottom of the tank will prevent freezing in most climates.
The use of water storage structures such as ponds, cisterns, and tanks can provide additional supplies of water to the homestead. With wise planning and construction, they will become important aids in providing an easier and more independent lifestyle.


