 |
|
| Issue #129 • May/June, 2011 |
I go through dozens of garden seed catalogs in preparation for each year’s new (and better!) garden. I have a lot of “old reliable” varieties that I grow year after year. They taste great, are hardy growers in our cool, Zone 3 climate, either store well (such as squash and carrots), or they can-up and dehydrate well. Many are open-pollinated varieties from which I save my own seed. But I still try new things in the garden. Some are the latest “bells and whistles” hybrids, often costing upwards of $5 a pack or more, others are very old heirloom varieties I’ve never tried before.
But one thing that strikes me hard is the steady and often shocking increase in the price of garden seeds. In a year of rocky economy, it seems like a whole lot of folks are going to be raising their own food. Several seed companies have already run out of catalogs, and the spring is yet young. I know we are getting very serious about our garden and are worried about the prospects of seed prices climbing even higher. So to fight that recurring expense, we’ve decided to again raise an increasing portion of our seed. After all, in the quest for a self-reliant lifestyle, the more a person produces what they use, the more sustainable life they will lead.
Seed saving is not complicated, although some seed companies make it seem so. After all, Native Peoples all over the world have been doing it for thousands of years. And out of all of this seed saving have come thousands and thousands of tasty, productive, beautiful, and hardy varieties. My, oh my, how these seeds have traveled from their beginnings! Take corn for example; it was developed in Central America from a wild maize, teosinte, which resembles a grass more than corn as we know it today. After years of selective planting, ear corn was developed. Soon, it was traded up through Mesoamerica (what is modern-day Mexico) and into what is now the United States, where it traveled quite rapidly and was quickly adopted by many Native American tribes. They, in turn, developed thousands of different varieties to suit their climates, growing seasons, and tastes.
The same thing happened, in different ways, with melons, squash, beans, and other vegetables. Squash started in the southwest, melons were brought by the Spanish explorers, and beans developed from wild beans of different cultures. Food has always been a chief trading stock and, because of this, new tasty foods traveled quickly.
The sad part is that during the 19th and 20th centuries, when commercial seed growing started, thousands of these superior, wonderfully tasty varieties were lost forever in the name of progress. In fact, this situation continues today. Most of the seed available through those beautiful seed catalogs are grown and marketed by a handful of huge companies. And most of it is hybrid (unable to produce an exact copy of itself), so seed saving is not a simple matter, as it should be.
Let’s take a look at some oft-used terms and just what they mean to you.
|
Open-pollinated
Open-pollinated seeds are usually old, tried-and-true varieties that have been around for a long time. They are often called “heirloom” seeds because they were initially passed from one family member to the next, down through the generations. The first people in this country to have done this were, of course, the Native tribes, carrying their seeds from one camp to the next, from one garden area to another. Many times, these familiar seeds were so treasured that people faced starvation rather than eat their precious seeds. Cherokee women even sewed seed for their favorite pole beans in the seams of their skirts during the horrific forced march after the government “removed” them from their farms. This “walk” of hundreds of miles was later called the Trail of Tears, from which this variety of bean is now known.
Following the Indians, the European settlers often received some of this seed through trading, gift, or theft. Some immigrant families also brought seed from the old countries, trading with their neighbors as it grew and thrived. Seed was food and food was life. It held huge importance in times when, if you didn’t grow it, you simply did not eat.
Open-pollinated seeds always produce the same plant and fruit as the plant the seeds came from. However, not all open-pollinated seeds are “heirloom” seeds. There is an increasing trend to create new and better open-pollinated varieties and to even breed back hybrids so that they will produce true types. One example is the “Indian” corn Painted Mountain. This was relatively recently developed by a Montana grower trying to develop a corn for cornmeal that would mature in a very short growing season. Diligently, he crossed dozens of native corns having good production, taste, and quick maturity, until he reached his goal. Then, by carefully choosing ears of corn closest resembling his goal each year, he stabilized this open-pollinated variety.
I have taken hybrid tomatoes, Early Cascade, and bred them back from the initial hybrid variety, in three generations, to reach a stabilized, open-pollinated variety. It only took choosing plants with the right type of tomato, pulling out the rest, and continuing to search for the ideal tomatoes.
Hybrid
Hybrid varieties are crosses between two or more varieties. Seed producers hire experienced plant breeders to research and develop new and “better” varieties each year to market in the future, often at inflated prices. While hybrid stock often does exhibit more vigorous growth and disease resistance, it can sacrifice such things as taste, tenderness, and keeping ability. Today more seed is developed for commercial growers who sell to wholesalers, shipping countrywide. Such traits as a thick skin (for more successful shipping), holding ability (pick it green and keep it in a warehouse for a while), ease of mechanical harvesting (eliminate farm workers), and firmness (bruise less in the store and during shipping), mean more than do sweetness, tenderness, flavor, and total productiveness.
These hybrid varieties may be fine, but do not expect seed saved from them to produce “children” like the fruit you got the seed from. You may get a totally different plant, resembling one of the initial parent plants, something “kind of” like it or something in between. Although companies like Monsanto are developing varieties with a “terminator gene” that can not reproduce, hybrid vegetable seeds today are not sterile. But they don’t reproduce exact copies, either.
Organic seed
Organic seed is simply seed that was produced without the use of chemicals in the growing of the “mother” plants. You can have organically grown hybrid seed, heirloom seed, or open-pollinated seed. It only means that the farm the seeds were grown on did not use chemicals, such as fertilizer, herbicide, or insecticide in the production of the plants.
Treated seed
Some seed is treated with a fungicide before being packaged. This is to prevent the seeds from rotting in the ground if planted just before a period of damp cool weather, which delays germination. Unfortunately, this seed treatment is also toxic (wash your hands after use, please!), and many people (me included) distrust putting it into their garden soil. Seeds often sold that have been treated are corn and muskmelon.
|
Which is best for me?
I’m asked that question a lot and my answer is always the same: “It depends.”
I prefer to grow and save my own seed. We farm organically, although we will probably never be certified because we do not sell produce and do not need, or want to pay for, that certification; we know what we put into our soil or what we do not. I try to stay away from treated seed by only planting when the soil temperature has warmed up enough to allow quick germination, and by paying careful attention to our trusty weather radio for a long-term forecast that we can usually depend on.
However, I also plant some hybrids each year, as many hybrids result in a much earlier crop than is available using open-pollinated varieties. (I always have “back-up” open-pollinated varieties in my seed boxes…just in case, for who-knows-what reason, hybrid seeds may be unavailable one year.)
I also always try a couple of new-to-me heirloom varieties to see how they perform for us, and how they taste. I like my food beautiful, too, so something new to me but an old and pretty heirloom always catches my eye, right off.
I firmly believe that every family should grow at least a portion of their own seed in order to be more self-sustaining as well as to cut garden costs.
|
Besides, saving seed is great fun. Most varieties of common garden crops produce seed that, if harvested and stored well, will keep viable for years. That way, if you have a good squash year and save a pint of squash seed, but then have two bad squash growing years, you’ll still have plenty of seed for the next year. Remember, seed equals food; seed is like money in the bank.
Seed saving basics
For the most part, seed saving is very easy and you get a lot of seed for very little work. But remember that to save “pure” seed for any kind of crop you should know that different varieties of the same species can and will cross if not separated by an appropriate distance. Here are guidelines for producing pure seed, but you can sometimes reduce the distances I recommend by taking into account barriers between the gardens. For instance, I can grow one variety of a squash species in our lower garden and another in our berry patch. The recommended distance to keep them from cross-pollinating is half a mile, but the distance between these patches is only 600 feet. However, there is a large hill and a woodlot between the crops, so we feel confident that the insects that pollinate the squash blossoms will not readily travel between patches. And remember, a homesteader’s need for “pure” seeds is not as high as is a seed grower’s or serious hobbyist’s.
Here are some recommendations for spacing to prevent cross-pollination:
| 20-500 feet | beans, peas, tomatoes, peppers |
| half mile | squash, melons, sunflower |
| one mile or more | corn, fava beans, okra |
In addition to planting different varieties of the same species at these distances, you can also build isolation cages from fine-screen mesh to cover the plants (this will keep pollinating insects out, so you will have to hand-pollinate the blossoms), plant different varieties at different times so they do not pollinate at the same time (works well with corn), or even hand-pollinate the blossoms.
To ensure that your seeds are plump and ready for collection, let your fruit ripen in the field. Unripe seeds will not germinate.
How long will my seeds stay good?
Most garden seeds, with the exceptions of onions and leeks, remain viable in storage for years, regardless of what some catalogs tell you. With older seed, there is a slow reduction in germination. Where year-old seed may have a 98% germination rate, four-year-old seed may have a 70% germination rate. When in doubt with some of your older seed, do a germination test. If most of the seeds germinate, great! If only a few do, you know you need to save seed soon. Simply plant more seeds to cover poor germination.
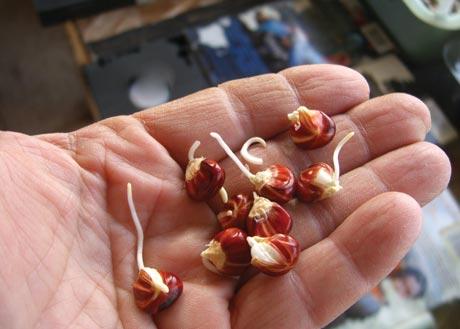
Test the germination of your seed by putting some seed on a damp paper towel, then wrapping it up and placing it in a closed jar. Put the jar in a warm place and check for germination (tiny roots and shoots). Some seeds germinate in as few as three days, where others require up to three weeks; check your seed packages or a catalog. Seed can remain viable a lot longer than commonly supposed. I have planted beans that were carbon dated 1,500 years and they grew!
|
Seed harvesting
We’ll start with the easiest crops first and work up to the more difficult ones.
Squash and pumpkin: There are five major varieties of the species Cucurbita, grown in the United States: C. pepo, C. maxima, C. mixta, C. moschata, and C. argyrosperma. C. pepos are usually pumpkins and summer squash. C. maxima are usually larger, pumpkin-shaped squash and hubbard-type squash. C. mixtas can be cushaw, “sweet potato” or Japanese squash. C. moschata includes some Japanese and pumpkin-squash. C. argyrosperma includes many striped cushaw-type fruits.
It seems confusing, but you can still grow five different squashes in your garden each year, one of each variety, and still keep pure squash. For instance, I can plant my favorite C. Maxima, Hopi Pale Grey, along with a summer squash, a butternut squash, a cushaw, and a sweet potato squash. Or I can save seed from one of each, one year, then grow different ones the next. Infinite possibilities. Or when you have a great supply of seed, you can grow as many of the same species, but of different types, as you wish and just not save seed that year; they are just as good to eat, as the fruits will be purebred…just the seeds will be crossed.
To save squash or pumpkin seed, harvest the ripe squash late in the fall, before any hard frosts. Bring them into a protected spot that will not go below freezing and let them continue to “ripen” for a month or more. (I just stack them in a cool, but heated room, under a table, in a closet, or even in the hallway, then save seed as we eat them.)
Cut your squash in half with a sturdy knife or even a hand carpenter’s saw if the rind is very hard. Be careful not to have an accident here. After the squash is halved, scoop out the strings and seed by using a large spoon. Then go through one piece at a time, squishing out the plump seeds by hand. Leave any that are flat and lightweight, as they are not viable and will not grow.
I place my seeds in a single layer on a pie plate. When finished, put the seeds in a warm, dry location. (Don’t put in the oven; heating that much will kill the seed.) Every few days, stir the seeds by hand to keep them from sticking. After a week or so, there may be a thin, papery coating that flakes off. Work the seeds by hand until it all loosens, then blow the coating off outdoors. In another week, the seeds should be very dry and ready to store. Pour them into a jar and turn the lid down snug. If any condensation forms in the jar in the next day or so, immediately remove the seeds and dry them some more or the seeds will mold and be no good.
Squash and pumpkin seeds will be good to grow for many years if stored in a dry, cool place. You can also put your containers in the freezer for even longer storage. Be sure to label your seeds so you know what variety you have in the jar.
Muskmelon (and other melons) and watermelon: Most muskmelons are of the same variety and species, but they will not cross with watermelon or other garden crops. So each year you can grow your favorite melon variety, or alternate with others when you have plenty of seed saved that is pure.
Like squash, melon seed saving is very easy. Easier, in fact, as you don’t have to continue ripening the fruit after harvest. We’ve all enjoyed a juicy melon in the summertime, spitting out the seeds as we go. All you have to do when you save melon seeds is to pick (or spit!) out the ripe seeds onto a piece of wax paper or non-stick cookie sheet. Pick out and discard any white, unripe seeds. Then put the seeds up until they are dry. I stir them around every couple of days with my hand or a spatula to keep them from sticking down.
In about two weeks (depending on the humidity), the seeds will be nicely dried and ready to put in an airtight jar for storage. Melon seeds remain viable for years.
Peppers: Most peppers, both sweet and hot, are of one variety, Capsicum annuum, so it’s best to stick to growing only one variety (or a couple if you have a large area or plan on using isolation screens) each year. To harvest viable seed, you must let your peppers ripen thoroughly. This usually means letting them ripen deep red or the pepper’s natural mature color. Some mature to orange, yellow, or even purple.
When the pepper is very ripe, harvest the pepper, cut it open, and remove the large, robust seeds. A few will be very thin and white; these are not viable so discard them. Of course, each variety of pepper has a different size and thickness of seed, so take that into consideration. Most bell peppers have a quite thick, larger, flat seed, where some smaller chilies have a much smaller, thinner seed. Take a look at a few seeds from your seed pack if unsure. I sprinkle my mature pepper seed out onto a kitchen towel, laid on a cookie sheet. The seeds don’t stick as badly on a towel as they sometimes do on paper. Let them dry for a few days, then rub them gently to loosen them from the towel. Again, let them dry more. In about a week, they should be dry enough to remove from the towel and put in a pie pan for extended drying of another week or so. When thoroughly dry, pack away in a small, sealed jar with a variety label enclosed. Pepper seeds will remain viable for several years.
|
Beans: Nearly all beans, both bush and pole, snap, and dry, are of the same variety, Phaseolus vulgaris. Exceptions you may run into are runner beans (Phaseolus coccineus), soybeans (Glycine max) and cowpea, often called “yard-long bean” which is Vigna unguiculata.
While the recommended spacing distance for beans is listed at 30 feet, a few tall rows between beans is usually sufficient to save relatively pure seed. I plant my pole beans on one side of the garden, my bush beans on the other side, and separate them with rows of corn. They’re only about 15 feet apart, but have never crossed yet.
All beans are saved for seed by letting them mature and dry in the pod, in the garden. This means letting a plant here and there, down the row, grow on and develop mature seeds, taking care not to harvest them when you pick your snap beans. I tie a piece of red yarn on all “save-for-seed” plants so I don’t get in a hurry and pick them. The seed is ready to harvest when it rattles around in the yellowish brown pod.
Do be careful, though, as a few types of beans will split their dry pods and “self-seed” throwing beans far and wide. When the pods are ripening, keep a careful watch so this does not happen.
When in doubt, take your beans, dry plant and all, carefully into your garage, shed, or barn and lay the plants loosely on a tarp to finish drying. That way if the pods split, the beans will not have to be picked up, one at a time, from the garden rows. For a smaller amount of beans, you can just pick the pods, split the beans out, and lay the seeds on a tray to finish drying.
For a large amount of seed, it’s easier to lay the plants or pods on a tarp, then walk around on them with clean shoes or rub the pods between your hands to loosen the bean seeds.
After harvest, the seeds should be cleaned and then laid out in a single row to finish drying for storage in airtight containers.
Peas: Peas, like beans, are of one variety, Pisum sativum, and will cross with each other. So if you plan on saving seed, stagger your plantings so that one will not flower at the same time as another. (Plant garden peas in the spring and then plant snap peas in the fall, for instance.) These peas include snap peas, edible pea pod peas, and garden shell peas. Soup peas are simply smooth seeded peas that are allowed to mature and dry.
To save pea seed, simply allow the peas to mature and the vines and pods to dry to a tan color. Be careful, as pea pods will split open, happily ejecting their seeds to reseed your garden. So when the pods are dry, either pick the pods or pull the whole vines to lay out in a dry area on a tarp to finish drying. Like beans, you can thresh out the seed by walking on the vines or whacking the vines with a plastic baseball bat or smooth stick.
Winnow the seed by tossing the seed from a basket, up in a strong wind. The wind will blow away the dry chaff and dust, leaving the clean seed behind. I further dry the seed on trays for a few days to ensure that it is sufficiently dry for long-term storage in airtight jars. Pea seed remains viable for years.
Cucumbers: All cucumbers commonly grown are of the same species and variety, so they will cross. If you are saving seed, it’s best to grow only one kind each year. Yes, you can make pickles from cucumbers such as “burpless” or “Japanese” types and pickling cukes will grow long enough to use as slicers.
Cucumber seed may be harvested much like melon seeds. Allow the cucumbers from one healthy plant to ripen to the fat, yellow stage. Remember that when a plant has a couple of these “boats,” it will stop blooming and producing pickle-sized cukes and slicers, thinking that its mission in life is done. So don’t let many plants grow mature cukes or you’ll lose out on a long harvest.
Cut the fat, mature cucumber open and squeeze the seeds out of the pulp by hand onto a clean piece of cloth, such as a kitchen towel. Remove any thin, unfilled seeds and discard them. Smooth the seeds out into a single layer and let dry in a protected, warm place. After a few days, stir the seeds around to dry them evenly and to prevent them from sticking. In a week they should be dry enough to put on a cookie pan to finish drying without sticking down.
After the seeds are very dry, pour them into a clean, airtight container and label them for storage. Cucumber seeds will remain viable for several years.
Corn: All corn grown in the U.S. is of the species Zea mays. So the different varieties of corn will cross. This includes field corn, sweet corn varieties, “Indian” corn, popcorn, and flour corn. As corn is chiefly wind pollinated, it is recommended that you isolate each variety from other corns by at least one mile. (Wind pollination is the means by which many “clean” corn fields are becoming contaminated by genetically modified corn pollen. It’s getting harder and harder to find untainted corn seed.)
But when you are growing for your own family’s use, varieties separated by about 100 feet, with a natural barrier such as a hill or woods between them, usually produce fine results. As most folks today grow sweet corn and don’t have large pieces of land, you can always use sweet corn as a flour or cornmeal corn, as well. It makes terrific meal that is naturally sweet.
To harvest seed corn, choose several ears of your nicest corn and allow them to fully mature and dry on the stalk. If wet or very cold weather threatens, you can snap the ears from the stalk and bring them in to a protected area to finish drying on the cob. I usually husk the ears so I can watch for any signs of mold. When the seed is very dry on the cob, you can shell it off with your thumb into a tray. Remove any small kernels and discard them. Finish drying on a tray for a couple of weeks to ensure that the thick kernels are totally dry and ready for storage. Pour into an airtight container that is rodent proof (mice and rats love sweet corn seed, and so do weevils). Label the seed and put away in a safe storage area. Corn seed remains viable for years.
|
Tomatoes: Tomatoes are of the species Lycopersicon lycopersicum, and all varieties will cross if not separated by several feet or physical barriers, such as tall crops (corn for instance), trees, or hills. Tomatoes are easy to save seeds from. I grow my “seed saver” varieties in different corners of our huge garden, and also in our berry patch up the hill.
To save tomato seed, simply choose your best plants and nicest fruit. Let several ripen thoroughly on the vine, then harvest them. Cut the tomatoes open and remove the pulp and seed. Place in a bowl and mash the pulp with your fingers. Add water to fill the bowl. Let sit on the counter from six hours to two days. The pulp will float to the top and the seeds will sink to the bottom. Remove the pulp, pour off the water, and remove the seeds. Spread out on a cloth to dry. In a few days, work them loose with your fingers and move them around to ensure that they dry thoroughly. Remove any inferior seeds and debris, then place in a labeled, airtight container for storage. The seed will remain viable for years.
Okra: Okra is also easy to save seed from. All varieties will cross if not isolated in cages or by long distances (one mile is recommended), so it’s best to grow only one variety of okra in years you plan on saving seed.
Simply allow some pods on your best plants to mature and dry. Harvest the pods when they are quite dry, but before they split open. Carefully remove the seed and lay on a pan in a dry, warm location to finish drying. When the seeds are very dry, place in a labeled, airtight container for storage. Okra seed will usually remain viable for more than four years.
Annual greens (lettuce, spinach, kale, Swiss chard, herbs, etc.): All lettuce is of the species Lactuca sativa and varieties will cross if not separated by many feet and physical barriers such as tall plants, woods, hills, or isolation cages. If you plan on saving seed, only allow one variety to bolt and bloom; keep the others cut.
Swiss chard is of the species Beta vulgaris, and may cross with beets, Beta vulgaris. However, beets require two years to produce seed the first year, they produce leaves and the beet root, the second, the seed so you have some flexibility here.
These greens usually bolt when the weather warms up and the season progresses. Leave a part of a row to go to seed when harvesting your salad greens, herbs for drying, or spinach and Swiss chard for canning. Soon after it is mature, it will bolt and send up blooming seed stalks, followed by seed heads. Keep watching these seed heads once they begin to dry. Some drop their seeds quite soon and easily; others hold them longer. Once the seed is mature (with thumb and forefinger, shell out a few seeds and examine them), clip the seed heads and place in a box or on a cloth to finish drying. When they are quite dry, rub the seeds from the husks onto a tray or pan. Winnow them gently to remove any debris, then continue drying them in a single layer on a pan.
When the seeds are dry, place them in an airtight, labeled container and put away for storage. Lettuce seed generally remains viable for a few years, while beets, spinach, and Swiss chard seem to remain good much longer
Broccoli: Nearly all broccoli is of the species Brassica oleracea so different kinds will cross if they are blooming at the same time. To save more than one, plant at staggered times or plant varieties with different maturity dates.
To save seed, simply allow your best broccoli to flower then form seed pods where the yellow flowers dropped off. In short-season climates, plant earlier broccoli or even start it in the house, as broccoli requires more than 100 days to form viable seed.
Protect your broccoli from frosts in the fall. Where broccoli itself is fairly frost tolerant, the seed pods seem to suffer damage from frost.
When the seed pods are fat and dry, watch them so they do not split and pop out their seeds. Clip off the seed onto a tray and bring into the house to finish drying thoroughly. When the pods are paper-dry, rub them between your hands to remove the seed. Winnow the seed gently to blow away chaff and debris. Continue drying the seed in a single layer on a pan in a warm, dry location. Pour dry seed into a labeled, airtight container for storage. Broccoli seed is usually viable for several years.
|
Biennial vegetables (carrots, beets, onions, celery, cabbage, Brussels sprouts, turnips, rutabaga, etc): Finally, we get to the “harder” vegetables from which to save seed from. These vegetables require two years to produce seed. The first year they produce leaves and roots, but no seed. They must be over-wintered in order to continue growing the second year, when they send up seed stalks and bloom. In mild climates, they can simply be left in place in the garden to winter over and continue growing in place the next year.
In colder zones, they can also be left in place in the garden and covered with a thick, protective mulch. However, in the coldest zones, we must remove the plants from the garden, store them in a root cellar, then replant them in the spring. Root crops, such as carrots, onions, turnips, and rutabagas are simply dug and stored in the root cellar until early spring when the ground may be worked. All are quite frost tolerant so late frosts will not hurt them as they begin re-growing in preparation for seed production.
Cabbage and Brussels sprouts can not be harvested as we generally do, by simply cutting them. When you plan on replanting them next spring, carefully dig up a couple of your best specimens, replanting them in large buckets. Store over winter in a root cellar, sprinkling the soil with water as needed, to keep it from drying out. In the spring, after the hardest frosts are over, replant in the garden and encourage new growth.
This new growth gets “unusual.” Many people think their plants have crossed with wild plants, as carrots get long stalks and look wild and unruly. Cabbages sprawl and send out blooming stalks that make the plants look alien. But it’s all part of Nature’s plan. Soon the stalks will have seed heads and, as the season progresses, they will begin to get fat and dry. Again, watch carefully so the seeds don’t end up down in the dirt, spit out from splitting seed pods. Clip off the dry seed heads and place on a tray in a warm, dry location to finish ripening. Rub the seed heads between your hands to release the seed onto a tray or pan. Winnow to remove debris and continue drying for several days. Label your seed and place in an airtight container for storage. This seed will remain viable for several years before reduced germination becomes serious.
Of course there are many seed saving tips out there. One of my favorite books is Seed to Seed by Suzanne Ashworth. If you’re interested in getting serious with your seed saving, this is the book for you.
And to find open-pollinated varieties in a seed catalog, check out Baker Creek Heirloom Seeds, Seed Savers Exchange, Native Seed/Search, and Fedco Seeds, among other great places.
Enjoy your trip down the road to more self-reliance, a cheaper garden, and tons of fun and good eating.








I had trouble saving cucumber seed (lemon and prolific). When dried, it was mostly flat, empty seed. Our local seed-saving, seed-selling company had some advice that they actually use. Ferment the seed in water. Just like you said, Jackie, remove the flat, empty seeds; in this case, from the top of the water and the heavier, viable seed will have sunk, and that’s where you collect them, lay out to dry, etc. I’d never heard of fermenting seed. I don’t know why it has to ferment. Anyway, it works. I’m so grateful for your thorough article. A friend recommended doing the same with tomato seed. Is this in book form, or on pdf? My gosh, you’re so experienced. I like every article you write! I’ll be saving this information. I’ve been saving much of my own seed for years.
REALLY enjoyed this article. Family garden, 60 x 60. ALL from seed last 2 years. But, commercially bought. Gonna try some of these saved seed ideas!