By Kristina Seleshanko
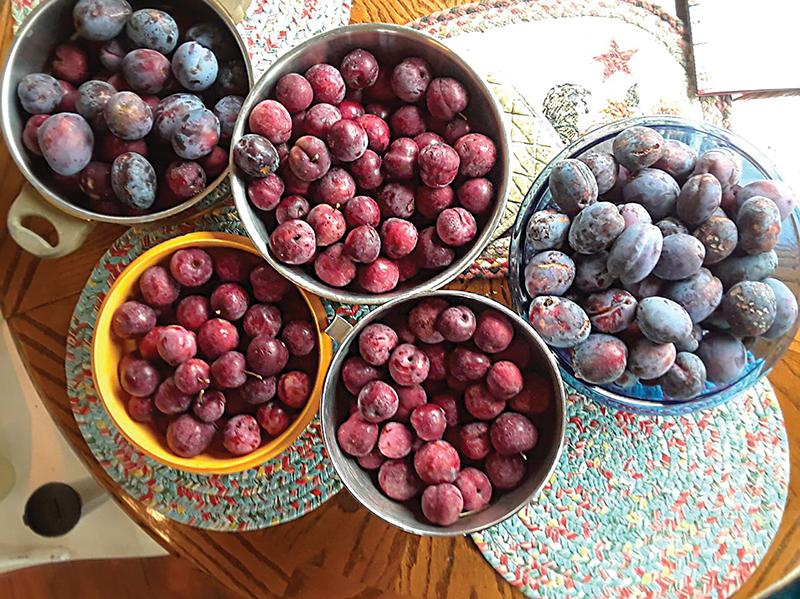
I’ve read that the Chinese believe plums symbolize good luck; perhaps that’s why plums are one of the most cultivated fruits on earth. (Or maybe it’s just that plums taste great!) Along with apples and pears, plums are also among the most durable trees found on old homesteads. Our homestead came with 11 plum trees, in four different varieties. Since there are only so many fresh plums a human can eat, you can bet I’ve spent some time learning the best way to preserve all that delicious fruit.
Dehydrating plums
Drying fruit is one of the world’s oldest preservation methods. It’s easy, doesn’t require a lot of equipment, and creates shelf-stable food that’s good for at least a year. On our homestead, we use dried plums mostly for snacking, but they are also wonderful rehydrated and used in baked goods.
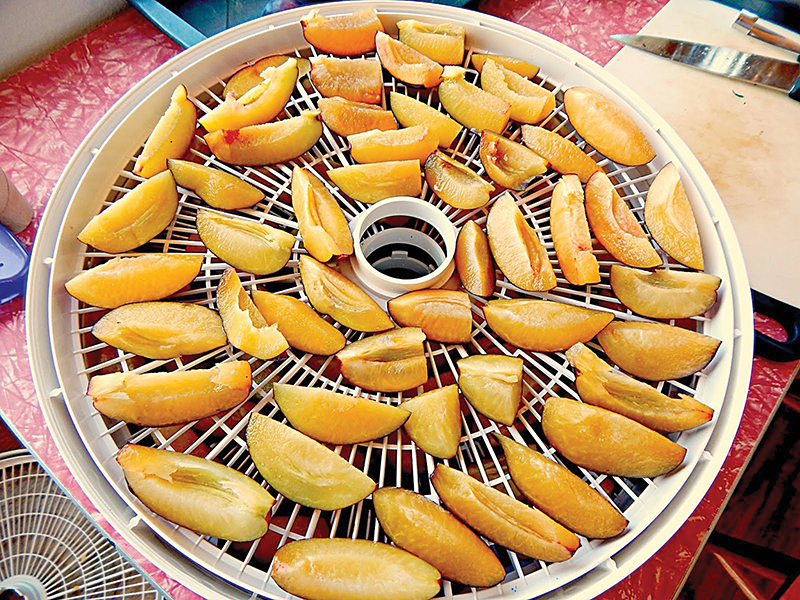
To dehydrate plums, cut the fruit in half, remove the pit, and cut the halves into slices. (You may also dehydrate plum halves, but because they take much longer to dehydrate, you run the risk of the fruit beginning to rot before it completely dries.) To keep plums from sticking to the trays of the dehydrator, place them skin-side down. Dehydrate at 135° F. Remove pieces as they dry and consolidate not-fully-dried pieces on the remaining trays. Be sure to rotate the trays once or twice during the drying process.
If you don’t have a dehydrator, you may use your oven or your oven’s warming drawer, instead — though the end product won’t be quite as good. Set the oven at its lowest possible temperature. If solar dehydrating, select a time when there will be several days in a row of dry, sunny weather and plan on turning the plum pieces several times each day.
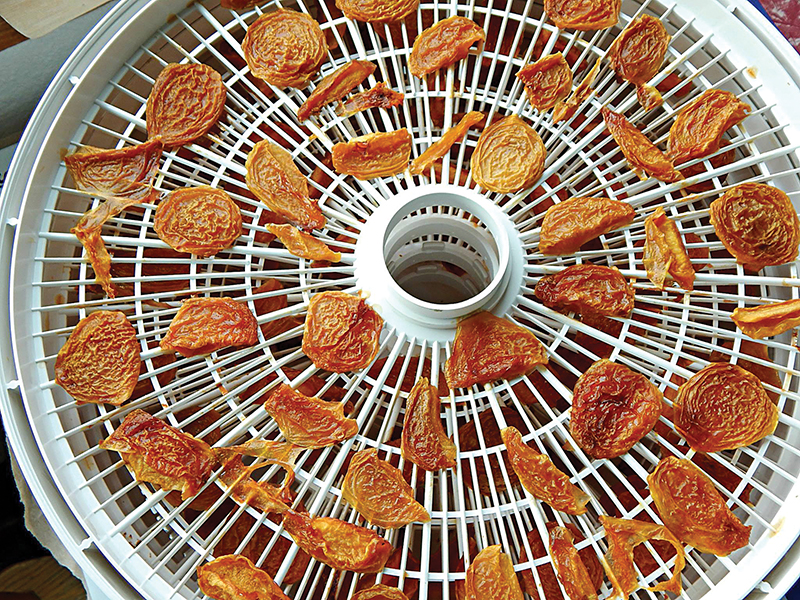
The plums are fully dehydrated when you can tear a piece in half and no moisture comes from the fruit. Allow the dried pieces to cool, then pack in an airtight container and place in a cool, dry, dark location.
Freezing plums
When the harvest season is at its peak, it’s not uncommon for me to throw a bunch of plums in the freezer to can later, when time allows. If I’m really in a hurry and I know I’ll be making jam with the plums, I just throw them into a freezer bag and call it good. Otherwise, I freeze whole plums by laying them out on a rimmed baking sheet and popping them in the freezer. When the plums are hard, I transfer them to a freezer bag.
There are other ways to freeze plums, too — ways that better prepare them for baking or cooking. The easiest method is to slice and pit the plums, then lay them in a single layer on a rimmed baking sheet, skin-side down. Pop the sheet into the freezer. Once the slices are hard, transfer them to a freezer bag.
A more traditional way to freeze plums (and a method that yields a higher-quality end product) is to slice and pit the plums, then place them in freezer-safe containers, leaving about ½-inch headspace. Cover the slices with a sugar syrup. For a light syrup, dissolve ½ cup granulated sugar into 4 cups of warm water. For a medium syrup, use 1¾ cups of sugar and 4 cups of water. Cool the syrup completely before pouring it over the plums.
Pickling plums
No two types of plums taste quite the same once pickled. There are two ways to pickle plums: the quick method, and the old-fashioned fermented method.
Fermented plum pickles:
This method produces food with good-for-you probiotics.
1. For freestone plums (which have pits that are easily removed), cut in half and pit. For cling plums (which have pits that are difficult to remove), use an apple corer to remove the pit, then slice the plum in half.
2. Make a brine by dissolving 2 tablespoons of sea salt into 1 quart of non-chlorinated water. It helps to warm the water first, then stir until the liquid is clear.
3. Freshly wash a glass jar and fill it with prepared plums. Cover the plums with the brine, leaving ½ to ¼-inch headspace. Cover the opening of the jar with a coffee filter or a double layer of cheesecloth held in place by a rubber band or a piece of string. Place the jar in an out-of-the-way location that’s neither hot nor cold. (If you’re comfortable, your ferment will be, too.)
4. After a few days, you may taste the plums to see if you like their flavor. Use a freshly-washed utensil and don’t double dip. When you’re satisfied with the fruit’s flavor, place a lid on the jar and store it in a cool, dark location, like a root cellar or refrigerator. The plums will continue to ferment, but much more slowly.
Quick pickled plums:
This is an easy way to create pickles that are suitable for storing in the fridge.
1. In a large, nonreactive saucepan, create the brine: 2 cups of vinegar (I use red wine vinegar), 4 cups of granulated sugar, 2 teaspoons of whole cloves, and 1 cinnamon stick. Bring to a boil. Reduce the heat and simmer for 10 minutes.
2. Add 4 quarts of pitted plums, cut into 6 to 8 slices each.
3. Gently boil the plums until just tender. This typically takes 2 to 3 minutes, at most. Do not overcook.
4. With a slotted spoon, transfer plums to a warmed canning jar. Pour the brine over them, leaving ¼-inch headspace. Put a plastic lid on the jar and allow it to come to room temperature. Refrigerate. Allow the fruit to sit in the fridge one week before eating.
Plum vinegar
This homemade vinegar is excellent on salads and for use in cooking. Don’t use it for preserving food, since it may or may not be acidic enough to do a safe job.
1. Place 2 cups of pitted, chopped plums into a large glass jar (½-gallon or larger).
2. Mix 4 cups of warm, non-chlorinated water, and 1 teaspoon granulated sugar, stirring until the sugar is completely dissolved. (Don’t worry; your vinegar won’t be sugary. By the time the vinegar is done fermenting, the good bugs in the mixture will have eaten up all that sugar.)
3. Pour the sugar water over the plums. Cover the opening of the jar with a coffee filter or two layers of cheesecloth held in place by a rubber band or a piece of string. Place the jar in an out-of-the-way location, where it won’t get hot or cold.
4. Allow the jar to sit for 6-8 weeks. The mixture will look dark and goopy, and a “mother” will have formed at the top. (You can keep this — handling it only with freshly-washed hands — to make another batch of vinegar; it will help speed the fermenting process.) Taste the vinegar using a freshly-washed spoon. Don’t double dip. When you like the flavor, move on to the next step.
5. Strain, disposing of the solids in your compost pile. Pour the vinegar into a clean glass jar, cover with a plastic lid, and store in a cool, dark location.
Canning plums
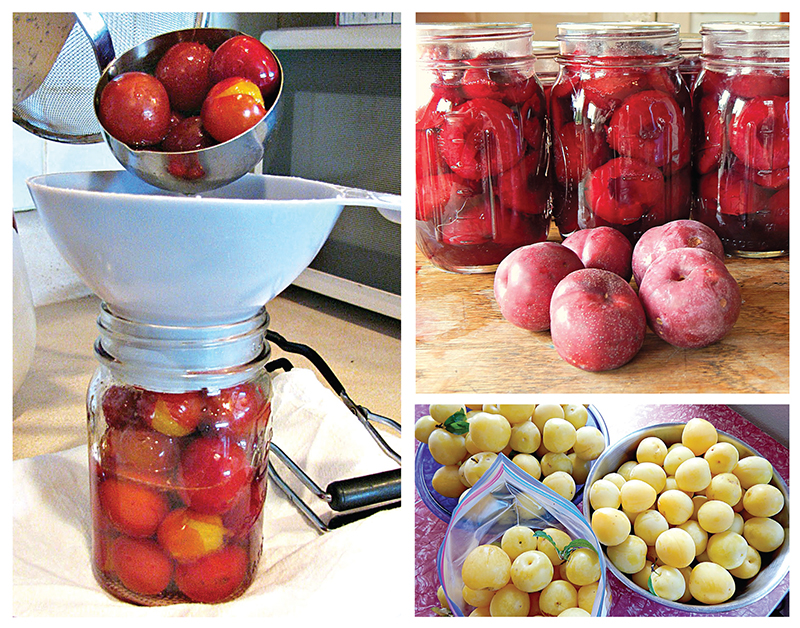
The simplest way to can plums is in syrup. Not all plums hold up well with this method, however. Meatier plums usually stay whole, but juicer ones get mushy. Even mushy, however, plums are great for baking cobblers and pies.
Please note that all canning processing times in these recipes are appropriate for those living at an altitude of 1,000 feet or lower. If your altitude is higher, please consult a reliable canning book or the National Center for Home Food Preservation website (http://nchfp.uga.edu) for correct processing times.
Whole plums
1. If you wish to can plums whole (which is a great choice for cling plums or small wild plums), prick the skins with a fork, on two different sides of the fruit. Otherwise, cut the plums in half and remove their pits.
2. Prepare a sugar syrup. For a very light syrup, use ½ cup of granulated sugar and 4 cups of water. For a medium syrup, use 1¾ cups of sugar and 4 cups of water. Heat the mixture on the stove until it is clear and hot.
3. To hot-pack the plums (which takes more time, but generally allows you to get more plums into each jar), place prepared plums in the hot syrup and boil for 2 minutes. Cover the pan and allow the plums to sit for 20 to 30 minutes. Gently fill hot jars with hot plums and syrup, leaving ½-inch headspace.
4. To raw-pack plums (which is quicker, but results in fruit that tends to float in the jar), fill hot jars with raw, prepared plums, packing them in firmly. Add hot syrup over the plums, leaving ½-inch headspace.
5. Process pints or quarts in a water bath canner for 20 minutes.
Mulled plums:
To make plums mulled in spices (a tasty treat for the holiday season), follow the instructions for canning plums in syrup, but add 1 teaspoon ground cinnamon, 1 teaspoon ground allspice, and ½ teaspoon ground cloves to the syrup.
Plum jam:
This basic recipe is excellent for every type of plum I’ve ever tried, including sweet yellow plums and meaty purple plums. It’s also an excellent way to use small, difficult-to-pit plums; just use whole fruit and fish out the pits before canning. Makes about 8 jelly jars of jam.
8 cups plums (pitted, if freestone)
½ cup water
one box powdered pectin
6 cups granulated sugar
1. In a large saucepan, bring plums and water to a boil.
2. Reduce the heat to medium low and gently boil, stirring often, until plums are soft. Measure out about 5 cups of plum pulp. (If you’re using cling plums, now is the time to use a slotted spoon to remove the pits from the pulp.)
3. Place the pulp back in the pot and stir in pectin. Bring to a boil, stirring often. Add granulated sugar and bring to a rolling boil, stirring constantly. Boil hard for 1 minute, stirring the entire time.
4. Remove from the heat and skim the foam off the top of the jam.
5. Ladle into hot jelly jars and process in a water bath canner for 10 minutes.
Plum sauce:
This Asian-style sauce is sweet and just a little spicy.
2 cups packed brown sugar
1 cup granulated sugar
1 cup apple cider vinegar
¾ cup finely-chopped onion
2 Tbsp. finely chopped and seeded green chili pepper
2 Tbsp. mustard seeds
1 Tbsp. salt
2 garlic cloves (finely chopped)
1 Tbsp. finely-chopped fresh ginger
10 cups plums, pitted and finely chopped
1. In a large, nonreactive saucepan, stir together all ingredients except plums. Bring to a boil, stirring constantly.
2. Add the chopped plums. Return to a boil. Reduce heat and simmer, stirring often to prevent scorching, until the mixture is syrupy and thick. This takes about 1 to 2 hours.
3. Ladle the sauce into hot canning jars, leaving ½-inch headspace. Process pint or quart jars in a water bath canner for 20 minutes.
Plum BBQ sauce:
Here’s a special treat that’s sure to make the summer months taste sweeter!
4 lbs. plums, pitted and chopped
¾ cup chopped onion
1½ cups packed brown sugar
1 cup granulated sugar
1 Tbsp. mustard powder
2 Tbsp. ground ginger powder
1 Tbsp. salt
1 garlic clove (minced)
2 tsp. red pepper flakes
1 cup apple cider vinegar
1. Measure out 8 cups of the plums and pour into a large, nonreactive pot.
2. Add the remaining ingredients and bring to a boil.
3. Reduce heat and simmer, stirring often, until thickened. This takes about an hour.
4. If desired, you can now make the sauce smooth. Remove from the heat and allow the mixture to cool a bit. Purée with an immersion blender, a traditional blender (working in batches), or a food mill.
5. Continue simmering and stirring often until the sauce is the desired thickness (about another hour; the sauce will thicken faster if puréed).
6. Ladle into hot canning jars, leaving ¼-inch headspace. Process pint or quart jars for 20 minutes in a water bath canner.
Plum applesauce:
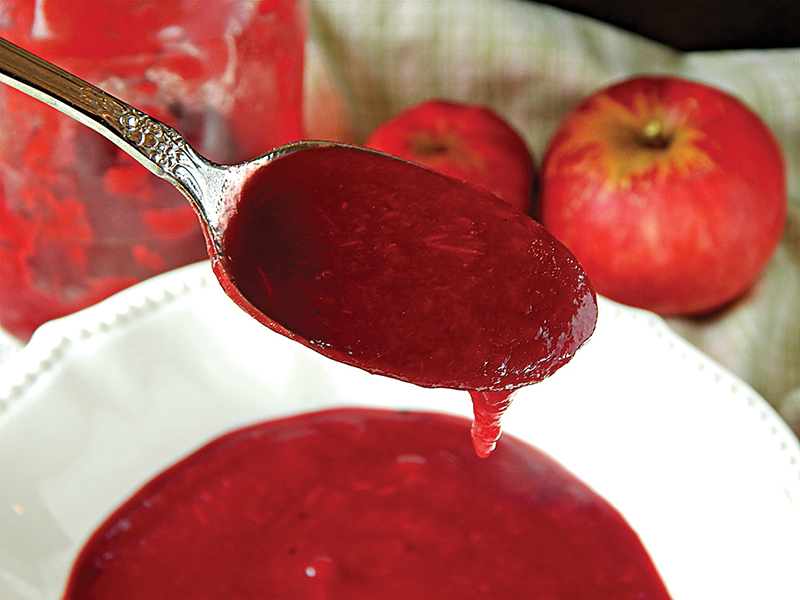
It’s like applesauce … but with apples and plums. And it’s a huge treat on our homestead.
5 lbs. apples, cored and quartered
5 lbs. plums, pitted and halved
3 cups water
sugar, to taste
3 tsp. ground cinnamon
8 Tbsp. bottled lemon juice
1. Place the apples and plums into a large pot, then add water. Cover the pot and bring to a boil.
2. Reduce the heat and simmer, stirring often to prevent scorching, until all the fruit is soft.
3. Remove from the heat and allow the mixture to cool a bit. Purée with an immersion blender, a traditional blender (working in batches), or a food mill.
4. Add sugar to taste. (I start with ½ cup of granulated sugar, stirred in well.) Stir in the cinnamon and lemon juice.
5. Ladle into hot canning jars, leaving ½-inch headspace. Process pints and quarts in a water bath canner for 20 minutes.
Plum pie filling:
If you don’t have ClearJel — a thickener that’s safe for canning — simply omit it. The resulting pie filling will be runny; before making a pie, simply pour the contents of a jar in a saucepan, heat it, and add a little flour or cornstarch as a thickener. (It’s not considered safe to use cornstarch or flour in the canning process.)
7 lbs. plums, pitted and chopped
zest and juice from 1 lemon
2 cups granulated sugar
½ tsp. ground cardamom or cinnamon
¼ tsp. salt
6 Tbsp. ClearJel
1. Into a large bowl, add all ingredients. Toss to combine. Allow to sit at room temperature for at least an hour, or put the mixture in the refrigerator overnight.
2. Strain, reserving both liquid and plums. Pour the liquid into a large pot and sprinkle with ClearJel. Toss until you can no longer see the ClearJel.
3. Place the pot over high heat and bring the liquid to a boil. Boil 2 to 3 minutes. Skim off foam and add the plums to the pot.
4. Reduce the heat to medium high and return to a boil. Simmer for 10 minutes.
5. Fill hot jars with plum pie filling, leaving 1-inch headspace. Process pints or quarts in a water bath canner for 30 minutes.







Excellent recipes. Thank you for sharing. Here are more ideas.
I can an Asian Plum sauce. You can prob find recipes online. Good with stir-frys or on pork.
Green hard, unripe plums can be brined and refrigerated in a gallon glass jar (crock), just like green cocktail olives–the flavor of the fruit, whether olive or plum is carried in the brine.
I make a 2-crust plum pie exactly like you make a fresh apple pie by adding sugar and dotting with butter. The secret to making it taste like a Bing cherry pie (another stone fruit) is by tossing halved plums with sugar and 1 rounded T. of cinnamon–really! Layer plums cut side down before sealing.
I can plums, but we prefer them dried as prunes. To reduce the need for sugar when reconstituting, I cook them in home-canned apple juice or cider. Put prune halves in a saucepan withj minimal sugar (or no sugar). Cover with liquid. Bring to a boil. Cover and remove from stove. Do this before bed, let cool until morning for breakfast.
Reconstitute prunes in brandy (maybe chopped?), instead of hot water, for use in baking. Raisin substitute or prune fillings.
I have minced prunes and substituted them in steamed plum pudding for Christmas (with a brandy sauce). “Plums” usually meant dried raisins or currants in the old recipes. It takes a lot of expertise and patience to release the pudding from the old stone molds. I would also make a fruitcake that was almost entirely home-dried fruit, of various kinds, with almost no flour and no processed fruit. And black walnuts. Wrap it in a muslin cloth soaked in brandy (as needed) and keep in a refrigerator or cool place to age until needed. It is totally different than store bought fruit cakes or modern recipes. More like a dried and compressed fruit bar.
If you only have room for 2 fruit trees, make one a self-pollinating apple and also an Italian Prune (plum). You may be able to find some decently producing abandoned homestead apple trees on right-of-ways, in parks or reclaimed forestland. Maybe your region of the country also offers wild nut trees?
Excellent information and ideas! Appreciated!
These tips and ideas are wonderful. Thanks so much for sharing!