| Issue #129 • May/June, 2011 |
I bought an old house last summer and inherited lots of the former owners’ stuff some of it good and welcome, some strictly landfill-fodder.
Among other things that the sellers left were bags of stove pellets. Now, that’s a good thing. Unfortunately, the stove for those pellets has a broken igniter and some of the pellets were stored in damp conditions and are dissolving back into the sawdust they were made from.
I asked readers of my Backwoods Home blog what they thought I should do with bags of ruined wood pellets. Suggestions were varied and creative. At first I didn’t pay much attention to one suggestion: make your own firestarters.
Why bother, I thought? Firestarters are cheap. Why spend hours on something I can get at the hardware store for a few bucks? (Yes, I know that’s not the best backwoods thinking, but there it is.) Not until somebody else laughingly suggested that I make my own and market them as “Firebrand Firestarters” in recognition of my political heckraising did the thought of homemade firestarters spark my imagination. Besides, since I wasn’t about to pay $200 to repair my stove’s igniter, I was going to need a lot of firestarters to get the thing going. At least one a day during heating season for years to come.
Well, I can tell you I’ll probably never market “Firebrands,” but I’ve discovered that making firestarters is a lot of fun. Not only that, the homemade type have several advantages over storeboughts:
• They tend to work better.
• They’re less expensive virtually free when made from materials already on hand.
• It’s easy to make several months’ supply in one session.
• You can custom-design your firestarters to have characteristics you want. Make different types for backpacking and home use, for instance, or one type for lighting charcoal and another for wood.
• They’re a great project to make with your older children.
• You can make them plain for everyday use or fancy (and fragrant!) for gifts or to sell.
|
Here’s what you need
• Some form of wax. This can be paraffin bought from your local canning supply. But I’ll bet you’ve got a bag of old candle ends around somewhere. Those will do just as well. So will those broken crayons your children no longer use. Or wax seals you’ve removed from old canned foods. Or beeswax.
• Some type of combustible material in small bits: sawdust, dryer lint, evergreen needles, wood chips, crumbly stove pellets, cotton balls, thick shredded paper or cardboard, cut up bits of old cotton rags even the soft undercoat you’ve brushed out of your dog’s fur. Don’t use anything that might be toxic (like sawdust from treated lumber, for instance); otherwise, if it’s small and it will burn, it’s probably good.
• A large pot (a water-bath canner with a rack in the bottom does nicely, but a stewpot will do)
• A quart-sized jar
• Something you can use for a mold: egg cartons, muffin pans, aluminum pie dishes, miniature paper cupcake cups, shot glasses, or votive-candle cups (if you have a bunch of them), or anything else that can hold the materials. Cut-down sections of toilet-paper rolls could work. Ice cube trays are a possibility; just make sure yours won’t melt!
• A cookie sheet or some other material to protect your kitchen counter from spilled or leaking wax.
|
How to make them
One important thing to remember: Although this project is easy and safe if you use reasonable precautions, you are working with flammable (and hot) materials. So melt your wax at medium to low temperatures (never use high heat). Keep an eye on it as it melts; don’t walk away and forget it. Handle hot materials with oven mitts. Work carefully to avoid spills. And keep small children and animals away from the stove and the rest of your work area.
1. Assemble your materials.
2. Place just two to three inches of water in your pan no more.
3. Fill a jar about halfway with wax and place the open jar into the water. Note: If the jar tries to float when you put it in the pan, either add more wax to the jar or lower the water level in the pan. Otherwise, you could end up with wax in your water and water in your wax.
4. Heat the water on medium just to simmering. As soon as you see rising bubbles in the water, turn the heat to low and watch as your wax finishes turning liquid.
5. While the water is heating, place your combustible materials loosely into the mold or molds. Place the molds on the cookie sheet or other protective surface.
6. Once the wax has completely melted, lift the jar carefully from the pan (wearing oven mitts on both hands) and pour just enough wax into the molds for your combustibles to absorb. Don’t worry about completely covering the materials; it can actually help to have some bits sticking out from the wax; protruding material can serve as a wick.
7. Once the wax has cooled, you can remove your firestarters from their molds. How you do this will depend on the materials you’ve used. If your mold was made of paper (like an egg carton or muffin cup), the mold may end up becoming part of the firestarter. Just cut or tear the excess away and use the remaining paper to help light your creation. If your mold was rigid metal or glass, put it in the refrigerator for half an hour and your new firestarters will pop right out. If your mold was flexible metal like an aluminum plate, just bend it until the waxy creation within pops loose.
|
Some tips and some fun additions
Once you have the basics, you can customize your future creations. Each material has its own characteristics, and by changing materials and sizes, you can make firestarters that are best for certain purposes.
For example: Cotton ball firestarters can be among the hardest to light. But because they’re lightweight, compact, and don’t crumble, they may be your best bet for backpacking trips. Also, if you’re using an egg carton or other paper mold, the saturated cotton balls may pop out without the need to destroy the mold.
I like to make the starters for my pellet stove using an aluminum pie pan. Just layer ½-inch or less of combustible material in the pan and pour in enough wax for the material to absorb. When it sets, you have one big pie-sized lump. It ain’t pretty. But it’s fast and you can break the “pie” into any size chunks you need. The irregular edges and protruding combustibles also make these pie-plate “Firebrands” very easy to light. The pan is good for several uses before it develops cracks.
If your only aim is to get a campfire, barbecue, or stove going, you probably don’t care how your firestarters smell. But be aware that some materials (like pine needles) produce a lovely aroma. Others (like dog hair) may stink when they burn.
If you want to get fancy with aromas, consider adding one of the following to your melted wax: oil of clove, cinnamon oil, peppermint oil, or some other aromatic oil.
When color matters, use colored candles. Or use white or clear wax, then add a crayon or two. A single crayon can create surprisingly vivid color. If you add more than one, be aware of the effects of mixing colors. A yellow crayon and a red one will yield orange. A blue one and a green one gives you turquoise or aqua. Red and blue make purple, and so on. But some colors only make a mess! Mix red with green or purple with yellow and you’ll end up with an ugly mud color.
If you discover that your newly made firestarters are hard to light (unlikely, but it can happen), wrap them in a twist of paper like a candy. Apply a match to one or both ends of the paper and you’re on your way.
You can also make firestarters by tying a length of cotton string or yarn to a small combustible object and dipping it several times in the melted wax. Pinecones are the most common for this, but you could get creative with any small, easily burnable thing cut cardboard shapes, little scrolls of rice paper, small wooden game pieces, or wooden beads, for instance. Once the wax dries, cut the string (leaving enough to serve as a wick), then pack your finished firestarter in a gift basket for a friend. (If you’re giving firestarters away, it’s a good idea to test that your particular kind works first.)
Decorative firestarters could also become items to sell at a local craft fair or farmer’s market. You’re not likely to earn a lot of money on them, but you’ll have had fun creating them.


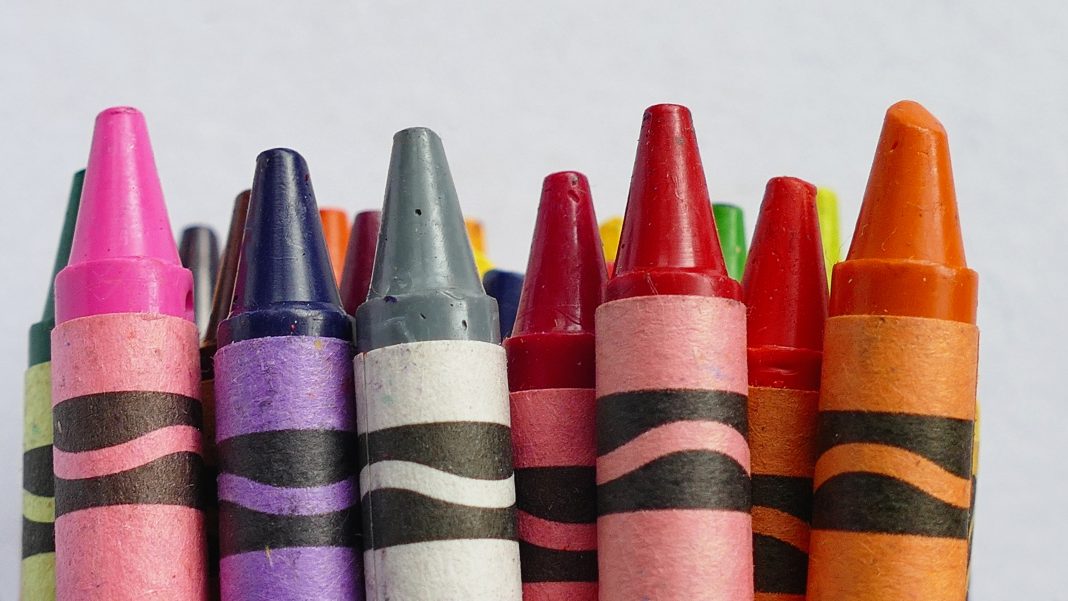




If you live anywhere close to one of those restaurants that provides crayons and placemats for kids to draw on, check with them to see what they do with the crayons that get left behind. If they are just throwing them away, see if they would be willing to save them for you. Be sure, then, to make arrangements to stop by on a regular basis to pick up what they have held aside for you.