 |
|
| Issue #89 • September/October, 2004 |
The old saying “Waste not, want not” could be applied to almost anyone’s producing garden. From fruit to vegetables, there is always the possibility of waste when it comes to discarding produce that doesn’t pass the picture-perfect test.
For instance, not all tomatoes are perfect in appearance. Some may not have the exact shape and color as photos shown in the seed catalogs, but is that a good reason not to use them? Certainly not. When you see jars of canned tomatoes or tomatoes mixed with other vegetables, do you question the appearance of the tomatoes before they were canned? I doubt it.
All good things from the garden are subject to blemishes of some sort. Unless you are planning on exhibiting them at the county fair, don’t rule out making use of produce with slight defects. A bell pepper with a small scar will taste as good as one that has no blemishes. A tomato that’s slightly lopsided from being squeezed between two other tomatoes is as firm as the rest and is as usable. It goes without saying that all rotten spots, bird damage, and so on should be removed before food items are processed for preserving. Play it safe and don’t take chances with anything questionable. One bad tomato accidentally mixed into your batch for canning will ruin the entire output, so take your time and be watchful.
Beginning with asparagus tips in the spring and continuing until Jack Frost takes his toll at the end of the season, there is always an abundance of something that can be harvested and stored away for later use. Sometimes it’s tomatoes or maybe it’s summer squash. One generously shares with friends and neighbors, but the tomatoes and squash keep on coming. This is not a time to discard. Instead, put some away for those cold, rainy days that are inevitable. For that matter, who knows what may happen next year when circumstances may not favor a bumper crop of anything?
|
Ketchup and pasta sauce
Many households consume a goodly amount of ketchup. If you have canned all of the stewed tomatoes, whole tomatoes, soup, etc., you can say grace over, get out the Crock-Pot or Slow Cooker and convert some of those tomatoes to ketchup. And who doesn’t like to have a good sauce ready to thaw out and serve over pasta when preparation time is short and everyone seems to be going in a dozen different directions? There are many ways to make something useful from excess tomatoes and squash.
Ketchup
| 4 pounds well ripened medium or large tomatoes 2 medium onions 2 medium bell peppers 2 jalapeno peppers (hot) |
Clean and quarter vegetables and put in a heavy stainless steel pot as mixture will be less inclined to stick than if in a thin gauge pot. (Never use an aluminum pot for this type of recipe.
| 1 cup sugar 1 tsp. salt 1 tsp. cinnamon 1 tsp. dry mustard |
Add sugar mixture to vegetable mixture.
| 1 tsp. cloves 1 tsp. allspice 1 tsp. pickling spices 1-½ cups apple cider vinegar |
Simmer spices in vinegar in a covered, small, heavy type stainless steel pot for about 10 minutes. Strain out spices and discard. Add remaining vinegar to rest of ingredients.
Puree tomato mixture in a blender or food processor until any lumps are dissolved. Return to pot and bring to a boil. Lower heat to a simmer and cook uncovered, stirring occasionally, until mixture loses some of its water content and begins to thicken. Transfer mixture to a large Crock Pot to finish cooking. Leave the top off so excess water may evaporate. This will take 10-12 hours. Ketchup should be thick and flavorful when ready to can. Pour into hot, sterilized pint jars and seal with a good brand of lids and rings such as Ball. Set aside to cool in a draft-free place. Cover hot jars with kitchen towels to slow down cooling. Label and date when cooled. If any of the jars have not sealed, either re-heat contents and sterilize jars again, or refrigerate to use within a couple of weeks or so. (To test sealing, look for jar lids that are still puffed and not flattened after jars have cooled. Some may actually pop and seal when touched.)
After making ketchup a time or two, you may want to use more or less of the spices or add some of your own. It’s all in the taste test. The good part about this shortcut with the Crock Pot is that there’s not much danger of the ketchup sticking while cooking and you are freed from all that stirring while the mixture thickens.
Tomato-squash pasta sauce
| 3 Tbsp. olive oil 1 cup chopped onions 1 medium bell pepper, seeded and chopped 1 mild jalapeno pepper, seeded and finely chopped 1 small clove garlic, minced 2 cups tomatoes, diced 6 fresh sweet basil leaves, torn in small pieces OR 1 Tbsp. crumbled dry basil leaves 1 bay leaf 4 Tbsp. chopped parsley 2 medium zucchini squash, sliced thin 2 medium yellow striaghtneck squash, sliced thin ½ cup chicken stock or water salt, optional |
Heat oil in a medium size stainless steel or porcelain pot. (Do not use aluminum.) Add next 4 ingredients and sauté about 5 minutes or until vegetables lose their firmness. Stir frequently to keep from sticking. Add rest of ingredients. Bring to a boil, reduce heat to simmer, and cook covered about 20 minutes. Cut off heat and allow sauce to cool to room temperature. Discard bay leaf, put sauce in airtight containers, and freeze. This should yield about 2½-3 cups.
When thawing, a double boiler works well. If mixture seems too thin, you can always beat a bit of flour and water together and stir into the hot sauce to get the desired thickness. Serve hot over your favorite pasta with a sprinkling of a tasty grated cheese.
It is not carved in stone that this type recipe must be followed to the letter. If you lack an ingredient, substitute something you like, i.e. if you have no zucchini squash, use another type of summer squash or only one kind. Maybe you’d like oregano instead of basil. If you have some cooked chicken or ground meat on hand, you may want to add some to the sauce. This recipe is versatile.
Asparagus
Summer vegetables aren’t the only ones that can overwhelm us. There are other times when we unexpectedly have an overabundance of an early spring crop such as asparagus. Maybe growing conditions are just right and the asparagus spears seem to multiply vigorously.
|
If you are lucky enough to have a bumper crop of spears, try preserving them by freezing. It’s one of the easiest ways to keep them. Just take your excess asparagus and clean it by trimming off scales and tough bottom portions of the stalks. Rinse in cool water and sort into sizes. Cut into lengths to fit your freezer containers. Blanch small and medium size pieces about 1½-2 minutes and large ones 3 minutes. Then plunge them into cold water to stop cooking. Drain well and pack into containers. Pack spears loosely to allow for expansion.
Word of caution: whenever you use plastic bags, be sure that they are freezer weight and not lighter weight sandwich bags. Despite what some people contend, there’s a difference. Don’t risk freezer-burn by using thin type bags, and remember to label and date your containers. All containers should be airtight, so check them for any possible air leaks.
Asparagus is one of my early spring favorites and one that can be enjoyed right there in the garden with no cooking whatsoever. It is a perennial that will serve a gardener for many years if plants are given some TLC. Try cleaning some freshly cut spears and snapping them into inch long pieces to use in a salad. Asparagus has a refreshing flavor and it’s delicious eaten raw. Vitamin A is at the head of the list of its health benefits, and a great way to enjoy fresh asparagus is to have it for breakfast with scrambled eggs.
Asparagus for breakfast
| 10 asparagus spears, cleaned and snapped into 1 or 1-½ inch pieces 2 fresh green onions, cleaned and chopped 5 good sized button mushrooms, cleaned and sliced (optional) 2 Tbsp. butter, melted |
Put all of the above into an iron skillet over medium heat and cover as soon as mixture begins to sizzle. This will keep juices from evaporating. As soon as onions and asparagus begin to soften a bit, cut off heat and set pan aside until eggs are scrambled.
| 6 eggs ¼ cup milk 1 level Tbsp. dried dill weed (optional) salt and white pepper 1 Tbsp. bacon or sausage drippings (optional) 2 Tbsp. canola oil |
Beat eggs with a whisk or fork until well blended and then combine with rest of ingredients, EXCEPT canola oil. Heat a large skillet until a drop or two of water will sizzle in it. Put in canola oil, re-heat and pour in your egg mixture. As soon as eggs start to cook and rise up around edge of pan, start to pull mixture away from edge, tilting pan so liquid runs to the lower edge. Keep this up, constantly turning eggs until they are completely done.
Place scrambled eggs on a large, hot serving platter and spoon asparagus mixture over them. Serve with your favorite hot bread and beverage. Breakfast meat is optional. Enjoy. (This recipe should serve 4.)
Unfortunately, this is not a food plant that will yield a harvest the same year it is planted. Rather, it takes at least two years to become established and should be given three years before beginning to have its spears cut for table use. Patience has its reward, however, and a well cared for asparagus plot will continue to produce year after year, often outlasting the owner. I wish asparagus would produce as well in our southern climate as it does in colder areas, but at least it’s not a complete failure here. We just have to be sure it gets plenty of water during hot weather, and a bit of shade is welcome too.
Berries
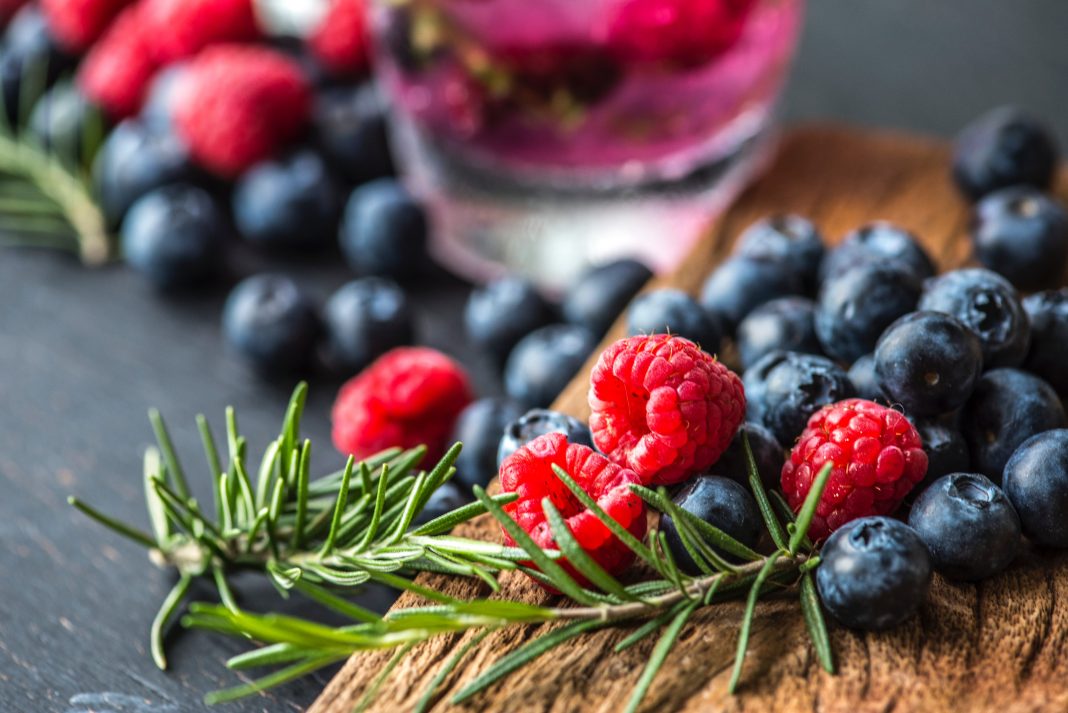
Abundance applies not only to domestic plants but to edible wild plants as well. Witness the widespread assortments of berriesraspberries (mainly a northern berry), dewberries, blackberries, and the like. Dewberries have a trailing habit requiring the picker to do some bending and squatting exercises, whereas most of the rest grow on 5-6 foot canes. Dewberries start the wild berry season in the South by ripening 2-3 weeks ahead of blackberries. There’s nothing like a juicy dewberry, picked and eaten right off of the vine.
Berry picking is a way of life for some of us, as berry patches are found growing along highway and railroad right of ways, on abandoned homesteads, in open fields everywhere they can find a foothold. Usually, no one cares if you fill buckets with the wild berries, except for perhaps the wildlife. However, I’d ask permission to pick if you can locate the owner of the property. Avoid berry patches along dusty roads as the berries may be coated with dust and a little hard to clean.
Pick in the cool of the morning and process the berries as soon as possible. If there’s going to be a lapse of several hours between picking and processing, keep the berries in a cool place or refrigerate them.
|
There are many ways to enjoy berries jelly, jam, pies, with cereal, you name it. I prefer to freeze excess berries, as it’s easy to do and I believe the flavor is better than when berries are heated and canned. (Never expect anything to taste as good as when freshly eaten out of hand.) Frozen berries can be converted into something else later and still retain good flavor. Ripe berries should be handled as little as possible, as they are easily bruised. Who wants half crushed berries after all the trouble one goes to when picking them in the first place? (Did I mention thorns? Don’t wear your best denims. In the South, we pickers face a blood-sucking hazard known as chiggers. Mercy!)
Gently put berries into a large pan of cool water such as a dishpan and skim off any leaves or other debris that rises to the top. Discard along with any faulty berries. Pour off water and rinse again as you want thoroughly clean berries. Let berries rest in a colander for several minutes to allow as much water as possible to drain away.
Put drained berries in airtight freezer containers. If you are using bags, you will notice they will have a tendency to shape into more shapes than nice square ones. This can be helped by putting the filled bags on cookies sheets, shaping the bags with your hands and letting them freeze. You can then make better use of your freezer space by removing the bags from the cookie sheet and stacking them in the freezer.
If you will put two cups of berries in each container, they will go right along with a neat little recipe given to me years ago by a friend, Mrs. Milree Parsons. I believe she originally received this from an in-law in Wisconsin.
Creeping crust cobbler
| 1 stick margarine 1 cup flour 1 cup sugar 1 tsp. baking powder ½ cup milk 2 cups fresh OR frozen blackberries (thawed) 1 cup sugar |
Because of the juiciness of the fruit, you will need to use a fairly large type glass or ceramic pie dish. I use a ceramic, deep dish that is 11 inches in diameter (rim to rim) and 1½ inches deep.
Preheat oven to 350° F. Cut margarine in pieces and place in baking dish. Put dish in oven just long enough to melt margarine. Sift dry ingredients into a mixing bowl and combine with milk to form a thick dough. Spoon dough over melted margarine but do not mix or stir the two together.
Combine fresh blackberries and 1 cup sugar together in a stainless steel or porcelain saucepan and cook over low heat about 5 minutes. If using frozen berries, a quick way to thaw them is to put about ¼ cup water in the saucepan and very slowly allow berries to thaw. Stir occasionally to prevent sticking. When berries are thawed and sugar melted, proceed with recipe.
Spoon hot berries over the batter and place dish in oven. Bake 30-35 minutes or until cobbler is golden brown and dough springs back when touched. This cobbler is delicious on its own served warm, but you may want to “dress it up” by serving ice cream or yogurt with it.
|
Other berries such as raspberries, blueberries, etc., may be substituted for the blackberries. Or you may like to use a combination of different kinds of berries.
Our native berries have such distinct flavors of their own that those of us who are familiar with them just can’t accept substitutes. When we taste a cake or sweet roll labeled “blackberry,” “raspberry,” etc., made by a commercial bakery, we know instantly there is a big difference between artificial flavoring and the real thing.
The peak of the berry season can sometimes be cut short by weather. Too much rain or just the opposite can affect the quality of the berries. If the season promises to be a good one, I’d say the sooner you get your share of those succulent berries, the better. There are other interested parties known as wildlife foraging for berries, too.
Space doesn’t allow for discussion of using overproduction from all plants, but the ones mentioned may prompt folks who like nutritious food to come up with some workable ideas of their own. I grew up in the Great Depression era when a waste of anything, particularly food, was frowned upon and ranked right up there with sin. I think that’s why so many of us are reluctant to throw anything away.
While we’re on the subject of waste, what about all of the discarded fruit and vegetable trimmings that are often thrown out as “no good”? Not so, as they are welcome additions to the composter. From the use of well rotted compost, we are rewarded with healthy looking plants and an abundance of great tasting produce. How’s that for turning waste into something useful?
At times, it seems necessary to give certain plants a boost by adding chemicals to the soil, so I won’t knock the chemicals entirely. However, I have observed that folks who go the composting route just seem to have the best luck with their gardens and they don’t kill out their hardworking allies known as earthworms and beneficial insects. The less we do that interferes with the natural process of growing things, the better off we are. When we use compost, we don’t have that apprehensive feeling of accidentally killing off something we didn’t mean to do in.
There’s another angle to being frugal and that is to be discerning as to which crops you really want to plant, harvest, and store, For instance, if your family likes fresh cabbage but does not care much for cabbage turned into chow-chow, sauerkraut, etc., don’t take up garden space with a big number of cabbage plants. Enjoy the taste of fresh cabbage while it’s in season and don’t put yourself through time consuming work canning something that may just sit there and never be eaten. Value your time. If you have enough of a surplus, you might consider selling it to a local produce market. Folks like to have access to fresh items from a local garden.
Whether you are harvesting heaps of produce or generating buckets of peelings, nothing really has to go to waste. There’s always the hungry composter. It’s a good feeling to come to the end of the growing season knowing you have covered all of your bases as well as possible.


