| Issue #133 • January/February, 2012 |
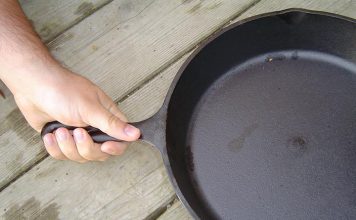
Cast iron loaf pans are not just for bread. Nearly as versatile as the cast iron 10-inch (#8) covered skillet, the venerable cast iron loaf pan will truly see you from breakfast to dessert and all points in between.
Want proof? Here are four recipes ideal for cast iron loaf pans. One is for breakfast, one for anytime bread, one for a dinner entrée, and one for dessert.
|
Breakfast
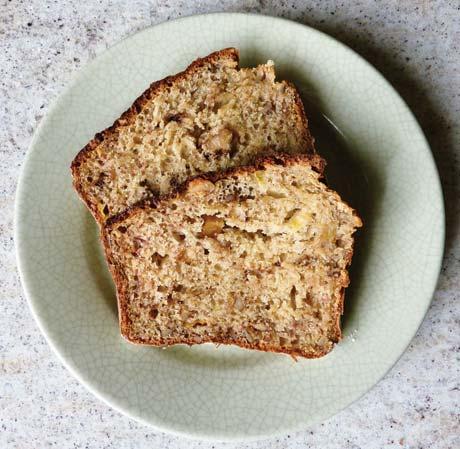
First, here’s a banana nut bread with a difference. This wholesome, low-fat, not-too-sweet treat is perfect for breakfast or snacking. Baked in a cast iron loaf pan, it will fill your kitchen with tempting aromas and you’ll love its deliciously crunchy upper crust.
Its flavor secret is the peach yogurt. For fewer calories, do try to find Greek non-fat yogurt, but if the only Greek you can find is the regular kind made with whole milk and cream, well, your banana bread will turn out over-the-top rich and scrumptious. Whatever type of yogurt you settle on, the subtle peach flavor will intrigue and delight.
A different banana nut bread
This is a great way to use those overripe bananas the kids won’t eat.
2 large eggs
½ cup turbinado (raw) sugar
1 Tbsp. olive oil
6 oz. peach yogurt (Greek non-fat preferred)
3 medium-sized ripe bananas (with brown spots), mashed
1 tsp. vanilla (or for a real flavor treat if you can get it, black walnut flavoring)
2 cups unbleached all-purpose flour
2 tsp. baking powder
1 tsp. baking soda
¾ cup chopped walnuts
Beat eggs until light and fluffy. Add sugar, olive oil, yogurt, mashed bananas, and vanilla, stirring thoroughly after each addition.
Sift flour with baking powder and baking soda.
Add wet ingredients to dry ingredients, stirring until all the flour is blended in. Add walnuts. Batter will be on the wet side.
Pour into well-oiled and very lightly floured 9×5-inch cast iron loaf pan. Bake on the upper shelf of a preheated 450º F oven for 10 minutes, then lower heat to 350º F and bake until toothpick comes out clean, about another 25 to 30 minutes. Remove from oven, turn out of pan (so it doesn’t keep baking from the heat stored in the cast iron), and let cool on rack.
Makes about 10 slices. Especially good spread with softened Neufchâtel (cream cheese’s low-fat cousin).
|
Anytime
Now let’s look at a good all-around daily white bread, excellent for sandwiches or toast. But first, a few observations about bread-making in general.
• You don’t need to waste your money on fancy designer flours, although for the novelty of it, if you ever get to an authentic stone mill, you might want to try some of its flours.
• Instant yeast much simplifies bread-making, but remember that water temperature is very important. It should be between 125 and 130 degrees F. Use an instant-read thermometer; don’t guess.
• Dough thrives in a warm, moist environment. Commercial bakeries have proof ovens that maintain an 80-degree temperature and high humidity for the rising bread. The closer you can come to this ideal, the better your bread. Try to work with warm mixing bowls and warm loaf pans.
• Most bread recipes call for two risings of about 20 minutes each. We like to use a third rising.
• Don’t over-knead the dough. Stop when it becomes a fine, smooth, silky, elastic ball.
• Punching down the bread should not be a violent act. Pull the edges of the dough toward the center and push down gently on the dough. Don’t slam it around.
• Slash the tops of your loaves before putting them in the oven; otherwise, they will crack along the sides and present an unattractive loaf.
• Optional enhancements: you may wish to lightly spritz the unbaked loaves with a very weak mixture of water and vinegar (one tablespoon vinegar to a spritzer bottle full of water). You may also wish to sprinkle the bread lightly with kosher salt, no more than one teaspoon for both loaves. Another option is to sprinkle a tablespoon of sesame seeds over each loaf. These extra steps make for an excellent appearance and a very tasty crust.
• Spraying a little of the water/vinegar mixture in the oven several times during the baking process helps to form a really nice crust.
• After baking, when you think the bread is done, always take its temperature before pronouncing it done. White bread should be around 180° F.
|
All-purpose city bread
6½ cups unbleached all-purpose flour
2 Tbsp. quick-rise yeast
2 Tbsp. white sugar
1 tsp. salt
2 cups water
¼ cup olive oil or canola oil
Place flour in mixer bowl. Add yeast, sugar, and salt. Whisk to thoroughly mix all dry ingredients. While you are mixing, heat water to between 125 and 130 degrees F.
To the flour mixture, add water and oil (olive oil gives the better flavor). Change the whisk on the mixer to the paddle. Stir on low speed until the dough forms a shaggy mass. Scrape the paddle with a rubber spatula and form dough into a rough ball.
Cover mixer bowl with plastic wrap. Place towel over plastic wrap and set aside in a warm place for 15 minutes. Meanwhile, oil a medium-sized ceramic mixing bowl (use olive oil for this step) and warm it slightly in the oven. The bowl should be merely warm, not hot to the touch. Remove ceramic bowl from oven.
After the mixer bowl has sat in its warm place for 15 minutes, use a rubber spatula to coax the dough from the mixer bowl into the ceramic bowl. Move dough around in the ceramic bowl to coat it on all sides with the olive oil. Cover the ceramic bowl with the plastic wrap and towel and set aside in a warm not hot place; 80 degrees F is perfect.
After 20 minutes the dough should have risen to approximately double. Give it the two-finger test (stick two fingers in; if the indentations remain, the dough is ready for the next step). Turn out onto a lightly-floured board. Knead for 3 to 5 minutes, forming into a smooth, satiny, round ball.
With a serrated bread knife, divide as equally as possible into two pieces. Form each piece into a ball. Invert ceramic bowl over one ball and the bowl from the mixer over the other ball. Let rest for a few minutes. Then, on a floured surface, with a rolling pin roll out each ball into an oblong a little less than an inch thick.
With your fingers, lift one end of the dough and roll the dough, forming it into what looks like a jellyroll. Pinch the bottom to seal. Fold the ends in to the bottom and pinch to seal. Place this loaf into a warm loaf pan. (You may want to spray your loaf pans with a nonstick product, depending on how well they are seasoned.) Cover the two loaves with the plastic wrap and towel and place in warm location to let rise for 20 to 25 minutes. Meanwhile, preheat the oven to 375º F.
When the loaves have sufficiently risen (the two-finger test, remember?), slash the tops with a razor blade or serrated bread knife. Sprinkle lightly with flour or sesame seeds (optional) and place in oven. After about 5 minutes or so, open the oven door and spritz in some water. This helps form a nice crust. Bake for 35 minutes. Use a timer.
After 35 minutes, pull one loaf out for testing. Plunge an instant-read thermometer into the thickest part of the loaf, avoiding the pan. For white bread, temperature should be approximately 180 degrees.
When test loaf has reached that point, remove both loaves from oven and immediately turn out onto a cooling rack. If you want to get fancy, you can put an egg wash on them to make them look pretty. Or just brush on some olive oil.
Let rest at least 20 minutes 30 minutes is better before slicing.
|
Dinner
We promised you a dinner entrée, so here’s an easy and most excellent meat loaf. Our version uses ground goat, though you’ll get impressive results with ground lamb, ground beef or, (if you’re lucky enough to have it in the freezer), any wild game such as ground elk, venison, or bear.
Goat (or lamb, beef, elk, or bear) loaf
6 strips bacon
2 pounds ground goat, lamb, beef, or elk
2 eggs
¾ cup old-fashioned oats
½ medium onion, minced
salt and pepper
Fry bacon in a cast iron skillet. In a large bowl or a mixer, blend meat, eggs, oats, and onion, adding salt and pepper to taste. Line bottom of loaf pan with half of the bacon. Fill loaf pan with meat mixture, then add remaining strips of bacon on top.
Bake one hour at 375° F. Remove from oven, let sit 10 minutes for flavor to absorb. Pour off excess fat. Slice and serve.
Makes 6 generous servings.
|
Dessert
And then, of course, there’s dessert. Set this apple treat over a low fire on top of your woodstove, come back a while later, spoon the topping over, and you’ve got a lovely hot dessert with very little fuss.
Woodstove-baked apple for two
1 large apple (McIntosh, Rome, or similar)
2 Tbsp. rum
½ tsp. molasses
2 tsp. turbinado (raw) sugar
1 Tbsp. creamy peanut butter
2-3 cubes candied ginger, minced fine
1 graham cracker, crumbled fine
Cut apple in half horizontally and core. Place in cast iron loaf pan with the cut sides up. (To serve four, double the recipe and stand the cored apple halves side by side, as in the photo.)
Pour rum over apple halves. Drizzle molasses over them. Sprinkle with sugar. Cover tightly with aluminum foil and place on low-heat woodstove. After 30 minutes, lift foil and test apple with a fork; if apple isn’t soft yet, replace foil and continue cooking for another 15 minutes or so.
While apples are cooking on wood stove, blend peanut butter with minced candied ginger and graham cracker crumbs. Reserve for topping.
When ready to serve, spoon apple halves into small bowls and pour reduced rum over them. Top each baked apple half with a dollop of peanut butter mixture. Serve hot. Serves 2 (doubled recipe serves 4).
Matt and Linda Morehouse are the authors of Cast Iron Cuisine from Breakfast to Dessert. Three of these recipes appear in their book, along with a host of other original and time-tested recipes for cooking in cast iron ware of all sizes and shapes.


