 |
|
| Issue #141 • May/June, 2013 |
For much of human history, people have tried to prevent things from rotting. Literally every food preservation method we’ve come up with in the past few thousand years (freeze drying, dehydrating, salting, canning, refrigerating, freezing, etc.), up to and including keeping animals alive until the day they’re consumed, is done in an effort to prevent food from going bad.
But rotting is actually a vital component to our existence. Imagine our world without the diligent munching of untold quadrillions of agreeable microbes. We would be layered with undecomposed corpses (of both plants and animals) stretching back into the mists of time. Yuck.
So we can thank microbes the world over for doing a dirty but necessary job on our behalf. And it’s even possible, with a little help from science, to tailor those microbial appetites to our benefit on the homestead.
I refer, of course, to composting.
The science of composting is just that a science. Reams have been written on the proper and methodical approach to getting things to rot. The Rodale Guide to Composting alone stretches to an impressive 17 chapters and 382 densely-packed pages addressing the subject from every possible angle, from small-scale to industrial applications.
Many gardening magazines and catalogs would have you believe that composting requires expensive and sophisticated tools and equipment. A quick glance through an upscale retailer’s website reveals a “back porch compost tumbler” for $249.95 and a kitchen compost bucket for $29.95. Yikes.
All this implies that composting is an intricate, slightly terrifying, and very expensive subject. What if I do it wrong? What if I don’t provide enough water? What if my compost pile doesn’t heat up enough? What if I can’t afford the expensive equipment?
Fortunately, as the rotting bananas in your fruit bowl will attest, composting is as easy as pie. And all the components can be obtained for free.
Join me now in the not-as-stinky-as-you’d-think world of microbial activity and learn how to exploit rot to your benefit.

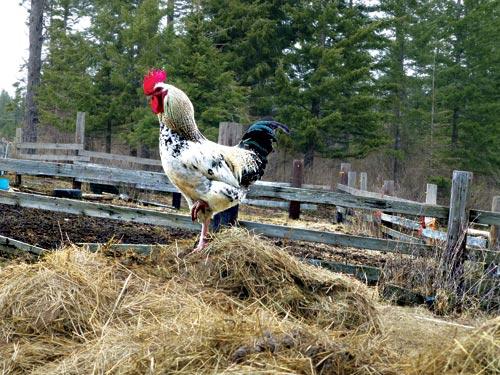
Our “helter-skelter” compost pile newer materials on top, three-year-old compost at bottom. Happy chicken thrown in for free.
Black gold
I’ll start by addressing the role composting plays on our own 20-acre homestead in north Idaho.
After moving here in 2003, we were dismayed to learn that our soil is heavy with clay and has a very difficult time producing anything except weeds (which grow with enthusiasm). We tilled and tilled and tilled compost (and sand) into the soil in an effort to improve it, with lackluster results. After years of increasingly frustrating attempts to get the unyielding dirt to give back something besides dog fennel and hawkweed, I gave up entirely the concept of planting a garden in the ground. Instead, I’ve switched to tire gardening (watch for a future article on this subject). Now all my veggies are grown in what are essentially miniature raised beds.
There have been some concerns about tires leaching dangerous chemicals into soil, but these concerns appear to stem from shredded tires (or tire dust) or from burning tires, but not from whole tires. Tires are long-lasting and almost impossible to decompose under ordinary conditions, so my concerns about any potential leaching is nonexistent. People have grown many food and ornamental plants in tires for decades with no adverse effects.
Our tires are filled, from top to bottom, with compost. I don’t even bother mixing it with dirt anymore just compost. The rotting remains of our endless barn-muckings have quite literally saved our garden.
To wax philosophical for a moment, I see homesteading as a circle. In a complete circle, all things on the farm are interconnected. The challenge is to link and connect as much of that circle as we can, without relying on outside sources. Without the compost provided by our livestock, that circle would be virtually impossible to close.
Thanks to the daily output of our 12 head of cattle, one horse, and a flock of chickens, we have compost in abundance. Piled unscientifically into an enormous heap, within three years the material has broken down into rich, black, loamy, beautiful stuff which vegetables adore.
Compost has long been called black gold among farmers and homesteaders, and they’re right. On a farm, compost’s value is beyond compare, especially when it comes to improving bad soil.
The science of compost
So what’s the big deal about compost? Why can’t plants just … grow?
Plants, as you know, require nutrients. The most basic are NPK (Nitrogen-Phosphorus-Potassium) in various ratios. Depending on where you live, the native soil may be deficient in these nutrients in anywhere from modest to alarming quantities.
Compost helps reintroduce some of these nutrients back into the soil, benefiting whatever is planted. Additionally, depending on what went into the compost to begin with, compost can provide the trace micronutrients in which plants are often deficient elements such as zinc, boron, molybdenum, iron, iodine, etc. These nutrients are slow-released into the soil to provide maximum benefit to the plants.
Compost offers additional benefits. It increases the friability of soil (how loose and workable it is). At either end of the friability scale, clay is too dense for plant roots to penetrate, and pure sand is too loose, poor in nutrients, and won’t retain water. Compost helps at both ends; it can break up the heavy density of clay, or it can bind together and provide nutrients to sandy soil.
Compost also invites useful organisms to help with the soil-building process. Worms, those humble but glorious gardener’s friends, are attracted to compost-rich environments. But other beneficial insects as well as microorganisms become inoculated into soil as well. Good compost is not dead, but is alive and teeming with life, which works symbiotically with soil to produce happy plants.
What a compost pile needs
It’s the action of those unthanked microbes that are responsible for successful composting. Microbes break down larger things banana peels, cow manure, ageing lettuce while digesting them. This digestion process results in the release of elements in a form that plants can use. That’s why rot is such a critical component of the natural cycle. Animal and vegetable materials all contain critical nutrients, but not in a form usable to plants. But if the material is
decomposed and mixed with soil, then the nutrients are released into a form plants can use.
But microbes can’t work in a vacuum. They need certain conditions in order to survive and do their job. Specifically they need four things:
• Energy (in the form of carbon). Microbial carbon is supplied through whatever dry, bulky vegetative waste you have on hand: leaves, straw, cornstalks, even sawdust.
• Protein (in the form of nitrogen). Nitrogen (sometimes called an Activator) is what stimulates the microbes, and is found in grass clippings, green vegetation, and such additives as kelp meal or blood meal. (Microbes need much less nitrogen than they do carbon, so don’t overdo the protein.)
• Oxygen. Oxygen merely means that microbes must operate in an aerobic (as opposed to an airless anaerobic) environment. Occasionally turning your compost pile provides this; alternately, the actions of worms and other soil dwellers help aerate the compost as well, though it will take longer.
• Moisture. Moisture is necessary for rot to happen. In fact, reducing moisture (dehydration) is an ancient form of food preservation, since microbial action requires some moisture in order to work. But too much moisture a waterlogged compost pile will slow down microbial action as well, since it contributes to an anaerobic environment. That’s why adequate drainage is necessary for compost piles.

A wheelbarrow full of compost, destined for the garden.
Activators
A special note about activators. Activators are additives that jump-start the microbial activity by providing a shot of nitrogen, which stimulates the microbes to decompose the carbons. You don’t want to add a lot of activators to your compost pile; a little goes a long way. However, those small amounts of activators are handy to get things moving.
To illustrate: On our homestead, we have about two steers a year slaughtered for meat. A mobile butcher comes to our place to dispatch the steer. He guts and quarters the animal before bringing the carcass to his facility for hanging and cutting.
During this process, the animal must naturally be bled out. We provide an empty trash can or large 30-gallon tub to drain the blood. And then we take that blood and pour it over our compost pile.
Before you say “Ewww, yuck!” consider that blood is an excellent microbial activator and increases the speed of the composting. In modest quantities, blood is an excellent additive to a compost pile. Besides, what better way to get rid of it?
For those without a natural source of blood, blood meal is available for purchase from gardening centers. This is simply blood from slaughterhouses that has been collected, dried, and powdered.
There are a lot of animal-product “meals” that can be added to a compost pile as activators. Blood meal, bone meal, horn meal, hoof meal, fish meal … these are all superb additions. For those preferring concentrated activators of non-animal origin, consider alfalfa meal or cottonseed meal.
Building a compost pile
So how do you make a proper compost pile? There are two schools of thought: the scientific approach and the helter-skelter method. Frankly you’ll succeed either way, but the scientific method is quicker.
Scientific approach
Ideally, a compost pile consists of a ratio of two parts vegetable matter (leaves, grass, straw) to one part animal matter (manure). The ratio of carbon to nitrogen should be about 30:1, meaning you should have 30 times more dry bulky vegetative waste than nitrogen-rich sources such as grass clippings or sea kelp.
Materials should be mixed rather than thickly layered; or at least layered thinly. If you pour several cubic yards of grass clippings onto your compost pile, for example, it’s likely to compress into a stinky anaerobic sludge. However if you first dry the clippings (or take the green clippings and mix them thoroughly with leaves) before adding them to the compost pile, the materials will break down more efficiently and with less smell. Avoid grass clippings or other materials that have been heavily sprayed with pesticides or herbicides.
Leaves are particularly useful. Here in north Idaho we’re surrounded by almost pure conifers; but for those lucky souls who live in deciduous areas, leaves are one of your greatest assets. Left alone, leaves compost very slowly; but decomposed leaves are one of the best possible natural composts. The richness of eastern gardens grown in “humus” illustrates this.
So rather than complain about the massive volume of leaves you have to rake each fall, instead layer those leaves into your compost pile and wait for the goodness to come forth. If possible, chop or shred the leaves first. This will reduce matting and speed up the decomposition. Mix the chopped leaves with other stuff and the leaves will decompose about four times faster than if they were simply piled and left alone.
Helter-skelter method
We aren’t nearly as scientific about compost on our farm, nor are we in a hurry for everything to decompose. You might say we follow the helter-skelter method of composting. There is a certain messy exuberance associated with this kind of composting. I don’t have the time or interest to get too scientific about things. When I’m cleaning the barn, I’m not thinking about whether my ratio of vegetable matter-to-animal matter is stable; I just want to dump the wheelbarrow and finish the stall.
Yet somehow it works. Peeking out from the bottom of our massive mound of barn waste is some of the most beautiful rich black gold you’ll ever see. In the spring I fork it into the wheelbarrow, trundle it over to the garden, and fill a tire with it, and know that whatever I plant corn or tomatoes or broccoli or beans will appreciate the results. And when those plants are harvested, whatever is left over cornstalks or tomato stems or broccoli leaves or bean pods will go into the compost pile, get broken down, and ultimately be ready to grow another round of food. The homesteading circle closes a bit more.
What shouldn’t be composted
Not all waste can be thrown on a compost pile. While theoretically anything organic can be composted, the reality is that some organic materials are harder to compost than others.
Some of the tough, stubborn items that take a long time to break down include corncobs, palm fronds, cotton stalks, twigs and branches, walnut or pecan shells, etc. These items will eventually break down, but it may take years. Make sure your “stubborn” materials are well-layered with more easily composted items, and they will compost a bit faster … though you may still have to pluck the occasional incompletely-composted corncob from your otherwise-composted materials and toss it back in the pile for another season.
However, these stubborn organic items can be resolved simply by chopping or crushing. The smaller the piece, the quicker it rots. It might be worthwhile to rent a shredder at the end of the season and run your larger or more stubborn organic waste through it.
There are other items that you should avoid adding to a compost pile, notably meat trimmings, animal fats, and grease. It’s not that these things won’t decompose, but they’ll do so at a much slower pace, and meanwhile they’ll attract pests such as rats and flies. If you do add meat scraps to your compost pile, make sure they’re in small quantities and are buried deep within the pile. Grease and fats hinder composting by literally coating the vegetative matter and providing an anaerobic environment, which drastically slows decomposition.
And no matter how precious and clean you think Fido and Fifi are, dog and cat poop can contain disease microorganisms and should not be added to a compost pile.
What about human waste? While it can certainly be composted effectively, I would keep it separate from your standard compost pile. For additional details on composting human waste, see The Humanure Handbook (available in our Bookstore).

Compost filling a tire, ready for planting.
Why livestock manure should be composted
If you have livestock, you must do something with their output, and the most logical thing to do is to compost it. What is manure, after all, except vegetative material that has passed through the digestive tracts of animals? The material is broken down in the animals’ bodies and emerges as a concentrated activator for compost.
Fresh manure is too concentrated to be put directly on plants. And some manures particularly those of chickens, sheep, and horses are called “hot manures” because their intense activity can create so much heat that it will kill not only beneficial organisms (like worms) but anything growing in it (like vegetables).
So it’s best to compost all animal manures. Under ideal and scientific conditions, this process will take anywhere from a couple weeks to a few months. Under helter-skelter conditions (and heavily mixed with hay), we give it about three years.
Thermophilic composting
To many people, “composting” is synonymous with “heat.” If their compost pile doesn’t achieve a high temperature, they consider it a failure.
Fear not, thermophilic composting isn’t always necessary for successful compost.
Heat plays an excellent factor in killing weed seeds or pathogenic organisms. But if you’re simply composting the remains of kitchen waste, thermophilic composting isn’t necessary. Don’t become so obsessed with high temperatures that you become discouraged if your pile doesn’t get hot.
In a nutshell, heat is beneficial if you need to kill weed seeds, destroy harmful pathogens, or decompose materials at maximum speed. But heat will also kill beneficial organisms such as worms, and it requires more frequent turning of the pile. So consider what you’re composting before obsessing too much about heat.
Urban composting
Since not everyone lives on a farm, I’ll address what I call Urban Composting. This is simply taking all organic waste from your home and yard (grass clippings, leaves, chipped branches, kitchen waste, etc.), and turning it into something usable.
You can use a dedicated garbage can or metal barrel. Drill holes in the sides and bottom to help in aeration, then prop the can up on bricks or cinder blocks to allow bottom ventilation. It would also be helpful to insert a perforated PVC pipe or other airy option into the center of the garbage can to permit air to penetrate the interior of the can. You can secure the lid and give the can a good rolling a couple times a week to increase aeration.
A bin made of pallets also works well. Composting yard and kitchen waste will not only provide you with usable material for container gardening or small raised beds, but it’s less material that will end up in the landfill (and might even reduce your utility bills).
What about those who don’t have yards? What if you live in an apartment or condo? Fear not, you can still compost on a small scale using earthworms (see Sidebar article). Worm composting is virtually odor-free, self-contained, and even potentially profitable.
Quicker compost
As you may have gathered, usable compost can either be made quickly or slowly depending on how precise and scientific you want to be. In his excellent book Let it Rot! (available in our Bookstore), Stu Campbell covers (among other techniques) what he terms the University of California Method for fast thermophilic compost, which is worth mentioning.
The three principles of the U of C method are: (1) chop or shred the organic materials to increase surface area; (2) blend together the carbon and nitrogen materials, i.e. mix up the manure with the chopped leaves and grass clippings; and (3) turn the compost pile frequently, at least every three days, to increase aeration and expose all the materials to the heat from the center of the pile.
To experiment with this method, Mr. Campbell fenced a spot four by five feet in size and layered it with leaves of many kinds, some already-rotting sticks, and some seedy first-cut hay. All the material was chopped or shredded. As he layered the pile, every three or four inches he sprinkled alfalfa meal (a microbial activator) and dampened the pile with a hose. Every 18 inches or so, he added a layer of coarse unchopped hay to provide air channels into the pile.
When the pile was five feet high, he stacked hay bales around the cage (for insulation) and layered the top with flakes of compressed hay, also for insulation. He diligently turned the pile every few days.
The result? Heat activation began almost immediately. Within two weeks, the pile had begun to cool down (meaning microbial action was nearly complete) and, while not everything was perfectly broken down, it was certainly usable as gardening material.
This technique demonstrates the potential speed with which composting can happen under careful and precise conditions.

Fresh livestock manure can damage plants, but composting it turns it into a rich activator for crops.
Speed factors
The three biggest factors which influence the speed at which decomposition happens are aeration, moisture, and material size.
Aeration
Aeration can be increased in a number of ways, both passive and active, depending on the nature of your compost pile and how much work you want to do.
Try vertically inserting things that will increase air flow such as perforated PVC pipes, a tightly-rolled section of chicken wire, or even bundles of cornstalks anything to help air reach the lower levels of a pile.
If your pile is contained in a compost tumbler or a barrel or garbage can, give it a spin every few days to shake things up. If your pile is stationary and you feel you need a physical workout, turn it over with a pitchfork. Anything that introduces air into the bowels of a pile will increase the speed of decomposition.
Moisture
Ideally, the amount of moisture in a compost pile should be like the amount of moisture in a wrung-out sponge. In real life, it’s not always possible to achieve this point of perfection. Fortunately, compost piles are reasonably forgiving when it comes to water. However …
Too much moisture means the compost pile goes into anaerobic condition, which drastically slows decomposition. If you live in an extremely wet climate, tarp your pile so it doesn’t become waterlogged.
Too little moisture means the compost pile simply never activates. You’ll have to water your pile. If you live in an arid climate where water is precious, use gray water to moisten your pile (dishwater is not recommended because the soaps and greases can coat the material in the pile, which slows decomposition).
Watering a dry compost pile with a hose can be tricky because most of the time water will only penetrate the top inch or two. It’s better to dampen a pile as you turn it, or sprinkle the pile in layers as you build it. Once water is inside a pile, it won’t easily evaporate; so make sure your pile is well-moistened as it grows.
Material size
While most of the time compostable materials are small in size, there will be times you’ll have larger materials to decompose. This might include cornstalks, branches, large vegetable rinds or stems (broccoli stems come to mind), or other stubborn materials. Fear not, these will all break down eventually; but they’ll break down a lot faster if they’re chopped or shredded first. Remember the smaller the material, the larger relative surface area it has, and the faster it rots.
Chopping or shredding, besides increasing the surface area of the materials, has the added advantage of more material fitting into a smaller container. Your intact Christmas tree takes up a lot more room in a compost pile than your chipped Christmas tree.
If you’re composting things that tend to mat, such as leaves or grass clippings, take whatever steps are necessary to reduce the matting potential. Leaves can be chopped. Grass clippings can be dried. Matting increases the likelihood of the material going into anaerobic condition, slowing down the decomposition process.
And above all, it’s fun
While it might sound odd to get overjoyed by rot, in fact composting is a deeply satisfying factor of farm life. It’s nice to be able to take what most people see as revolting garbage and make something highly useful and even valuable out of it for free. Those who compost are modern-day Rumpelstiltskins who spin (black) gold out of straw.
An interview with a worm composter
For those unable or uninterested in larger-scale composting, it’s still possible to compost kitchen scraps indoors by using worm composting.
I’d heard of this in theory, but it wasn’t until I saw worm composting in action that I became deeply impressed. I visited some friends (Kurt and Cindy) who have an active worm composting system for their kitchen scraps. Because it was still winter when I interviewed them, they had brought the composter indoors and placed it in a seldom-used shower stall until warmer weather permitted them to put the composter on the porch.
The first thing I noticed or rather, didn’t notice about this system was its odor (or lack thereof). Despite the small enclosed bathroom location, there was no noticeable odor whatever. However, they did have a few fruit flies buzzing over the composter. And when I say “a few,” I’m talking about three or four, that’s it. (There are probably more fruit flies when the composter is outdoors.)

Top tray gets the fresh kitchen scraps
This particular composter consisted of four stackable trays with solid sides and mesh bottoms. A lid closes over the top tray, and the trays are arrayed on a four-footed solid base to elevate the composter by about 12 inches. The base collects the liquid (worm tea) which drains to the bottom and is harvested with a spigot.
Kurt told me he started with the first tray into which he placed some shredded (non-glossy) newspaper. He moistened them until the newspaper stuck to the tray. The moistened newspapers should be about an inch thick. Then he added tiny red worms he purchased online. One pound of worms (which are shipped in soil) contains about 10,000 tiny baby worms. Kurt added both the soil and the worms to the tray. On the top tray he put a week’s worth of kitchen scraps (carrot peelings, potato peelings, onion skins, eggshells, coffee grounds, etc.). He didn’t chop the scraps or crush the eggshells, though doing so would allow the worms to break down the organic material more quickly; he just added them to the top of the tray and spread them out evenly. Then he closed the lid and left the worms alone.
When the bottom tray gets full, Kurt adds another tray on top, repeating the process of adding shredded newspapers and moistening them before piling kitchen scraps on top. When the worms deplete the nutrients in the first tray, they start to migrate upward through the mesh into the next tray (hungry worms always move upward). Kurt repeats the process until all four trays are stacked. By the time the worms get to the top tray, the bottom tray shouldn’t have any worms at all and the compost can be used directly on plants. The bottom tray mostly consists of worm castings (an ideal plant food) and has absolutely no odor. Once Kurt empties the bottom tray, he then stacks it on top when he’s ready.
Meanwhile, the worms breed. Kurt estimates that his initial one pound of worms now totals about five pounds. How fast the worms work their way up to the top tray depends on the number of worms you start with, but in Kurt’s case it takes about three to four months to cycle through all four trays.
An important side bonus (besides the worm castings) is worm tea, the liquefied drainage from the compost. This “tea” is a concentrated fertilizer and is in high demand among gardeners. Kurt drains the liquid via a spigot into an old measuring cup, which he then pours into empty one-gallon milk jugs. The tea is far too concentrated to be used directly and must be diluted with water at approximately a 1:20 ratio. Kurt told me it’s possible to sell diluted worm tea for $4 to $5 a gallon. It takes him about two or three months to fill a gallon jug, depending on how moist the kitchen scraps are (melon rinds have more water than eggshells, for example).
Kurt said all kitchen scraps can be composted in this manner except meat scraps, milk products, and citrus (which might kill the worms). He also said not all worms are suitable for worm composting it’s best to purchase composting worms from a reputable source. A rule of thumb is to purchase twice as many pounds of worms as the amount of kitchen waste you produce each day. If you produce about half a pound of kitchen scraps a day, then start with one pound of worms.
The worm composting system is essentially maintenance free. Once it’s set up, it doesn’t require mixing or adding water or anything else except harvesting the finished compost and draining the worm tea. However worms must be kept in moderate temperatures. They don’t work as efficiently below 55° F or above 80° F. In cold climates, they would do best sheltered in a garage or even indoors; in hot climates, consider a basement or other cool location. Worms work in the dark, so make sure your composting system is not in direct sunlight or other bright light that will discourage worms from working at top efficiency.
Altogether, I found worm composting to be an elegant and efficient system of composting. I came from the interview deeply impressed and anxious to experiment with this system of composting on my own.


