| Issue #108 • November/December, 2007 |
Winter is coming again, pretty much on schedule in spite of global warming, and it will be cold, just like always. Having a reliable heating system makes winter a more enjoyable, less stressful season. Most homes have central heating with oil, gas, or electricity for fuel and these are reasonably dependable even if evermore expensive to use. Many folks use woodstoves for backup or even main heating systems and this brings me to today’s subject: The Barrel Stove, Deluxe Version.
The Fall and Winter 2007 Northern Tool + Equipment Master Catalog (NorthernTool.com) arrived today. They must like me because I got two. One of them is hard cover, which I will add to my valuable book collection immediately. On page 523 is the barrel stove kit that converts a 30- or 55-gallon barrel into an efficient wood-burning heater. It is true. I have built and used many of them over the years. I remember way back when they cost $19.95 instead of the $41.99 in the new catalog. They are still worth the money. On the same page is another kit for $29.99 (once upon a time $12.95) to add a second barrel for even more heating efficiency.
|
New this year is a grate for the barrel stove ($39.99), allowing more efficient combustion, something that should have been available sooner. It is a good idea and better than the technique I used, though my way was dirt-cheap because I used…dirt. Even more useful is a cast iron hot plate that has a lid you can lift off with a special handle, just like on an old-fashioned wood cookstove. This is great! At $29.99 it could be worth the money. After attaching one of these hot plates you will be able to cook on top of your stove without worrying that a pan will slide off the barrel. On the same page they will sell you (for $49.99) a heavy-duty steel barrel. Northern Tool has it all.
For a few years barrel stove kits were hard to find, but they are back and the new options for them should stimulate renewed interest. Next thing you know there will be wheel kits made for them. Oh, there is an idea: Have Heater – Will Travel.
Okay, buy the parts, follow the directions on the packages, and put your barrel stove together. That is almost deluxe in itself. You will have warmth each time you fire it up and you can make coffee and flapjacks, too. However, there is an upgrade you can do yourself, for free, to bring the performance of these heaters and many other types of wood stoves to a whole new level.
I recommend adding a heat storage mass to your wood heater. By absorbing and storing heat radiated from your stove while it is at its hottest, then giving it off slowly for many hours after the fire is out, you can extend the time your home stays warm. And it is “stone simple.”
As you are roaming around the countryside, start collecting attractive stones that catch your fancy. It does not matter what kind of stones. You may have heard stories about stones blowing up but that only happens when wet stones are exposed to open fires. The denser the stones the better they absorb and hold heat. Granite is my favorite.
|
Collect stones that pile easily. Fairly square rocks are the easiest to use in construction of a stonewall. That is what you will be building around your heater. Stones about the size of a mailbox should not be too heavy for most people. Use common sense. You want your mass walls to be stable, and rocks that rest on each other without wobbling, especially in the bottom courses, help assure that.
All stoves must sit on a nonflammable surface. If you are starting from a concrete floor, as the pictures show, you can set up your stove and start piling the stones around it. If you have a wood or other flammable floor surface, set your barrel stove heater, with legs attached, on a layer of patio blocks (8”x16”x1½”) or other fireproof base material. Make sure it covers the floor under the whole footprint of the stove plus 16” on the sides and back and 24” in the front.
The heat mass should weigh as much as possible. A ton is not too much. If there is a basement under the spot where you want to build your mass make sure to provide extra bracing under it. Adjustable metal posts or another means of support able to resist the extra weight are mandatory.
If you use regular concrete blocks under your barrel you can leave the legs off for better stove-to-mass contact. The blocks under the barrel absorb heat and contribute to the heat sink effect almost as well as the stones piled around it.
The higher the stove the easier it is to load wood into it. You might want to set your barrel on two or three courses of concrete blocks, or on rocks if they are stacked firmly. Having the stove door up high could be a back saver and allows more stone mass to be piled around the stove.
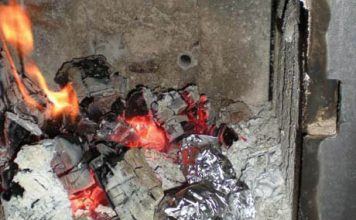
In the pictures I show a barrel stove set up as a sauna heater. I had some concrete blocks and used them to start the mass walls. This is not as pretty as it would be if made entirely with rock but piling the first courses was easier. I filled the hollows in the blocks with small stones for extra bulk. The nice rounded granite stones piled on the blocks and over the top of the stove warm up quickly and keep the small room they are in very hot for an hour or two, and stay warm for many hours after the fire has gone out. The larger the amount of stone, or other masonry materials, the longer the room stays warm.
With the barrel held tight in that heavy pile of stones, it will stay stable even if you happen to whack it with a chunk of wood by accident. I had a moment of panic once when I bumped a barrel stove while loading it and the chimney pipe popped out, even though screws were holding it in place. I guess previous whackings had broken the screws.
The mass provides other safety factors. The stones do not get sizzling hot like the surfaces of the stove itself. Coming in contact with them may be surprising but not a medical problem. After the fire in the stove is out, it is reassuring to know you can leave your home safely while the mass is keeping it warm until you return. The warm, but not hot, rocks are handy places to dry gloves and mittens. They can keep food warm too. In my cabin, I used to keep a pot of cider warming on the stones for rest breaks. The stove lid option mentioned above makes this even easier to do.
When you fire up your stove, the mass allows, even encourages, burning a very hot fire. Burn the wood quickly. The mass will absorb most of the heat and give it back later. This is a plus if you are burning resinous soft woods like pine or cedar. No damping down the fire to make it last all night. Fast hot burns get the most heat out of your wood right in the stove. Damping down the fire restricts the amount of combustion air and slows the draft, allowing unburned hydrocarbons to pass into the chimney where some is be deposited as creosote and the rest passes into the outside air.
|
You can replace the existing air inlet to increase the efficiency and safety of any stove by routing air from outside the building directly into the combustion chamber. Efficient combustion of wood (or any fuel) needs lots of fresh air. A stove that is warming your room is using up all the air in it about three times an hour. That is air that was just recently warmed by the stove. Worse, the warmed air is being replaced by cold outside air if your house is loosely built. If your home is tight, the fire is going to burn slow and may start polluting the room it is in. You can find more information about this and how to build an air inlet system in Backwoods Home Magazine’s issue #100, page 53. Maybe someone will put together and sell a kit to get outside air to a barrel stove, another good idea worth at least $39.99.
I have met people with big beautiful, but not so efficient, fireplaces who put a woodstove in front of the hearth and stuck the stovepipe up the chimney. This is a good step in the right direction. Adding a couple of tons of stone around the stove (or, better yet, a barrel stove) makes a world of difference in heating efficiency in these situations. The foundation of the fireplace will support the extra weight and the face stones of the fireplace add some bonus mass.
Take your time assembling the stones in your fireplace heat mass to make it look great. Unlike some stone works, you can rearrange the way yours is put together until it becomes a thing of beauty. All the stones piled in the hearth, around the stove, and up the front will conceal the fireplace; so just start telling people it is your new altar.
One more thing, the barrel stove kits also work on other metal containers. A 250-gallon oil tank, half full of gravel for more mass and stability, works well. A saber saw and electric drill are recommended tools to use when building with drums and tanks. Propane tanks with their thicker steel also make really good stoves. Just be sure the tank is thoroughly ventilated before cutting into it. A cutting torch and welder are better suited for working with propane tanks.
|
If you are a handy person there is one more device you can add to your heating system, especially one with a heat mass, to add another level of efficiency. It is a chimney top cover as shown in the pictures. I made this one from one of those halogen floor lamps people are throwing away by the thousands because they have been found to be fire hazards.
Disassemble the lamp. Connect the ballast weight from the bottom of the lamp to one end of a metal rod, pipe, or other scrap metal. Connect the metal cover that was hiding the ballast to the other end of the metal rod. Use eyebolts for connections so the ballast weight and the metal cover dangle loosely from each end.
Attach to the roof a bracket made from 2×4 lumber that will allow the metal rod to pivot on a steel pin or long bolt like a seesaw. Make sure the ballast has the leverage advantage and holds the metal cover in the open position above the chimney opening. See the pictures.
Here is the hard part. Attach a wire to the metal rod which, when pulled down, lowers the metal cover down onto the chimney opening. Route the wire through the roof and on down to a location near your heater and provide a way to secure the wire to hold the cover closed. The weight keeps the chimney cover open; pulling the wire closes it. Releasing the wire lets the cover lift off the chimney opening. The cover must be open while the fire is burning and closed only after the fire is dead out.
This cover system keeps rain, rust, and critters out of your chimney when there is no fire in the stove. It took me about two hours to build. The lamp was from the transfer station. The rest was from the scrap pile in my shop so the cost of this project was pocket change.
A note. Dampers that you buy, including the one that comes with your barrel stove kit, do not completely close off the stovepipe to stop the draft. Regulations require this to prevent downdrafts of smoke and gasses from passing back through the stove into your home. This could happen if you accidentally close the damper before the fire is dead out. If you build the outside air supply system mentioned above, this would not happen. Any backdraft would go out the air intake pipe, not into your home.
Cool weather is coming and gathering rocks is pleasant exercise. By winter you could be enjoying the benefits of a heat sink.







the ceramics belong INSIDE the stove, where they can act as a refractory, and outside where they store the heat.
Awsome ideas i have built one of thease stoves for outside use after watching a friends farther when we were kids heat a entire 13 room coloniel with 1 50 gallon stove .i never thought about using outside air great idea i wonder if it should be capable to keep cold air from circulating through system when not in use .the first stove i built i put the small vent hole on the bottom with a 12 inch pipe coming out of it and a screw on cap on it for air controll i drilled the pipe under the cap for added venting it wasnt good enough .next stove i build i will use the large fill pipe cap on the bottom R centered under the door for added venting this fill vent could have a pipe screwed into it and that pipe could be vented to the outside for extra air like you suggested great idea.and i love the stones around it .i was thinking all thease stones would block the quick heating ability of the stove conciderably though and my house is large and cold quick heat is a necessity so i think i will try your ideas but with a 2 barrell stove kit so i have the rocks to stay hot if it goes out plus the quick heat off the top barrell .i was thinking a 30 gallon barrell inside of a 50 gallon barrell with a copper tubing coil might just be a awsome way to add more mass and hold heat longer while also creating a potential hot watter source if i can figure out a way to controll pressure in the watter tank .or i will wrap a coil of copper around the exaust pipe leading to the chimney for heating watter .does anybody have any ideas how i could create a safe watter heater with a circulator and exterior watter tank or is the coil around the metal chimney pipe a better idea