 |
|
| Issue #82 • July/August, 2003 |
Crisp carrot sticks, fresh cabbage, and fried potatoes from my Montana garden in June? Yes, but only if I’ve kept them in cold storage from last summer’s garden.
A garden is a wise investment and provides the freshest, most nutritious vegetables available during the summer. But I need it to supply vegetables year-round, and that can be a challenge here in northwest Montana. I lean toward self-sufficiency and eating a local, seasonal, sustainable diet; we try to grow what we eat and eat what we grow. We preserve, dehydrate, and freeze both fruits and vegetables, making a trip to the fruit room or freezer a real delight throughout the winter. But I also like to eat some fresh veggies and have succeeded in storing carrots, potatoes, cabbage, and onions until just about the time the next crop is ready. I manage to keep beets, pumpkins, squash, and apples into late winter.
|
Ideally, I would have a root cellar which maintained the correct temperature for the produce I would like to keep. Unfortunately, it’s not that ideal, so I have to look for other places to store things. Fortunately, different vegetables like different temperatures, so everything doesn’t have to go in the same place. Other storage options (depending upon the item) include in the ground, under a staircase, unheated rooms, outside stairwells, pits in the ground, or extra refrigerators, to name a few.
A storage method is only the last step to having successful cold storage and fresh vegetables in the winter. The first step begins with the seed catalog; it is extremely important to choose cultivars which store well. For example, not every type of carrot will still be edible the following May. Most seed catalogs are good at telling us which ones have good storage qualities. I have relied on their recommendations and have found particular cultivars of a number of vegetables that store very well for me.
Planting time and harvest time also affect the success of storage. Many storage vegetables are planted later and harvested after frost. In the following discussion, I will note what works best for me as I deal with a fairly short growing season and cool nights.
Carrots
The carrot named Bolero, a nantes-type hybrid, is a dual purpose carrot. It can be planted early for delicious sweet carrots, but when planted later (in June here), it will achieve a nice size of 6 to 7 inches in length with a 1-1½ inch diameter in time for fall storage. After storage, this carrot will still be crisp and sweet. Harvest as late as possible, after frost, but before the ground freezes. I snap off the green tops right where they join the carrot.
I choose nice straight healthy carrots of good size for storage and bag up the forked, broken, nicked, small, or oversized ones to put in the refrigerator for immediate use in canning, juicing, or munching. Then I take five-gallon plastic buckets, clean washed sand, and a pitcher of water to dampen it. Don’t put too much water in the sand as it will pool in the bottom and make it too soggy. I try to dampen the sand in a different container and add the sand to my storage bucket as needed. First I put down a layer of sand and lay carrots side by side. I prefer the carrots don’t touch. Then in goes another layer of sand to cover the first layer of carrots. I continue pressing carrots into the sand and adding sand until I am near the top of the bucket, where I put on an extra thick layer of sand and lay the lid on top.
This bucket is very heavy, so I put the carrots into it at the site it will spend the winter, which, for me, is at the bottom of a stairwell leading into the basement from the garage. When the weather gets really cold, I throw some rugs and blankets over the buckets to keep them from freezing. For ideal storage, carrots prefer 32° to 40° F and 90 to 95% humidity. If you don’t have varmints underground looking for a free meal in winter, you can store them in the ground with a thick layer of mulch to prevent freezing.
Potatoes
Potatoes are a traditional fresh storage food, but all cultivars are not equal. The challenge is to have an edible supply year around.
|
Last fall I stored Red Norland, Sangre Red, Yukon Gold, and Kennebec potatoes of all sizes. Red Norland sprouted first, followed by Kennebec, Yukon Gold, and Sangre Red. Sangre Red, also called Sangre, is a round-to-oblong, white fleshed red potato with shallow eyes. It is a very good new potato as well as being great for storage. Digging them is easy, as they generally cluster very near the plant; it is also a heavy producer. Even though a local nursery lists them as so-so keepers, Sangre has been the last to sprout in storage, with the largest potatoes keeping the best. I will eventually have to pull the sprouts from them also, but I do not have ideal storage facilitiesjust a room in the basement where I keep my canned goods, where the temperature ranges between 50° and 60° F during the year. Potatoes prefer 40 degrees. Colder temperatures will turn them sugary. Much too crisp and juicy for hash browns in the fall, these Sangres reach the perfect condition for frying in June and July.
By planting these early season potatoes the end of May, I get large potatoes by the end of August, which I harvest in late September. Planting earlier, I can have new potatoes earlier, but for storage it works better to plant later here where frosts may kill the tops the first of June and potatoes grow well into summer as the nights are cool and the days moderate.
Cabbage
One of the greatest challenges in storing vegetables has been the cabbage. I tried a number of methods, but nothing worked until I started to grow cabbage especially bred for storage. So far my favorite is Storage #4 (available from Johnny’s Seeds). It will produce a large, very solid head, which is still nice and solid the following June.
While I start my early cabbages in March (eight weeks before the last expected spring frost), I start the storage cabbages the first week in May, about 100 to 120 days before the first expected frost in the fall, as it will make most of its head late in summer, but grow some and hold well into fall. I dig mine before the ground freezes or before the weather stays below freezing. I cut off the root, leaving 6 inches of the stalk, and trim off those loose outer leaves. I then wrap each very loosely in a plastic grocery bag and store them in the extra refrigerator or upside down in the stairwell next to the buckets I store the carrots in. During the cold months, they do best in the stairwell where ventilation is better. They prefer 32-40 degrees with 90% humidity. As the temperature rises outside, I have to move them to a refrigerator to last into summer. They can produce cabbagey fumes, which may make one reconsider keeping them in the house long term.
Onions
Perhaps my favorite vegetable in storage is the onion. The sweet ones have to be eaten in the summer and early fall, but the pungent ones can last until you have the next crop. A couple of long-day hybrids, Copra and Norstar, have worked well for me. I start the seed indoors in February, feed them fish fertilizer, and set tiny plants out in early May. Norstar matures sooner than Copra, but both are narrow necked hard onions of medium size. In August, I quit watering them.
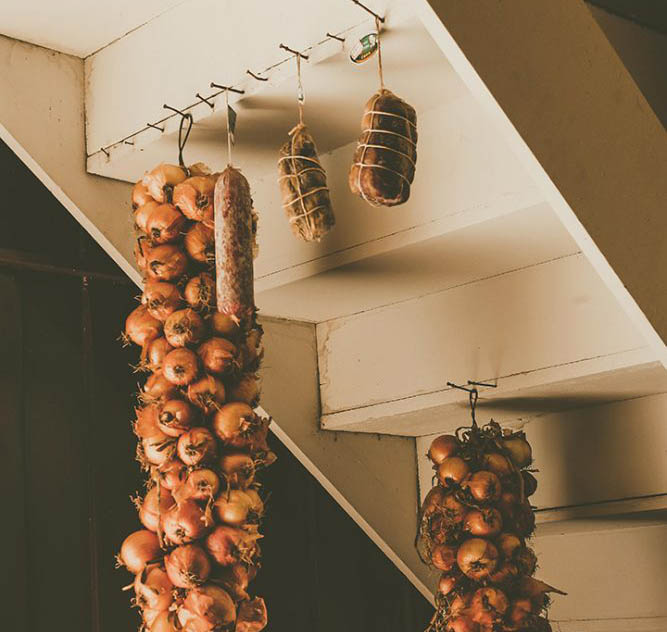
When they mature, pull and dry them in the sun. If the weather isn’t warm enough, it is necessary to push the tops over and then pull them and lay them out to dry for quite a while. When they have dried sufficiently, remove the dry tops (but not the skins) and put the onions in a basket or mesh bag and set or hang in a dry, cold (32° to 35° F.) place where they get ventilation. I don’t have a perfect place, but these two cultivars do well even when ideal storage can’t quite be met.
For those who prefer non-hybrids, the yellow potato onion, a multiplier onion, is terrific. They are smaller (up to 1½ inch), but store extremely well, being very hard well into summer. You plant this onion in early fall and mulch for winter. Remove the mulch in spring to find sprouts which can soon provide green scallions or grow (with liberal watering) into bunches of small onions which will dry down in July. Be sure to save some to plant for the next crop.
Squash and pumpkins
An easy crop to store is squash or pumpkins. Nearly all kinds labeled winter squash and even mature summer squash, such as the Mid East cousa type, can keep almost six months if they are picked at the right time and cured properly. At harvest, the skin should be so hard that a fingernail won’t puncture it. Leave the stem on and cure both squash and pumpkin in the sun at 70° to 80° F for 10 to 14 days. If properly cured and later stored at 55° to 60° F with 60 to 70% humidity, they should hold through most of the winter. An unheated bedroom works well for me. Pies from fresh pumpkin taste delicious in March.
Beets
|
I hadn’t even considered storing beets until a few that I had just thrown in a plastic bag in the refrigerator were in pretty good shape a couple of months later. Upon investigation, I discovered that, although the common Detroit Dark Red that I was planting can be stored if done properly, there are specific beets for winter storage. I purchased some Lutz Greenleaf seed and sowed it in the spring along with my other spring beets. It took a long time to germinate and then grew slowly, but in October, I dug some softball sized beets to store. Unless you are using a long season beet like Lutz, the seed should be sown in June or July for late harvest.
Beets tend to be more susceptible to frost damage (their shoulders often stick out of the ground), so they should be harvested before a killing frost. Harvest only mature beets and cut off the tops, leaving an inch of stem. Do not remove any of the root tip. Brush off the dirt and pack in layers in damp sawdust, sand, or moss. Keep cold (near 32° F) and very moist at 90 to 85% humidity. As mentioned before, unwashed beets keep quite a while in bags in a refrigerator. Depending upon storage conditions, beets can last anywhere from two to five months in storage.
Winter radishes
If you like radishes, you can enjoy them throughout the winter if you plant the winter type. There are a number of cultivars which lend themselves to storage: Miyashige (fall harvest Daikon), Long Black Spanish, Misato Rose Flesh, China Rose, Round Black Spanish, and Radish Sakwiajima Mammoth to name a few. Generally, the planting date is July or early August, but each cultivar could be different, so pay attention to what the seed catalog tells you and adjust for your particular growing season. These radishes use more space; they not only may grow larger roots, but their tops are more leafy. Harvest in the fall and store only perfect roots. Trim off the leafy tops and treat like carrots, layered in moist sand, moss, or sawdust in your coldest above freezing storage place. They should last until February if stored properly.
Rutabagas/turnips
Rutabagas, known also as Swede turnips, are good candidates for storage. The turnip, however, gets mixed reviews. Johnny’s Seeds doesn’t recommend turnip storage, but some people have done it. Plant Purple Top White Globe in July or August and harvest three-inch maximum roots before heavy frost, cut off the tops, and treat them like carrots.
Laurentian and Purple Top (rutabaga, not turnip) are two common rutabaga cultivars recommended for winter storage. Plant in mid-June to mid-July or 90 days before intended harvest. Wait until there has been at least a couple of good frosts, usually October here, before digging for storage. If the roots are working their way out of the ground, I would hill some soil over them or mulch them when there may be a chance of freezing so the roots don’t get damaged before I harvest. Cut off the tops and store like carrots. However, rutabagas shrivel easier than carrots, so you want to be sure to keep them moist. They can be waxed (sometimes you see them waxed in the supermarkets) to reduce dehydration; beeswax would be best if you choose this route. Rutabagas can be expected to last for two to four months in storage.
Celeriac
Celeriac, sometimes described as turnip-rooted celery, is an excellent keeper. Monarch and Brilliant are two good cultivars available. The trick with celeriac is the planting time. Start indoors (slow to germinate) in April but do not set out in the garden until June when the temperatures are averaging above 50° F. If the weather is too cold, the plant will think that it has passed through the first summer (in your house or greenhouse) and is in the winter cool down; when it warms up, the plant may bolt and go to seed.
|
Celeriac requires rich soil and plenty of moisture like celery, but is actually easier to grow. You don’t want the plant to mature too early and get woody before you harvest. When you dig celeriac, break off the stocks, brush off the dirt, and remove long fine roots, if desired. It will keep a while on a shelf in the cellar; for the long haul, layer in moist sand, moss, or sawdust. Keep at 32° to 40° F with 90 to 95 % humidity.
Parsnips
Rated as the hardiest of all root vegetables, the parsnip could be awarded “best of show” when it comes to storage. Harris Model and related cultivars are popular. Since all parsnips are intended for storage, choose one that fits your needs (some are resistant to disease, etc.). Dig a deep bed and plant fresh seeds early in the spring, March through May (depending upon your season). Be patient as they may germinate slowly (up to 28 days). It takes a long season (100-120 days) and freezing weather to produce tasty parsnips. Frosty weather helps starch in the root turn to sugar so they taste sweeter. Then you can begin harvest.
You actually have four options. You can take advantage of all four. First, after a few moderate to heavy frosts, you can dig some to eat immediately. Because the roots can get very long, digging, not pulling, is recommended. Or to keep the ground from freezing, put down some mulch so you can dig later.
Even though the ground may not freeze under the mulch, you may not want to go out and dig in mid-winter; dig and store some in the cellar. These roots should have the leaves trimmed and be stored like carrots in damp sand, moss, or sawdust. Ideal conditions are 32-35 degrees and 90-95% humidity.
And for the final option, when the ground thaws in the spring, go out and dig the sweetest parsnips. They will be good until new leaves are formed; they get woody after they begin to grow. With parsnips, the last really could be the best.
Apples
Apples are the only fruit I have tried to store fresh through the winter. Since there are hundreds of cultivars, there should be quite a few that store well. The nursery catalogs will usually indicate that attribute. Usually, the storage apple will ripen late, so that it can be picked in cool weather. The apple I have had great success with is Honeycrisp. It has a sweet-tart flavor and is exceptionally crisp, features that were still noticeable after months in my extra refrigerator. Although a tad shriveled, they made excellent applesauce.
|
Some helpful pointers in harvesting apples: pick mature fruit, leave the stem on the apple, and cool fruit overnight before storing if the day is somewhat warm. Apples last best if stored near 32° F at 80 to 90% humidity; the warmer the temperatures, the faster they soften. They should be kept in shallow layers in baskets or slatted crates; they also need to be checked for spoilage occasionally. It is wonderful to have some homegrown fresh fruit to go with all those winter vegetables. They should be stored separately, though, as apples give off ethylene gas, which ages vegetables.
General harvesting tips
In cold storage, we are taking advantage of the plant’s natural dormant stage between seasons. Success rates are also raised by following proven guidelines. Harvesting in dry, cool weather is helpful because cold weather encourages the vegetables to store sugars and starches rather than water in the roots. Brush off the dirt gently, but cleaning isn’t necessary. Don’t bruise the produce. Store only the best produce; bruised, broken, or nicked vegetables be used soon. Tops should be clipped immediately; if left on, they suck moisture from the root. Many tops are good to eat; chop some and dehydrate to add to soups later.
Folklore recommends that you pick apples and harvest root vegetables during the decrease of the moon, in the third and fourth quarters, because bruised spots will dry, not rot, and the food will keep better. If you follow the moon in planting and harvesting, you might want to keep this in mind also.
Two books which have been helpful for me to pursue my goal of providing the kitchen with year around vegetables from my garden are Root Cellaring by Mike and Nancy Bubel and Four-Season Harvest by Eliot Coleman. The first is about the natural cold storage of fruits and vegetables, with drawings for possible root cellars (and alternate hideaways) and details of how to store many different varieties of garden produce. Coleman’s book is basically about ways to extend your gardening season, but includes a chapter on root cellars and indoor harvesting. Reading these books opened my eyes to the possibilities of having a larger variety of fresh vegetables from my own garden throughout the year.
Successful cold storage review
1. Select the best cultivar.
2. Plant at the right time.
3. Harvest at the right time.
4. Store properly.
I follow these steps, keep notes on planting and harvesting dates to determine the right time for my area, and store under the best conditions I have available. It can work for you too.






I have gardened in Montana for almost 70 years, and love to store as much of my garden produce as possible. One thing I do is start my carrots and parsnips in the late fall/early winter. It is called dormant seeding because you want to seed late enough that it does not sprout in the fall, but stays dormant over the winter, and the hard seed coat gradually takes up moisture during the winter and early spring months. They emerge soon after the snow goes off.
You might want to look at this site about storing cabbages by cutting out the core and packing it with salt.
romanian-fermented-whole-cabbage-process
I line flat grape boxes with purple cardboard apple box liners. Set one apple in each cup of the liner. no touching other apples. Set an upside down box liner under the boxes or set the boxes across boards so air circulates underneath them, esp. on freezing floors. Keep in a dark cool area. If space is at a premium and your boxes are tall enough to allow space above the tops of the apples, you can stack boxes cross-wise. Check boxes for turning and spoiling fruit at least once a week, every few days at the end of the season. I have had some apples keep until February this way, depending on the type and harvest conditions.
Onions can be stored the same way, but not stacked. I lay a sheet of newspaper over them. It helps protect them from occasional light (sprouting) and seems to help with the off-gassing that affects potatoes. Esp. towards spring, sort out any onions turning soft or starting to sprout. I store 50# of onions every winter like this. Some will last until June if I rotate them.
Also grow runner onions in a raised bed (box), so walls are high enough to protect them from freezing winds and rodents. I have a screen over my box. Runner onions are a perennial that keeps on giving.