| Issue #105 • May/June, 2007 |
Not too long ago, I watched a man open his pocket knife by pulling it partway open to a wide L-shape with his hands, and then push it the rest of the way open by swiping the edge against his thigh. That’s right, he applied enough force to the edge of his knife against his blue-jeaned leg to snap it into the open position, and no, it didn’t cut him.
That indicated to me plain as day that I was talking to a man who did not know how to sharpen a knife. The way he applied that blade to his body made it clear that it never crossed his mind that he might be about to injure himself, which tells me there are no sharp knives where he lives. If he knew how to sharpen a knife, he would never settle for a useless (although attractive and cleverly designed) lump like the one he showed me that night. When I think about performing his maneuver with any of my own knives, it gives me a sick feeling…it would be messy.
|
Now, I don’t say that to brag. I keep my knives sharp, but that’s not an especially big accomplishment. In fact, I really think it should be the normal state of affairs: Cook nourishing food; wear clothes that keep you warm, dry, and safe; and do your cutting chores with sharp tools. Why in the world would you do otherwise?
I’ll show you how to make a knife so sharp the hairs will jump off your arms in fear when they see the edge coming. You’ll never go back to using dull knives again.
A cupboard full of sharpeners
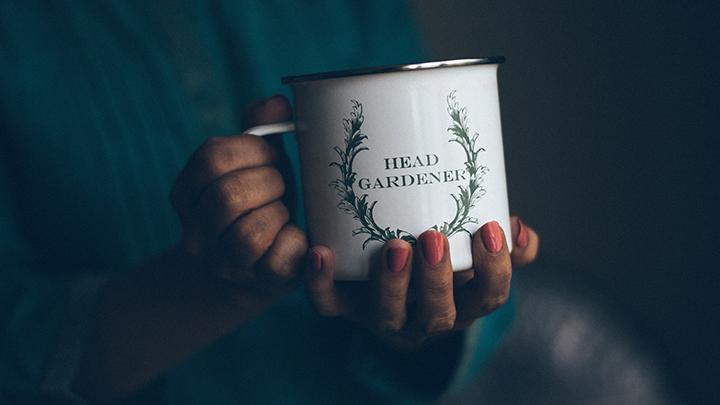
You already have an excellent sharpener in your cupboard. The humble ceramic coffee cup. You see, ceramic coffee cups are made out of exactly the same stuff that ceramic sharpening stones are made of—ceramic. Most of the surface of a ceramic mug is glazed to protect it, but when they put the mugs in the kiln to bake on the glaze, the ring on the bottom, where the cup sits on the rack, remains unglazed, leaving the abrasive material exposed. So turn your cup over and, voila, ring-shaped, medium-grit ceramic sharpening stone.
|
The first time you give this method a shot, I’d recommend something with a thin blade like a paring knife or fillet knife. A thick blade like a cleaver or hunting knife will have more metal right behind the edge to be removed (Diagram 1). That means it will take longer, and we don’t want you to get discouraged and give up before you have tasted success.
Simply apply the edge of the knife to the unglazed ring on the bottom of the cup. Do this at a 20-degree angle or maybe somewhat less. To figure out what a 20-degree angle looks like, hold the knife vertically, then move it halfway to horizontal. That is 45 degrees. Halfway again makes 22.5 degrees. A tiny little bit lower than that is about 20. What angle you are sharpening at is not nearly as important as picking one angle and sticking with it consistently.
So at your 20-degree angle, rub the edge on the ring with a small circular motion. Make a circle about ½-inch in diameter. The ring should turn black—this is steel coming off the knife, exactly what we want to happen. Rub, rub, rub in a circle. You can use some pressure, but don’t lose the 20-degree angle. Proceed all the way up the knife in ½-inch increments, then flip to the other side. Do it again. Rub, rub, rub, ½-inch circles, all the way to the tip.
The first time you sharpen a knife this way, you may have to flip back and forth a number of times. This is because you are changing the angle of the edge, and removing some metal. Subsequent sharpenings will be quick because the angle will be prepared for you. Again, it is important to try to maintain a consistent angle.
Forming the burr
Here comes the interesting part. This is the key to effective sharpening with any method whether traditional or newfangled. You know you are actually sharpening the edge of the knife when it forms a burr. That is what matters—the burr. You can grind on your knife for half an hour, but if there is no burr forming, then something is wrong, and you are not removing metal from the edge of the knife. What exactly is a burr? A burr is a little lip of metal that forms on the side of the knife opposite the abrasive. If your coffee cup is on the table, then you are removing steel from the downside, and your burr will form on the upside.
You should be able to feel it with your fingertips and see it under a bright light.
|
The burr is the white line along the very edge. If you have never sharpened this way before, you will not know what it should feel like. You may think you feel it, but you’re not sure…when the burr is formed properly, it will be big and unmistakable.
When you have a nice big burr on one side of your knife, all you do is flip and repeat the circular motion. Now you will be rubbing the burr into the ceramic. Sharpen a little bit lighter, with a little less pressure now than you did at first. When you make one whole trip to the tip of the knife, the burr should have flipped entirely to the opposite side again. Flip and repeat. As you repeat this process, flipping the burr from one side to the other, sharpening with less and less pressure each time, the burr should be getting smaller and smaller. You can’t just continue using the same heavy hand, because you’ll continue getting the same fat burr. So lighter and lighter, smaller and smaller. After a few flips, it should be entirely gone. At this point, the knife is sharp.
How do you know you’ve got it? Here are some good tests of sharpness:
|
- Armhair is a classic. Cut with the grain, not against it.
- Fillet the ink off a sheet of paper. Not as hard as it sounds, but sure looks impressive.
- Slice a tomato—doesn’t that feel good?
How often do I need to sharpen? That’s a matter of taste, but here is how I make that call: As soon as a particular material starts fighting back, as soon as it feels tough where it didn’t feel tough before, it’s time for a little touch up on the sharpener. Rope is always going to be tougher than celery stalks, but if that celery was effortless two weeks ago and gives you a little resistance today, go back to your mug.
Remember, a sharp knife is a safe knife. Wrestling with and straining against your knife is just asking for an accident. So keep ’em sharp—it takes no more equipment than a coffee cup.


