| Issue #84 • November/December, 2003 |
My initial enthusiasm for making my own soap was deflating with each book I read on the subject. They all warned of the dangers of lye, one of the key ingredients, to such an extent that I began to wonder if I would be risking my life to attempt making soap. Goggles? Rubber gloves? Lots of ventilation? No aluminum pots? And above all, don’t let the lye touch you or it will burn holes in your skin.
Well, I’m happy to say my enthusiasm for the idea of making soap stayed strong enough that I decided to try it in spite of all the cautions. Being the skeptic that I am, I figured that the books were required to be extremely cautious to avoid lawsuits from individuals possessing less than a full ration of common sense. Making soap is really quite easy and lots of fun. I reasoned that if I proceeded with a sensible amount of caution things should be okay. I’m glad I did.
Cautions
Lye really is nasty stuff. It’s corrosive, it gives off chocking fumes until it is all dissolved in the water and it can indeed burn your skin on contact. You need to be careful not to let the lye crystals touch your skin as you slowly pour them into the pitcher to dissolve. Stir gently with a wooden spoon when adding the lye to the water so as to avoid splashing. I learned that it is definitely a good idea to have a window open for ventilation when dissolving the crystals. I also tend to hold my breath until the lye is all dissolved just for good measure. The first few times I did this step I worked outdoors just to be safe. After a bit I decided this was overkill and reverted to just opening a window.
Wearing rubber gloves is also a good idea because the lye and the raw soap can burn. I definitely make sure to remember the gloves when cutting the day-old soap into bars and when setting the bars out to dry as they can bite. By the way, if you ever do splash lye on your skin pour a little white vinegar on the area. The vinegar will neutralize the lye and take away the sting.
|
One more caution: Lye will eat through aluminum pans. Use only glass, enameled pans with no nicks, plastic, or stainless steel containers. You can use wooden spoons as long as you are aware that they will deteriorate and splinter over time. Plastic or rubber spatulas work well and don’t disintegrate.
Okay, so now the cautions are out of the way. Let’s talk next about what you’ll need to make your first batch of soap.
Utensils
You’ll need one large cooking pot in which to melt the lard/oils, a glass or plastic pitcher in which to mix the lye and water, a glass or plastic measuring cup and a wooden or plastic spoon or spatula for stirring. You’ll also need a mold, such as a rectangular plastic box, if you have one, or you can make one out of wood. I made a wooden one, using plywood for the base and 1 x 4 lumber for the sides. You’ll also need a cover to put on top of the mold after you pour in your soap mixture. You can use another piece of plywood or heavy cardboard for this. A blanket will be needed to wrap it in, and some freezer paper to line the mold so the soap mixture doesn’t leak out the cracks. If you’d like to do it the old-fashioned way wet an old towel and line the box with that. It will leave funny patterns on the bottom of the soap, but won’t affect its quality. I have found that a little soap leaked through the towel when I tried this, however, so if you’re worried about a bit of mess you may not want to do this.
Ingredients
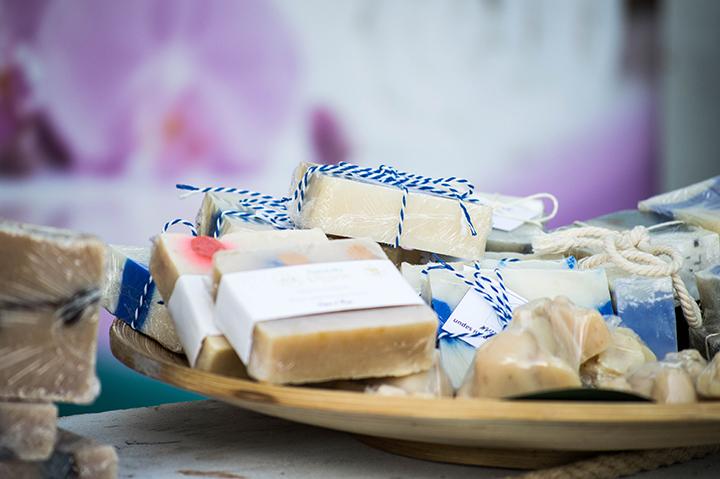
Now, what is soap actually made of? Soap is made by combining lye and fat. When heated and combined the mixture undergoes a chemical reaction and becomes an entirely new substance: soap. The type of fat you use is up to you. If you use beef fat (suet) your soap will be brown. If you use pig fat (lard) it will be white and vegetable oils will give you a creamy off-white bar. Soap made with vegetable oils will be softer than those made with beef or pig fat. My personal favorite is lard mixed with coconut oil. The coconut oil will create a richer lather. If you’d like scented soaps, you will also need to add some essential oil. Each type of fat requires a different ratio of lye water to fat so it will be a help to you to get your hands on a book with recipes suited to the type of soap you want to make. For a simple first-try batch, I have included a couple of my favorite recipes at the end of this article.
Most of the modern soap making books will try to convince you that you should buy a scale and weigh everything, including your water, rather than to measure it in cups. This approach will certainly give you more accurate ratios of lye to lard/oils. My interests in Colonial living led me to try making soaps with as few modern utensils as possible. Doing so taught me that using either weighed or measured ingredients will produce usable soap.
The same holds true for using thermometers and bringing your lye water and lard/oils to the correct temperatures. The goal is to get both mixtures to nearly the same temperature—somewhere around 95 degrees F. I used thermometers for a long time. Then came the day I was demonstrating soap making at a living history museum and couldn’t use any modern utensils at all. I then had to rely on the old-fashioned method of feeling the outside of the containers to determine when they were the same lukewarm temperature. I was rather nervous about using this less than scientific method, but it worked just fine.
Step by step
Okay, so let’s talk about how a batch of soap is actually made.
One: Pour four cups of cold water into a large glass or plastic pitcher. Now slowly add the lye powder, stirring carefully so as not to spill or splash. (Do not use hot water, as this could cause the lye to bubble up or even explode.) As the lye dissolves the water will heat up drastically, to around 120°.
It will take about 1½ to 2 hours for this mixture to cool down to the temperature range needed for mixing (anywhere between 79° and 98° works best). If you’d like to hasten this process you can stand the pitcher in a basin of cool water. The other approach is to mix the lye water the day before, but then you’ll have to raise its temperature by standing it in warm water when it comes time to use it.
Two: Melt the oils/lard on the stove in a stainless steel pan. Keep the fire low—they only need to melt and if you get them too warm, then you have to cool them off again. It’s easiest if you heat them just enough to melt them. Remember, the range we’re looking for is between 79° and 98° F.
|
Three: When the lye and lard have reached the correct temperatures slowly pour the lye water into the lard/oils, stirring constantly and steadily. The mixture will turn an opaque peachy colour. Keep stirring until it begins to trace. Tracing occurs when a bit of the mixture drizzled off the spoon leaves a trace or track on the top of the mixture in the pot, rather like honey does. This step could take up to an hour to occur. But it could also happen as quickly as 10 minutes, but in my experience an hour is more likely. Don’t be discouraged if you never do see tracing; I’ve had many, many batches that never traced at all as far as I could tell and they still turned out fine. When you get tired of stirring and it still hasn’t traced leave it alone for up to a half an hour and then come back and stir some more. If it still hasn’t traced in a couple of hours, but it is showing signs of beginning to thicken, go ahead and stir in the essential oils and then pour it into the mold. It will probably be fine.
Four: Cover the mold with the plywood or cardboard and then cover the whole thing in a big blanket (wool works best) and let it sit for 24 hours. Be sure to keep it level while covering it and while it sits or you’ll end up with thicker bars at one end of your mold. After the 24 hours are up, unwrap it, put on your rubber gloves, and cut it into bars. Set the bars somewhere clean to dry and cure. They’ll need to sit for about two months so find a place where they’ll stay clean, warm, and dry. I use an old screen, covered with a piece of muslin and set on blocks of wood for airflow. I turn the bars of soap on edge after a week or so to dry all sides.
Once they’re thoroughly dry you may notice a light coating of powdery ash on the bars. This isn’t harmful, but you might like to take a knife and scrape it off so the soap looks nicer. The longer the bars are stored the harder they become and will therefore last longer when used.
Five: Store them in a cool, dry place. As you make more batches, using different scents, you’ll want to store them in separate boxes so the scents don’t taint each other.
By now I hope you’re convince that, with a little common sense and caution, soap making can be easy, fun and highly rewarding. If you’d like to do more reading on this subject I would recommend either of these two books: The Soap Book by Sandy Maine (Interweave Press) and The Natural Soap Book by Susan Miller Cavitch (Storey Communications).
Soap recipes
Here are two good beginner recipes, one using lard and one using vegetable oils. As you become more familiar with soap making you can adapt them to your own tastes. The number of bars and how thick they are will depend on the size of your mold.
Basic lard soap:
13 cups of lard
4 cups of cold water
1 can of Red Devil lye (12 oz.)
4 ounces essential oil for scent (optional)
Basic vegetable oil soap:
3 cups coconut oil
10 cups vegetable shortening
4 cups cold water
1 can of Red Devil lye (12 oz.)
4 ounces of essential oil for scent (optional)
Sources of supplies
Red Devil lye can be found in most grocery stores, in the household cleaner section. Lard is often with the vegetable oils, as is the solid vegetable shortening (such as Crisco). Essential oils can be found at health food stores, though to get the quantity needed for these recipes you may wish to order them from a company such as Attar Herbs & Spices located at 21 Playground Road, New Ipswich, New Hampshire 03071 (800-541-6900) or on the web at attarherbs.com. Unfortunately, essential oils are quite expensive and Attar’s minimum order is $50.00, plus shipping and handling. Soap works just fine without any scent, so if the cost is off-putting, try making your first batches with no scent added.


